With our new Denoising Segment Editor feature, you can now control exactly where and how to reduce noise inside a production: Refine our automatically generated denoise segment boundaries, choose different denoising methods per segment, or switch denoising off completely for things like jingles, embedded music, or sound effects.
The result: you only clean what really needs cleaning, gain more creative control, and work with much higher precision inside a single production.
Only Denoise the Parts That Need It
Many productions contain a mixture of different situations:
- Music jingles or sound effects combined with noisy speech
- A clean studio introduction followed by a noisy on-location interview
- Speech combined with short news clips, where ambiance and noises should not be removed
- A short section where a fan or laptop noise becomes audible
Segment-Based Denoising lets you target specific segments of your production, and leaves the rest of the file untouched. The segments are created automatically by our Dynamic Denoiser, which classifies the noise conditions of your audio and generates initial segment boundaries. You can refine these segments manually now - similar to how you adjust cuts in our Cut Editor.
It is also possible to exclude denoising entirely in segments where you don’t want it at all - for example Jingles, embedded music, sound design elements, or external audio inserts.
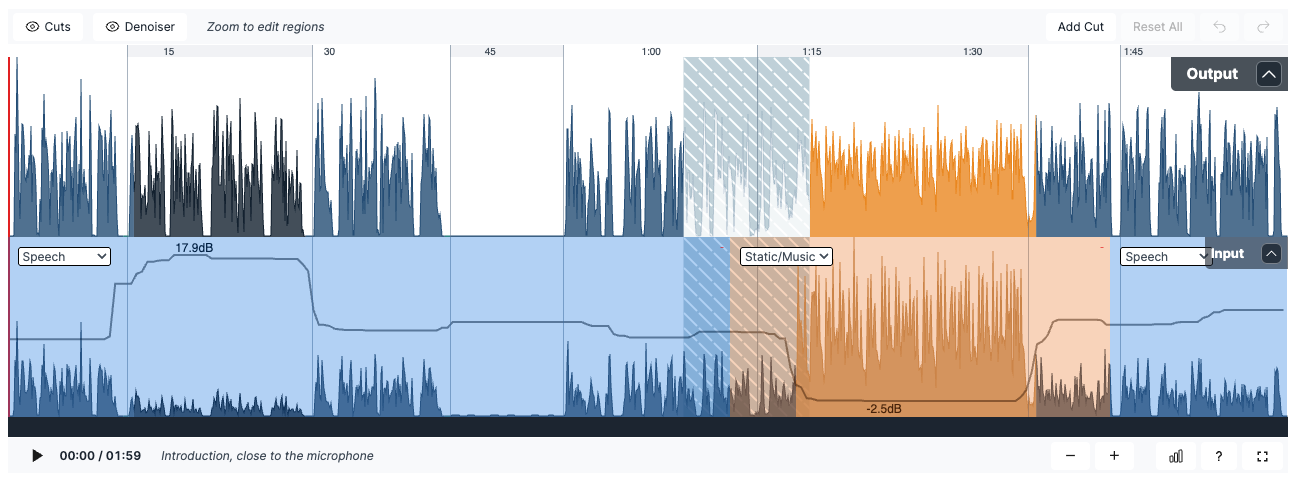 Auphonic Editor with Output and Input waveforms and editable denoise segments
How Segments Work
The new segment editor for denoising is an additional layer on top of our Auphonic Editor:
- You can split existing segments wherever you like.
- You can move segment boundaries to match words, pauses, or noisy events more precisely.
- You can create a sequence of smaller segments inside one automatic segment if needed.
The automatically detected segments give you a fast starting point which you can adjust for perfect results.
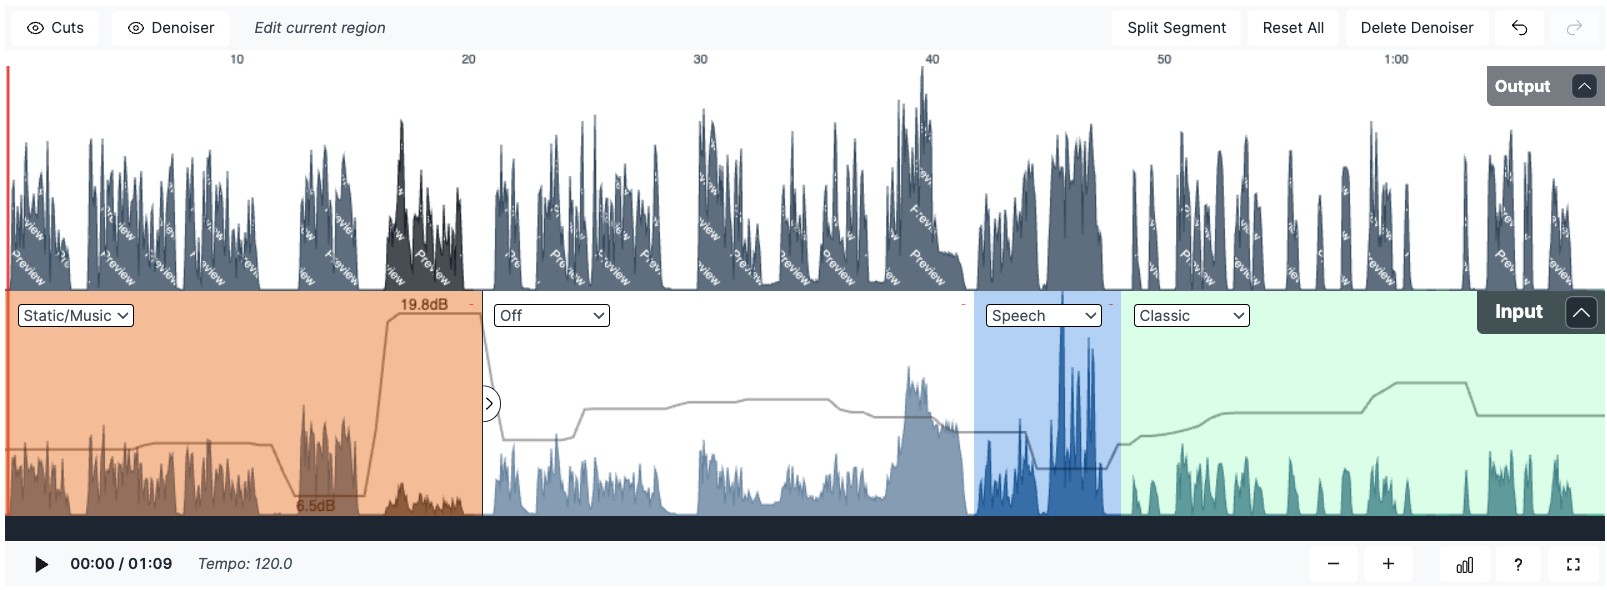 Denoising Segments in multiple colors - change methods or turn denoising on/off per segment
Every segment on the Denoiser layer can have its own processing setting.
For each segment you can: turn denoising on or off completely
or select which denoising method you want to use - for example our
Speech Isolation,
Static & Music Denoiser,
or
Classic Denoiser.
This keeps the interface simple and consistent.
You only decide where to reduce noise and which algorithm to use.
How to Use Segment-Based Denoising
- Run your production with Noise Reduction
- Open the production result page to see our Auphonic Editor
- Split or move segment boundaries in the Denoiser layer
- Select the desired denoising method for that segment, or turn denoising off
- Press Apply Changes or Edit Production to reprocess (reprocessing these edits does not consume additional credits)
Try our new Segment-Based Denoising now!
Conclusion
Noise in your recordings changes over time,
so it makes sense that your denoising settings can change as well.
Segment-Based Denoising lets you:
- Denoise only the parts that actually need it
- Combine multiple denoising methods in a single production
- Fix misclassified or delicate sections without touching everything else
- Work with more precision while keeping the workflow simple
Open a finished production in our Auphonic Editor,
switch to the Denoiser view,
and start experimenting with segments.
You will quickly hear how much more control you gain over the sound
of your final output.
Segment-Based Denoising is a major step in our broader direction: blend powerful automation with precise human refinement. Expect more features following this philosophy to arrive next year.
Feedback
As with all new features, we are very interested in how you use Segment-Based Denoising in your workflows. If you have feedback, questions, or suggestions, please Contact Us or send us a message via the production feedback form.