Auphonic Plugin for DaVinci Resolve
The Auphonic plugin for DaVinci Resolve Studio lets you use the Auphonic Web Service directly from your DaVinci Resolve timeline (Windows, macOS and Linux).
Select audio tracks or clips on the timeline, and the plugin sends them to Auphonic
for processing with our audio algorithms (Leveler,
Loudness Normalization, Noise Reduction,
Filtering, … - see Audio Examples),
with Chapter Marks from your timeline markers.
The processed audio comes back on a new track directly below the original, in sync,
ready to edit and export with your video.
Download the Auphonic Plugin for DaVinci Resolve: Install-Auphonic.lua
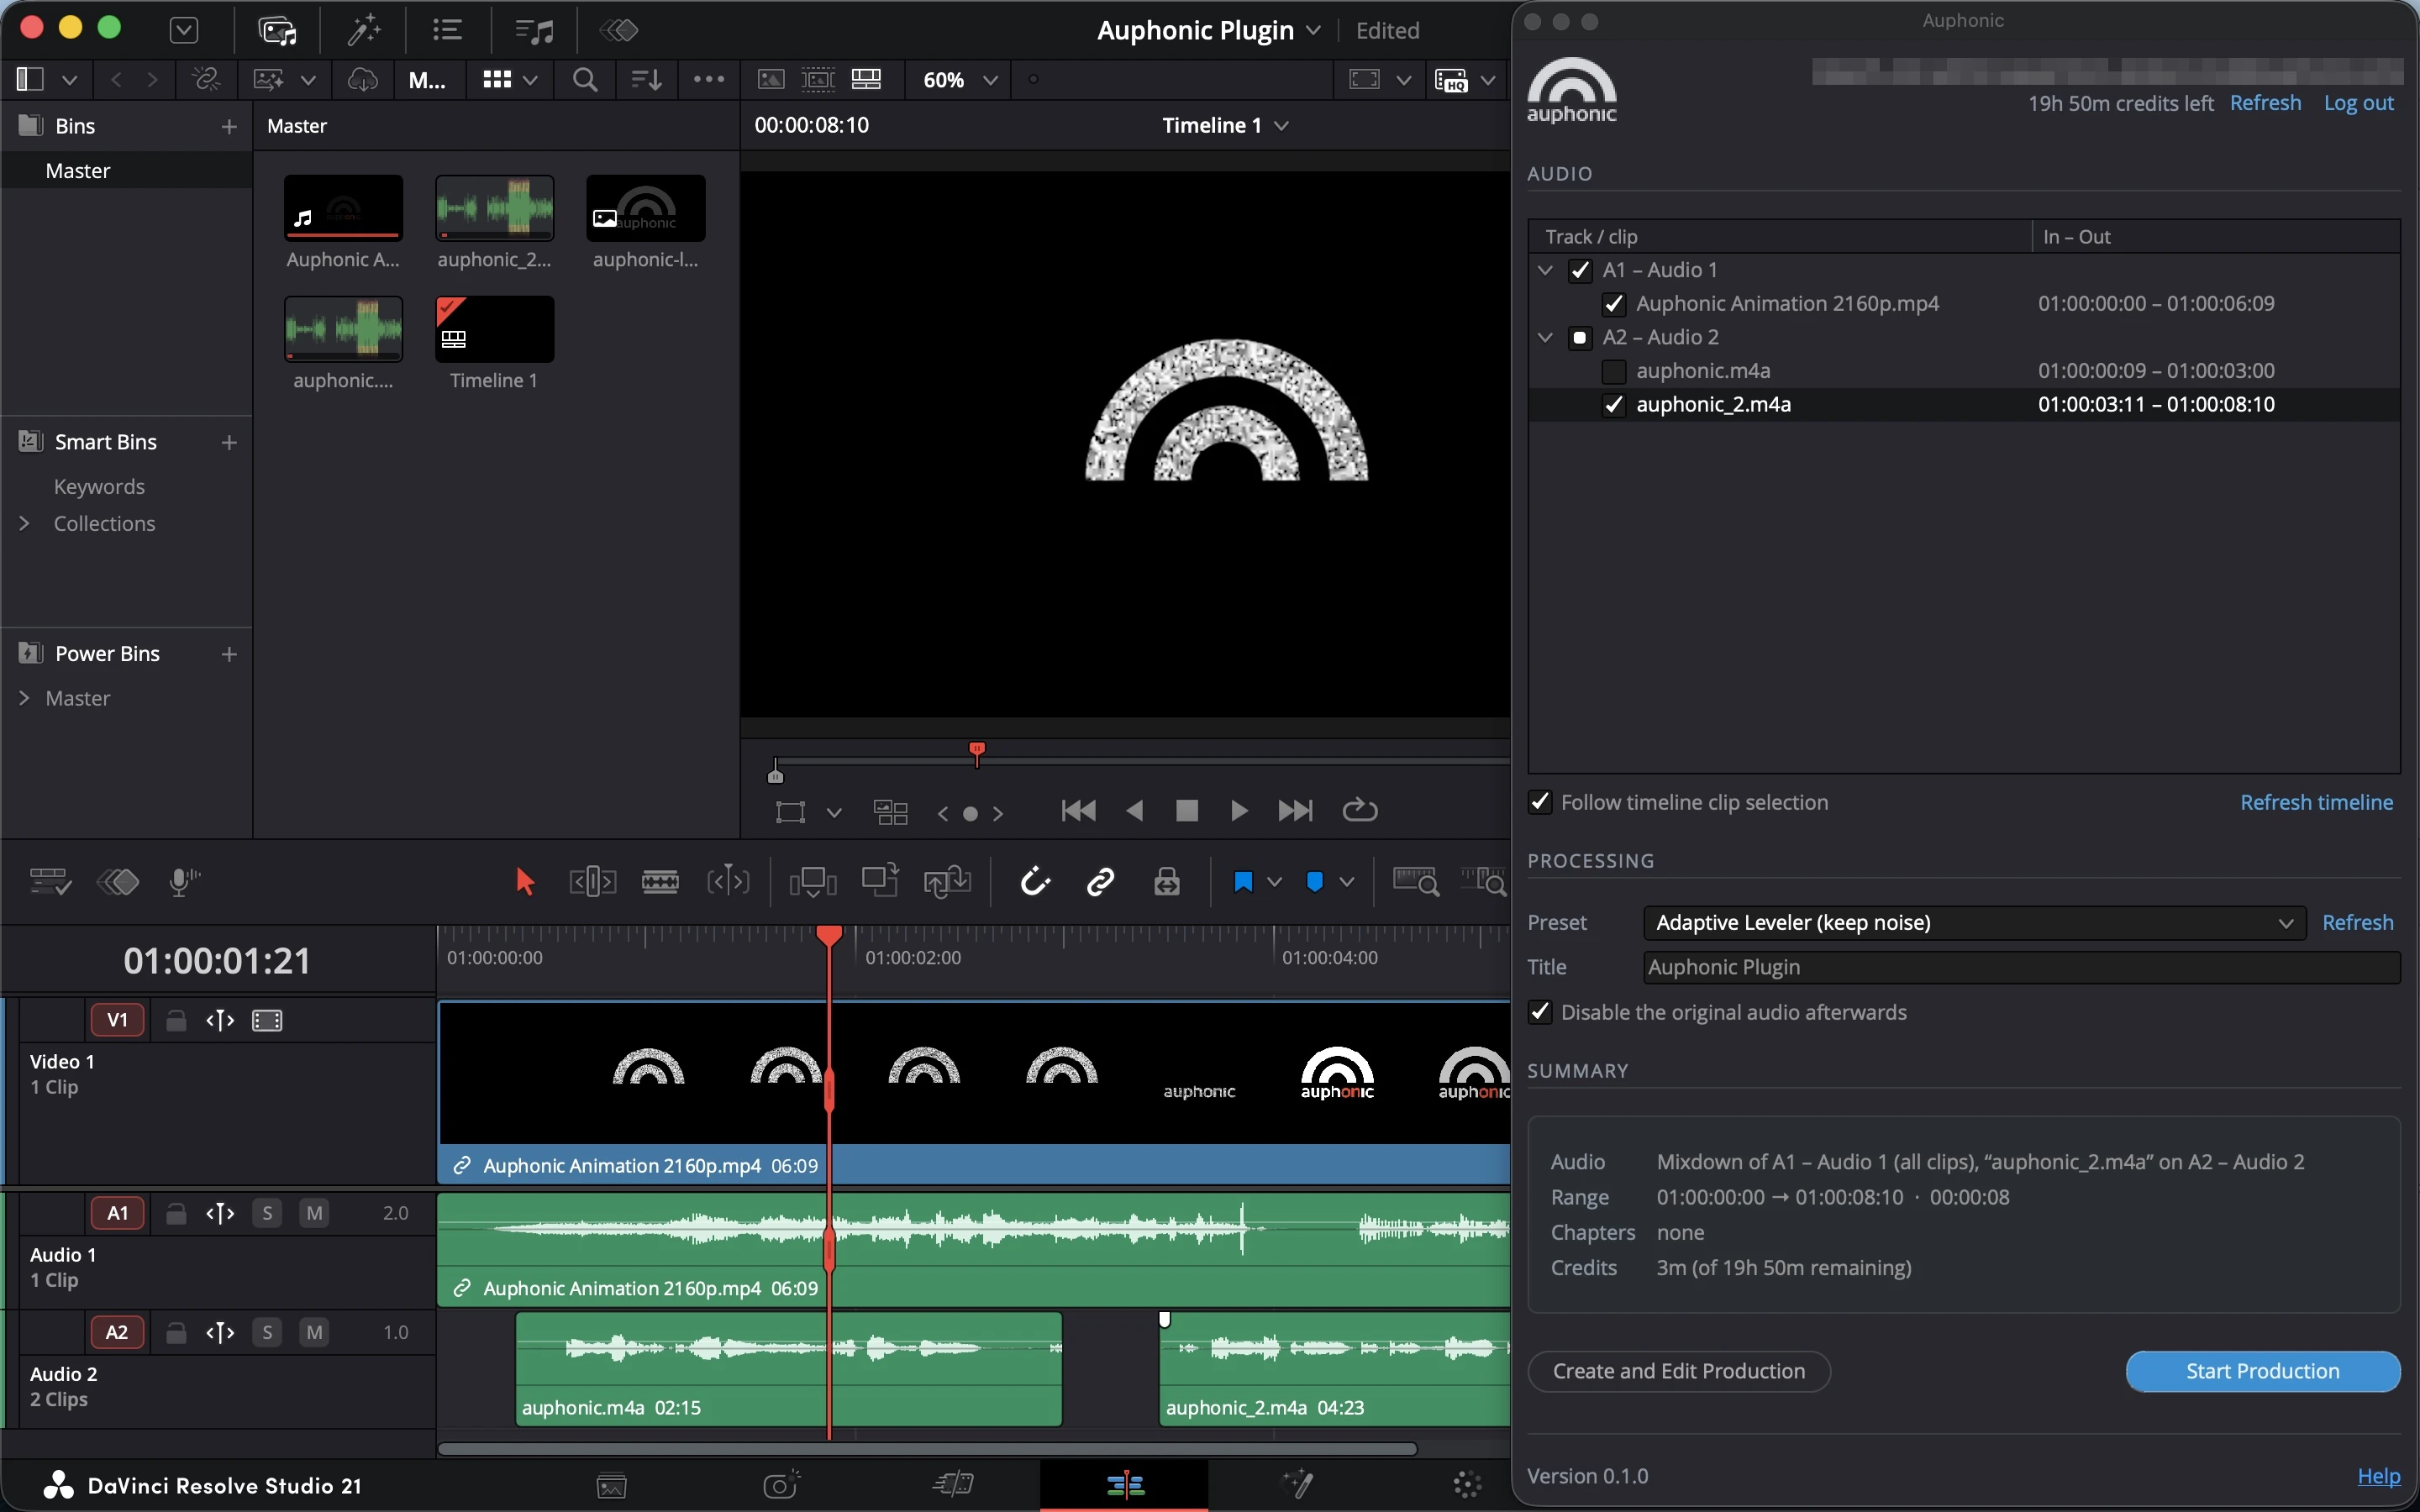
The Auphonic plugin next to a DaVinci Resolve timeline.
Requirements
DaVinci Resolve Studio 19, 20 or 21 on Windows, macOS or Linux.
Resolve Studio 21.1 and newer: nothing else to install. Resolve comes with its own Python, and the plugin uses it.
Resolve Studio 19, 20 and 21.0: Python 3.10 or newer from python.org (see Installing Python below).
An Auphonic account. The free plan includes 2 hours of processing per month (with the Auphonic jingle, see Free Accounts: the Auphonic Jingle).
Note
DaVinci Resolve Studio only: The free edition of DaVinci Resolve doesn’t allow scripts
to open windows (since Resolve 19.1) and doesn’t run Python scripts at all since Resolve 21.1,
so the plugin can’t run there.
If you start it (or its installer) in the free edition, it explains this in the Console.
DaVinci Resolve |
Python |
You need to install |
|---|---|---|
Studio 21.1 and newer |
built into Resolve |
nothing |
Studio 19, 20, 21.0 |
your own |
Python 3.10+ from python.org |
Free edition, Studio 18 and older |
- |
not supported |
Installation
Download the installer: Install-Auphonic.lua
Open DaVinci Resolve Studio and open the Console with Workspace -> Console.
Drag
Install-Auphonic.luaonto the Console.A window shows where the plugin will be installed. Click Install.
Start the plugin: Workspace -> Scripts -> Auphonic -> Auphonic.
It’s in the menu right away; no restart needed.
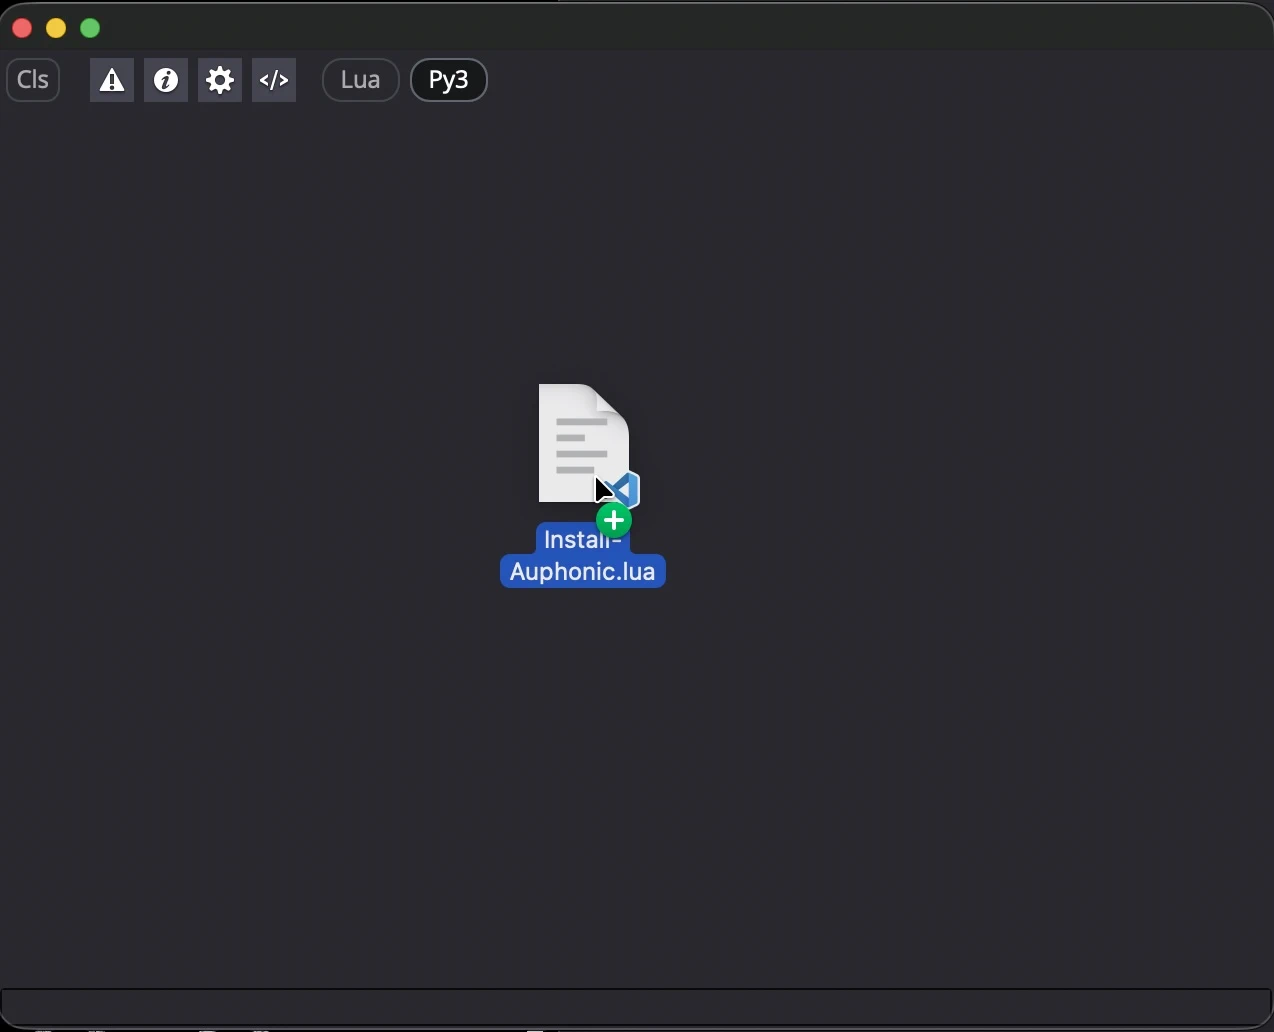
The installer runs inside DaVinci Resolve. It only writes the plugin’s folder for your
user account, so it needs no admin rights, it doesn’t go online, and it changes
nothing else.
It’s a plain text file: open it in a text editor to see what it does.
- Updating
Download the new
Install-Auphonic.luaand drag it onto the Console again. It replaces the installed version.
If the Auphonic window is open, close it; the next time you start the plugin, the new version runs. Your login and settings are kept.
The installed version is shown at the bottom left of the plugin’s window.- Installing by Hand
As an alternative, download Auphonic.zip, unzip it, and copy the
Auphonicfolder into the folder below (createUtilityif it doesn’t exist).
Don’t unzip theauphonic_lib.zipinside.System
Folder
Windows
%APPDATA%\Blackmagic Design\DaVinci Resolve\Support\Fusion\Scripts\UtilitymacOS
~/Library/Application Support/Blackmagic Design/DaVinci Resolve/Fusion/Scripts/UtilityLinux
~/.local/share/DaVinciResolve/Fusion/Scripts/Utility- Uninstalling
Click Log Out in the plugin (to remove the saved API key), then delete the
Auphonicfolder from the folder above.
The processed audio files and your productions on auphonic.com stay.
Installing Python
Only needed for DaVinci Resolve Studio 19, 20 and 21.0.
Skip this on Resolve 21.1 and newer: there, don’t install Python just for this plugin.
Windows: download the installer from python.org, tick Add python.exe to PATH in the first screen, and click Install Now.
If Resolve still can’t find Python, run the installer again, choose Modify, tick Install Python for all users, and finish.macOS: use the installer from python.org. Python from Homebrew is often not found by Resolve.
Linux: install Python 3.10 or newer with your package manager (Ubuntu 22.04 and newer already have it).
Restart DaVinci Resolve afterwards. If Python is missing or too old, the plugin shows a message saying so.
Logging In
The plugin logs in with an Auphonic API key, not with your password. The first time you start it, the login window explains these two steps:
Create a free Auphonic account, if you don’t have one yet.
Create an API key on your account settings page, copy it, paste it into the plugin and click Log In. Leave Remember me ticked to stay logged in.
With Remember me ticked, your API key is stored securely and encrypted in your system’s
password storage (macOS Keychain, Windows Credential Manager, or the Linux keyring),
so you only enter it once.
The top of the window shows your account and your remaining credits, with Refresh and Log Out.
Log Out removes the API key from your computer;
to disable the key itself, revoke it on your account settings page.
Send Audio from DaVinci Resolve to Auphonic
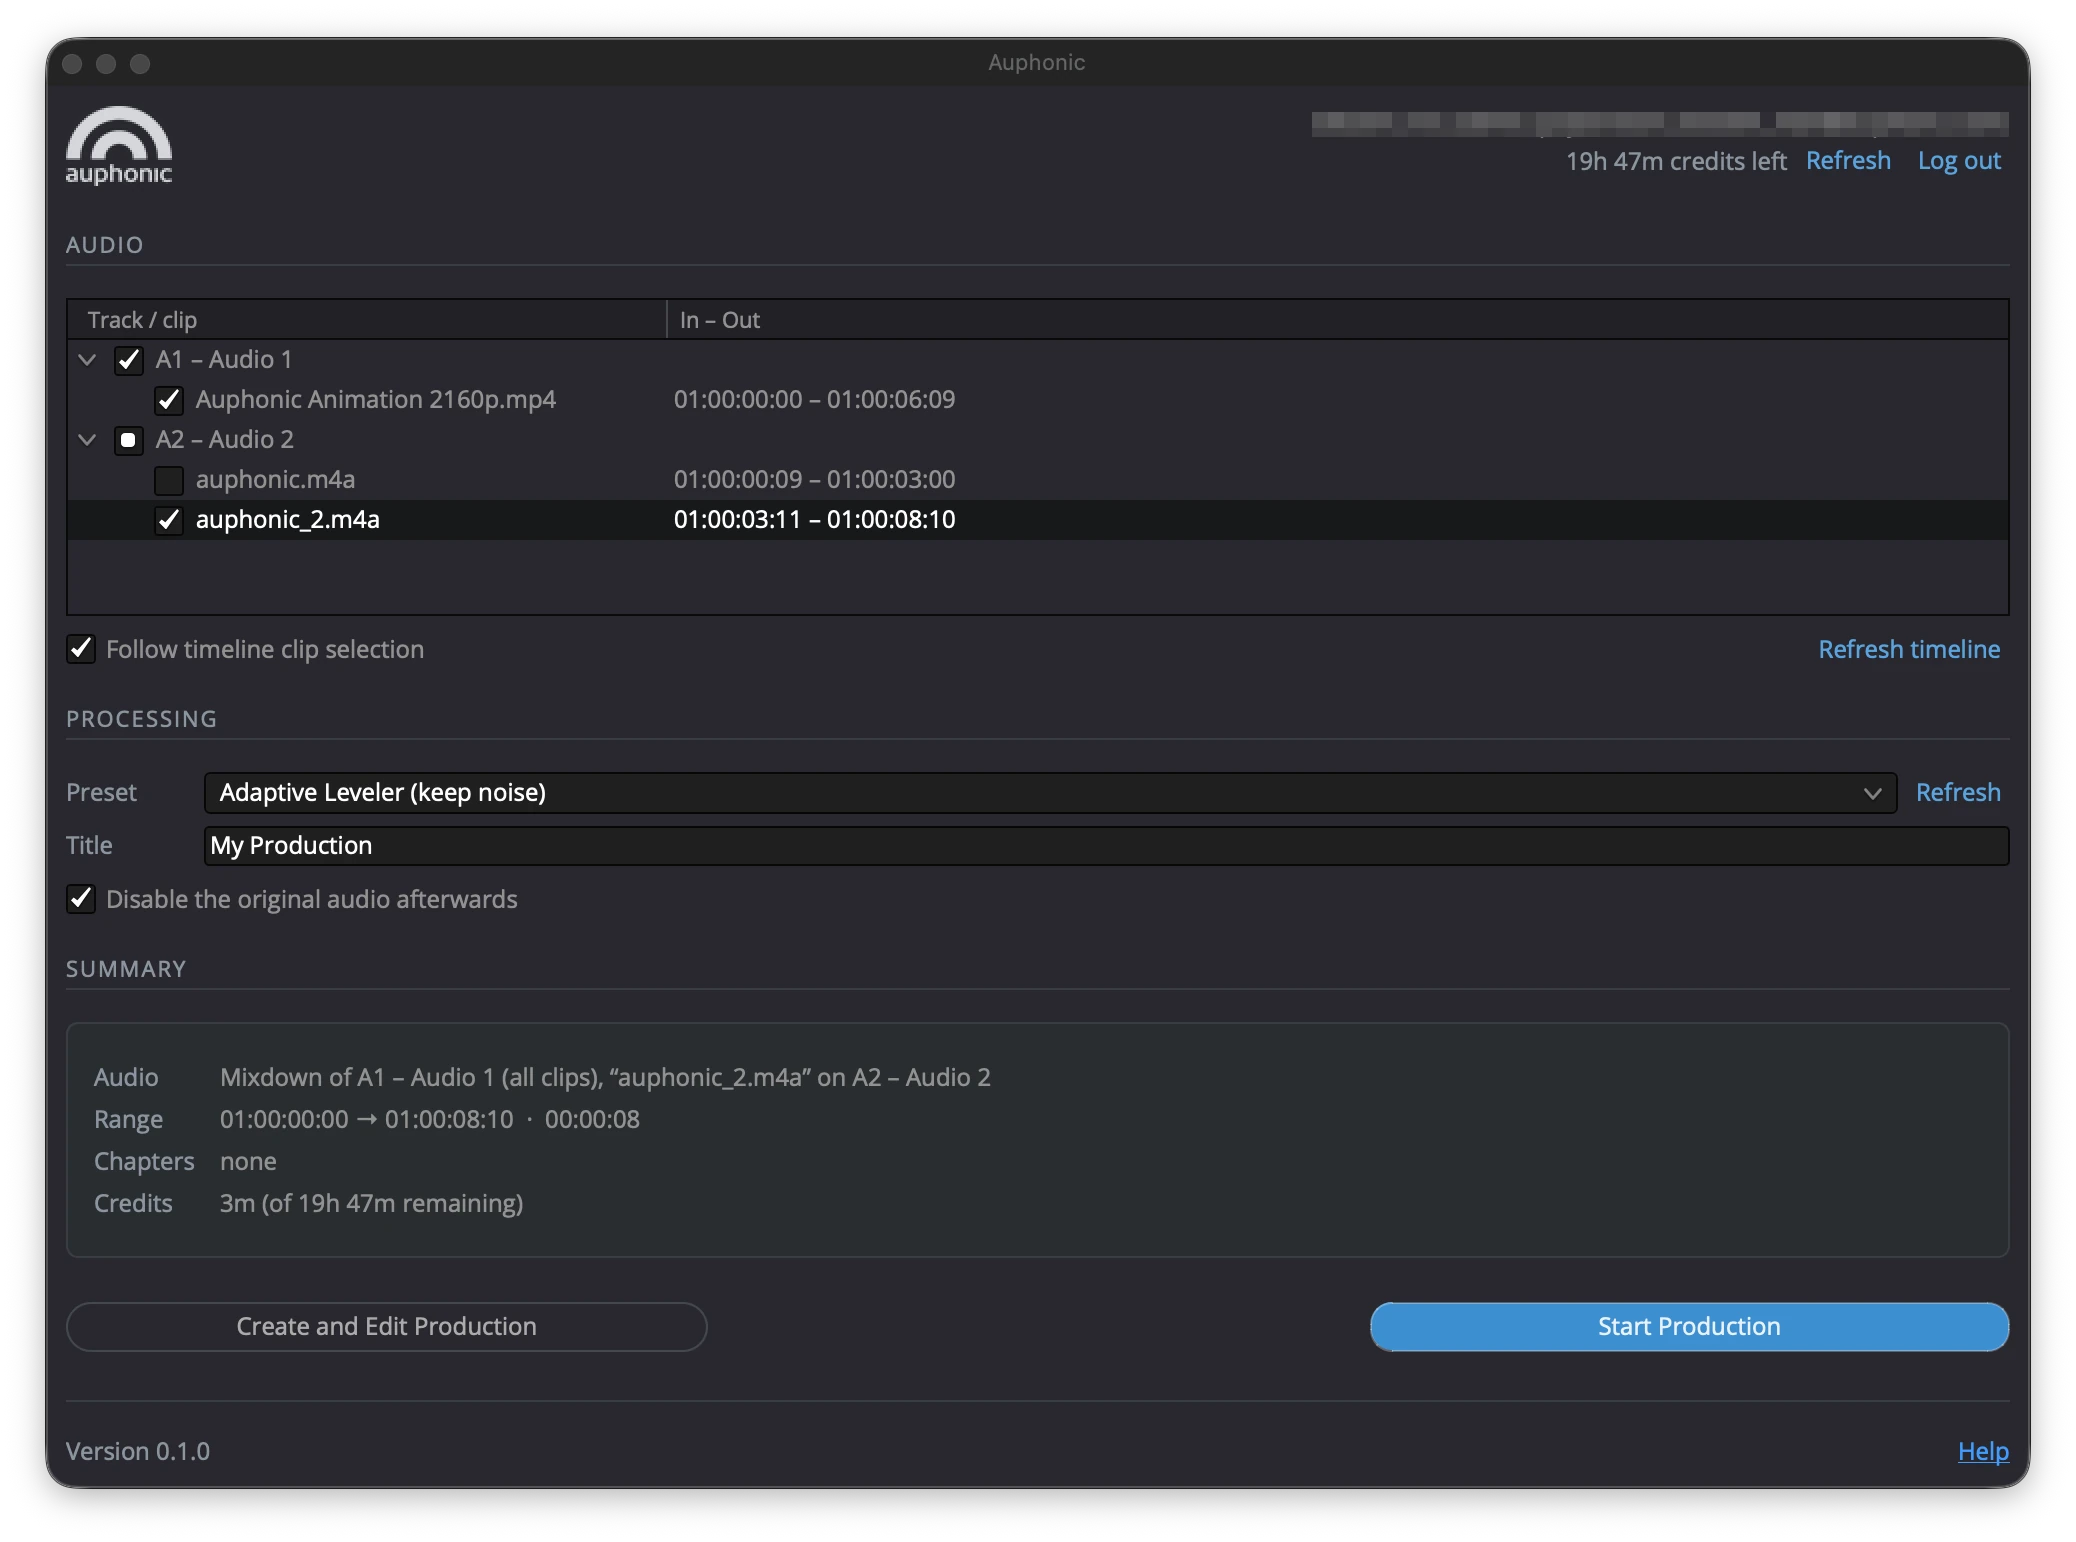
Open the timeline you want to process and start the plugin. The window has three sections: Audio, Processing and Summary.
- Audio: Tracks and Clips
The list shows the timeline’s audio tracks and their clips. Tick a track to process all its clips, or tick single clips.
With Follow timeline clip selection on (Resolve 21.0.4 and newer), clips you select in DaVinci Resolve’s timeline are ticked automatically; selecting a video clip ticks its linked audio.
Note
Several ticked tracks or clips are processed together as one mixdown
(one Singletrack Production), like in our Adobe Add-ons.
Only what you ticked is heard; other audio in that time range is switched off while rendering.
- In and Out Points
When whole tracks are ticked, only the part between the timeline’s in and out points is processed. Clear In/Out removes them to process the whole track.
Single clips are always processed completely.- Auphonic Presets
Choose an Auphonic Preset for the processing: your own presets first, then Auphonic’s ready-made presets. Only singletrack presets are listed.
The plugin remembers your choice; click Refresh after changing presets on auphonic.com.- Title
The production’s title on Auphonic, and the name of the new track. Defaults to the project name.
- Chapter Markers
Timeline markers in the processed range become Chapter Marks, named after the marker (or its note).
Only markers on the timeline ruler count, not markers on clips.- Summary and Credits
The summary shows what will be processed, its timecodes and length, the number of chapters, and the credits the production will use.
Auphonic bills by duration, with a minimum of 3 minutes per production; the estimate turns red if your credits aren’t enough.- Disable the Original Audio Afterwards
Once the processed audio is on the timeline, this mutes the original (the ticked clips or tracks), so only the new audio plays.
Processing and the Result on the Timeline
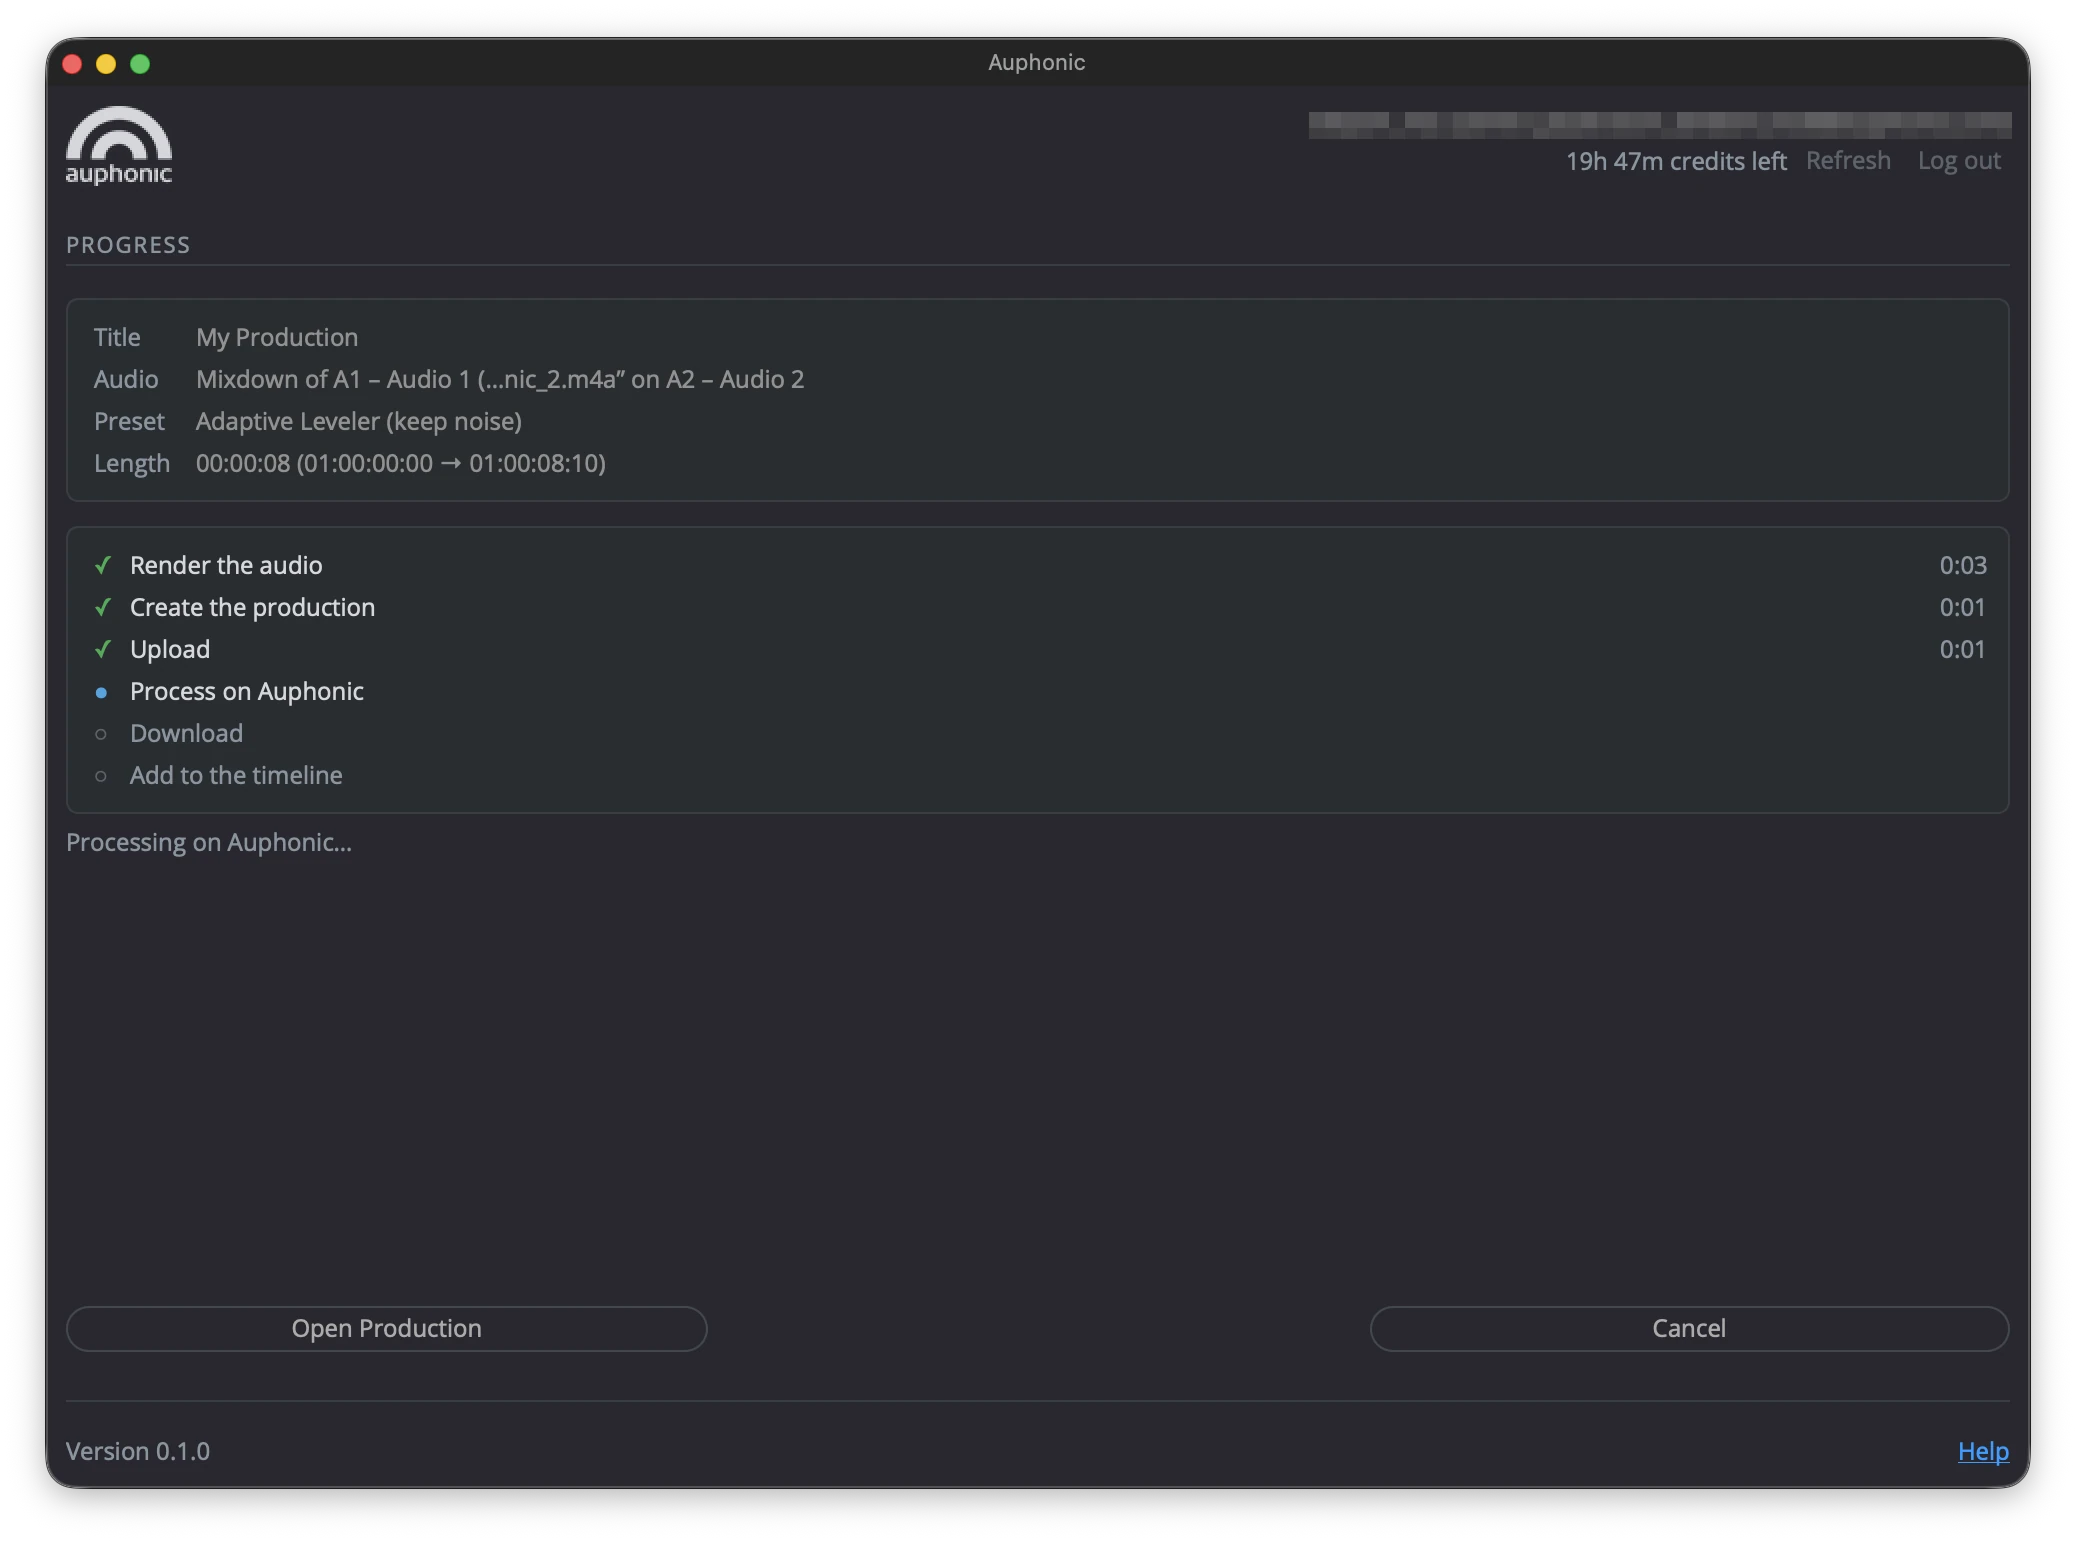
While the production runs, the window shows its steps (render, upload, processing on Auphonic,
download, adding it to the timeline) with progress and timings.
Open Production opens it on auphonic.com.
When it’s done, the processed audio is:
downloaded to
Documents/Auphonic/<project name>/(keep these files; your project uses them),imported into a Media Pool bin called Auphonic,
placed on a new audio track directly below the original, named after the title, starting at exactly the same frame, so it’s in sync.
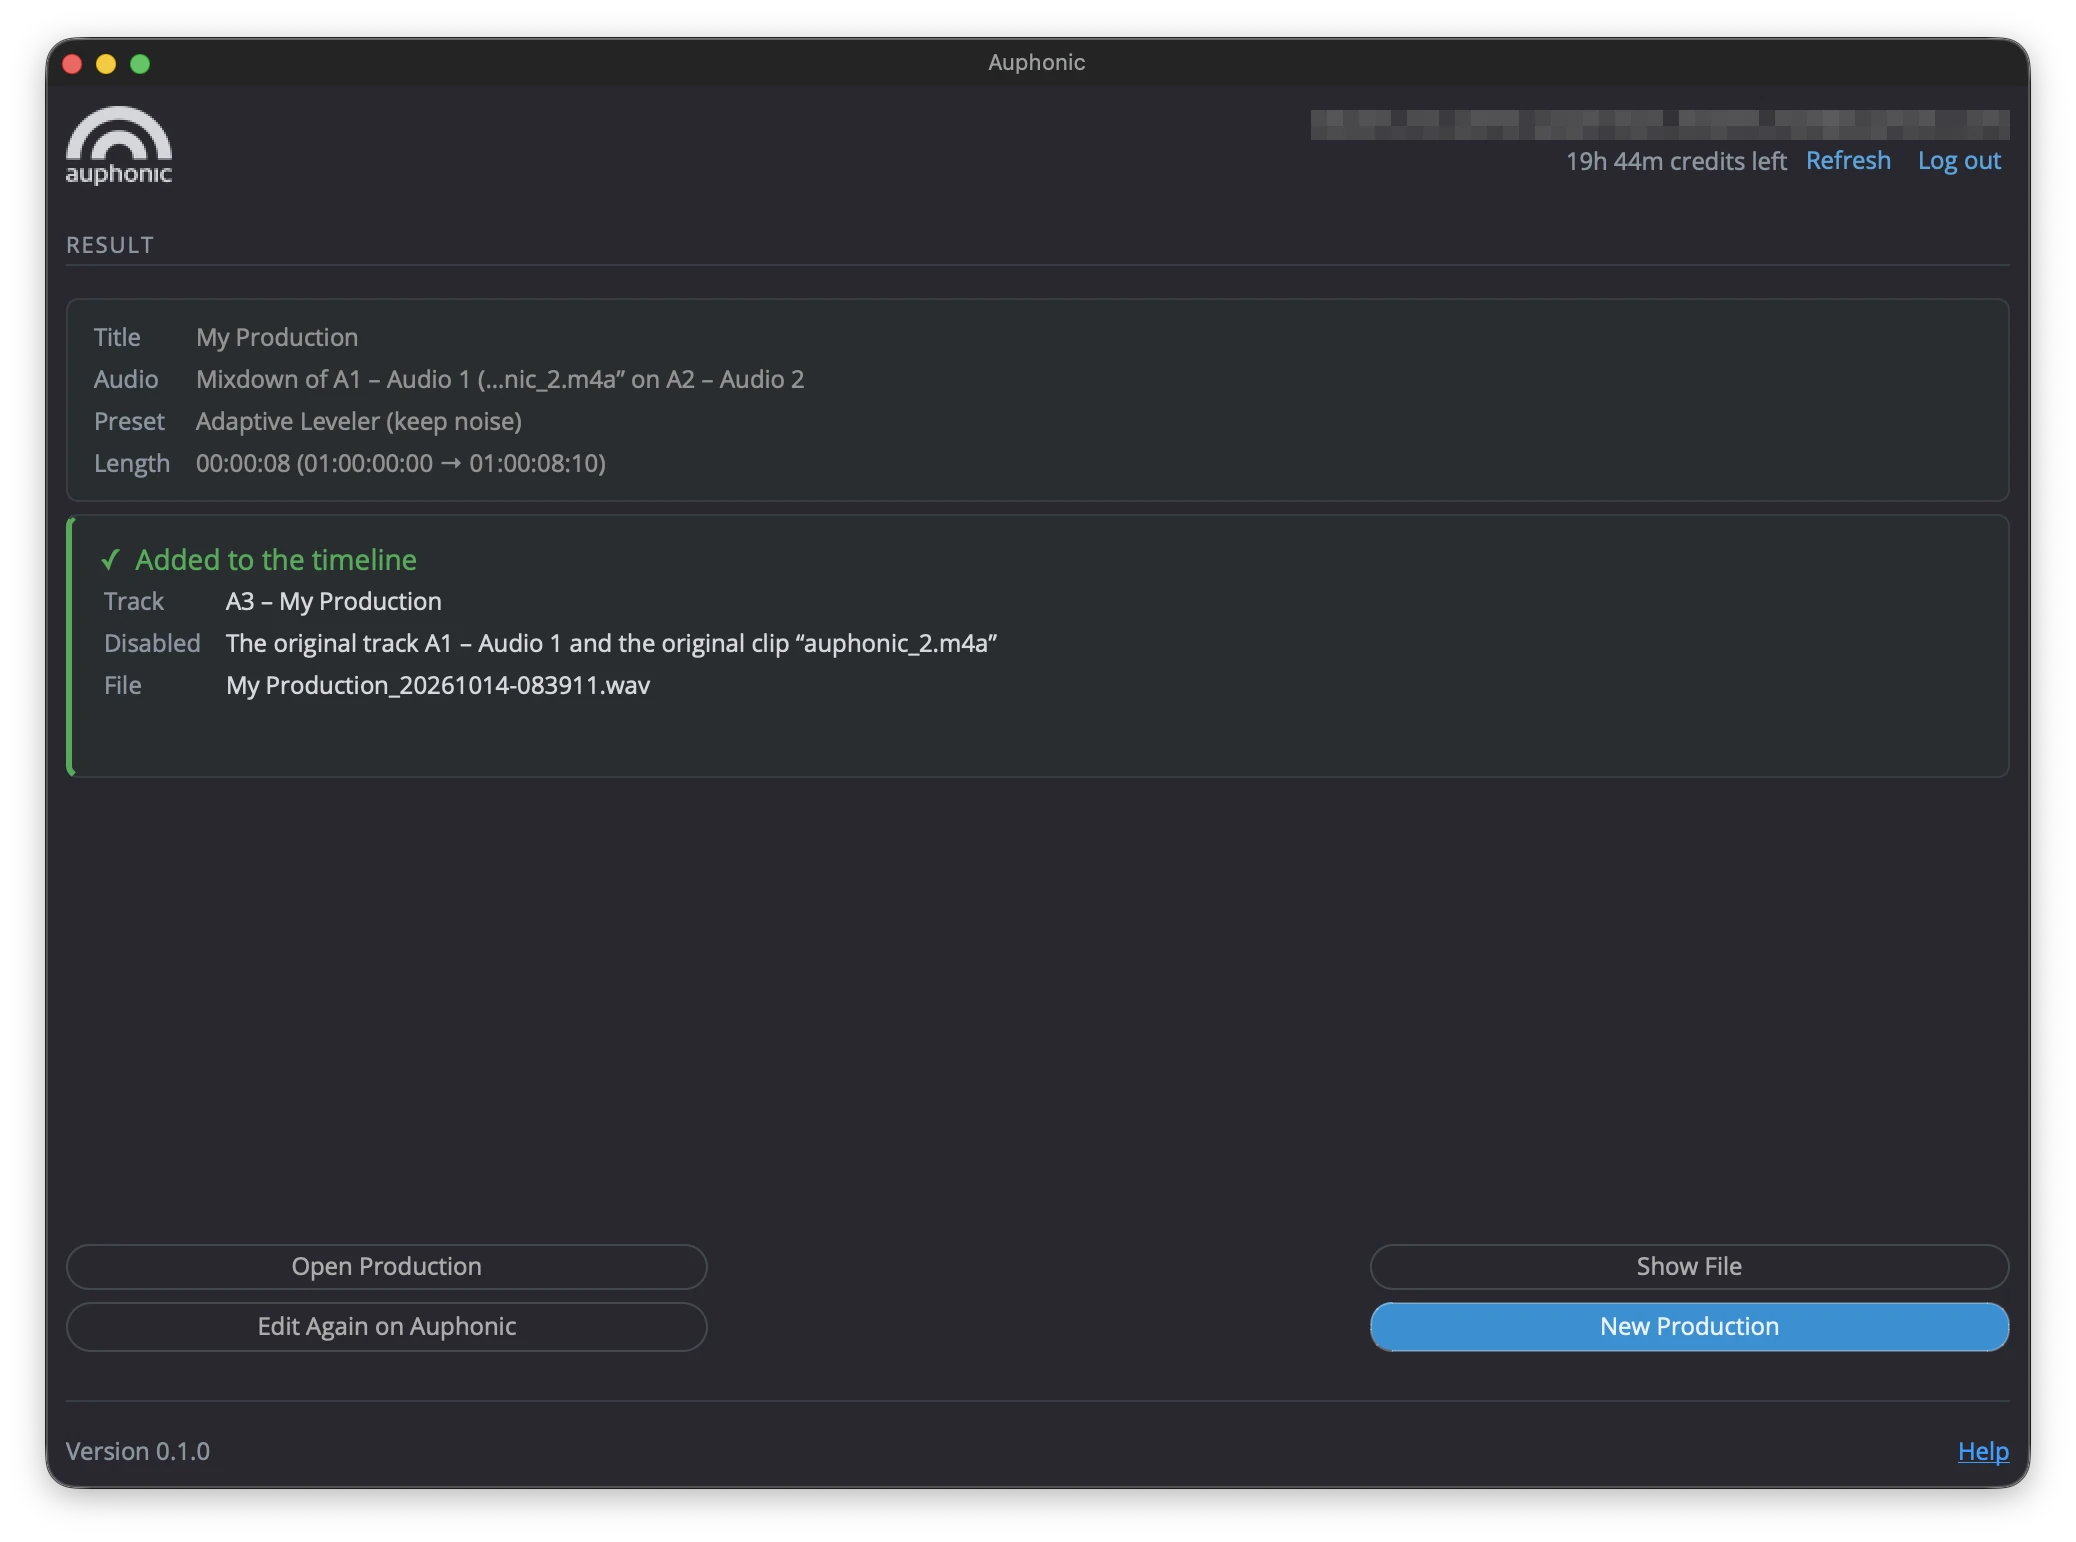
The result view also warns you if the processed audio is longer or shorter than the original
(for example because your preset cuts silences or adds an
intro), since it’s then only in sync up to that change.
Show File shows the downloaded file, New Production goes back to the options.
Note
Free accounts: the Auphonic jingle. Productions of free accounts come with a short Auphonic jingle
(about 6 seconds): at the start of audio longer than 30 seconds, and also at the end of audio
longer than 2 minutes (audio up to 30 seconds only gets it at the end).
The processed audio still starts at the original position, so everything after the intro jingle
plays about 6 seconds later than the original. The plugin mentions the jingle before you start.
Productions with paid credits have no jingle.
Cancel stops a running production at any time. Your tracks and in/out points are always restored.
If the production was already created on Auphonic, you can choose Keep Production or Delete Production.
Edit Again on Auphonic
Not happy with the result? Click Edit Again on Auphonic in the result view.
The production opens on auphonic.com: change its settings and start it again there.
The plugin waits for the new result and puts it on the timeline in place of the previous result,
on the same track. If you changed that track in the meantime, it’s kept and the new result goes on a new track.
Nothing is rendered or uploaded again.
Troubleshooting
- Where Are the Messages?
The plugin writes to DaVinci Resolve’s Console: Workspace -> Console (choose Py3 or Lua at the top).
Every start prints one diagnostic line like this; please include it when you contact us:[Auphonic] v1.0.0 | Python 3.14.4 at built-in (…) | Resolve DaVinci Resolve Studio 21.1.1.10 | macOS 26.6.2
- Common Problems
Nothing happens in the free edition: expected, see Requirements.
“Auphonic needs Python”: see Installing Python.
Dragging in the installer does nothing: drop it onto the Console (Workspace -> Console), or install by hand.
“Auphonic couldn’t process the audio: …”: click Open Production to see the details on auphonic.com (for example, not enough credits).
The download failed: the production is finished on Auphonic; download the WAV file there (Open Production) and import it yourself.
The window stops updating during playback: expected, DaVinci Resolve pauses script windows while playing. Processing continues and the window catches up.
Render settings: after processing, the Deliver page keeps the plugin’s audio-only settings. Choose your usual render preset before your next export.
- Questions and Problems
Email support@auphonic.com with the diagnostic line, your operating system, your DaVinci Resolve version, and what happened.
The Console never shows your API key, so its output is safe to send.