As we have described last week in Chapter Marks for MP3, MP4 Audio and Vorbis Comment, chapter marks are a great way to make your podcasts more informative and searchable. But while chapters are incredibly convenient for listeners to have, they are also a lot of work for producers to create!
At Auphonic, we therefore offer several features to import chapters from your favourite audio editors and other sources, that make the creation of chapter marks much easier. Choose your option:
- Add Chapter Marks through the Web Interface
- Add Chapter Marks while Recording with our Mobile App
- Import Chapter Marks from Audio Input Files and WAV Markers (Zoom, Audition, Garageband, Hindenburg, Ultraschall)
- Import Chapter Information from Plain Text Files
- Import Chapter Marks from Audacity
- Import Chapter Marks from Reaper
- Import Chapter Marks from Adobe Audition
- Create Chapter Marks through the Auphonic API
Please note that a chapter's start time should always indicate its position in the source file without the intro that you might use in your production. There is no need to add the length of your intro file to chapter start times, Auphonic will automatically do this for you.
1. Add Chapter Marks through the Web Interface
The simplest way to add chapter marks in Auphonic is to write them by hand in your production form. We have been offering this solution for quite some time, and although it is straightfoward, it is not always the most convenient method. This is why we now offer several alternatives, which might suit your requirements better.
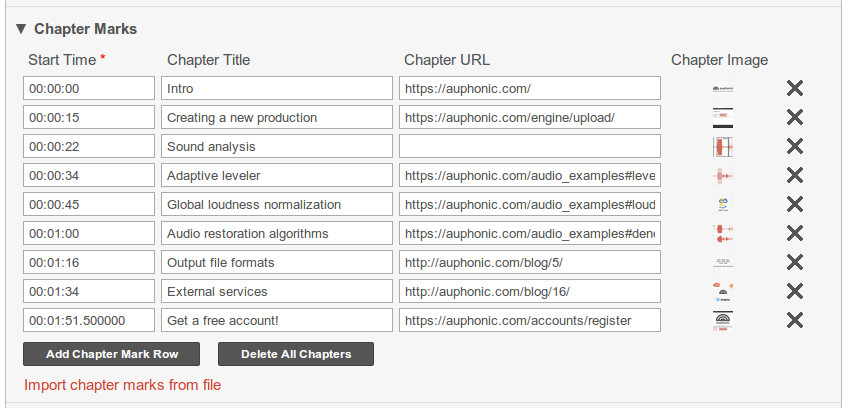 Adding chapter marks in the Auphonic production form.
2. Add Chapter Marks while Recording with our Mobile App
With the Auphonic audio recorder apps for iOS and for Android, you can add chapter marks as you are recording:
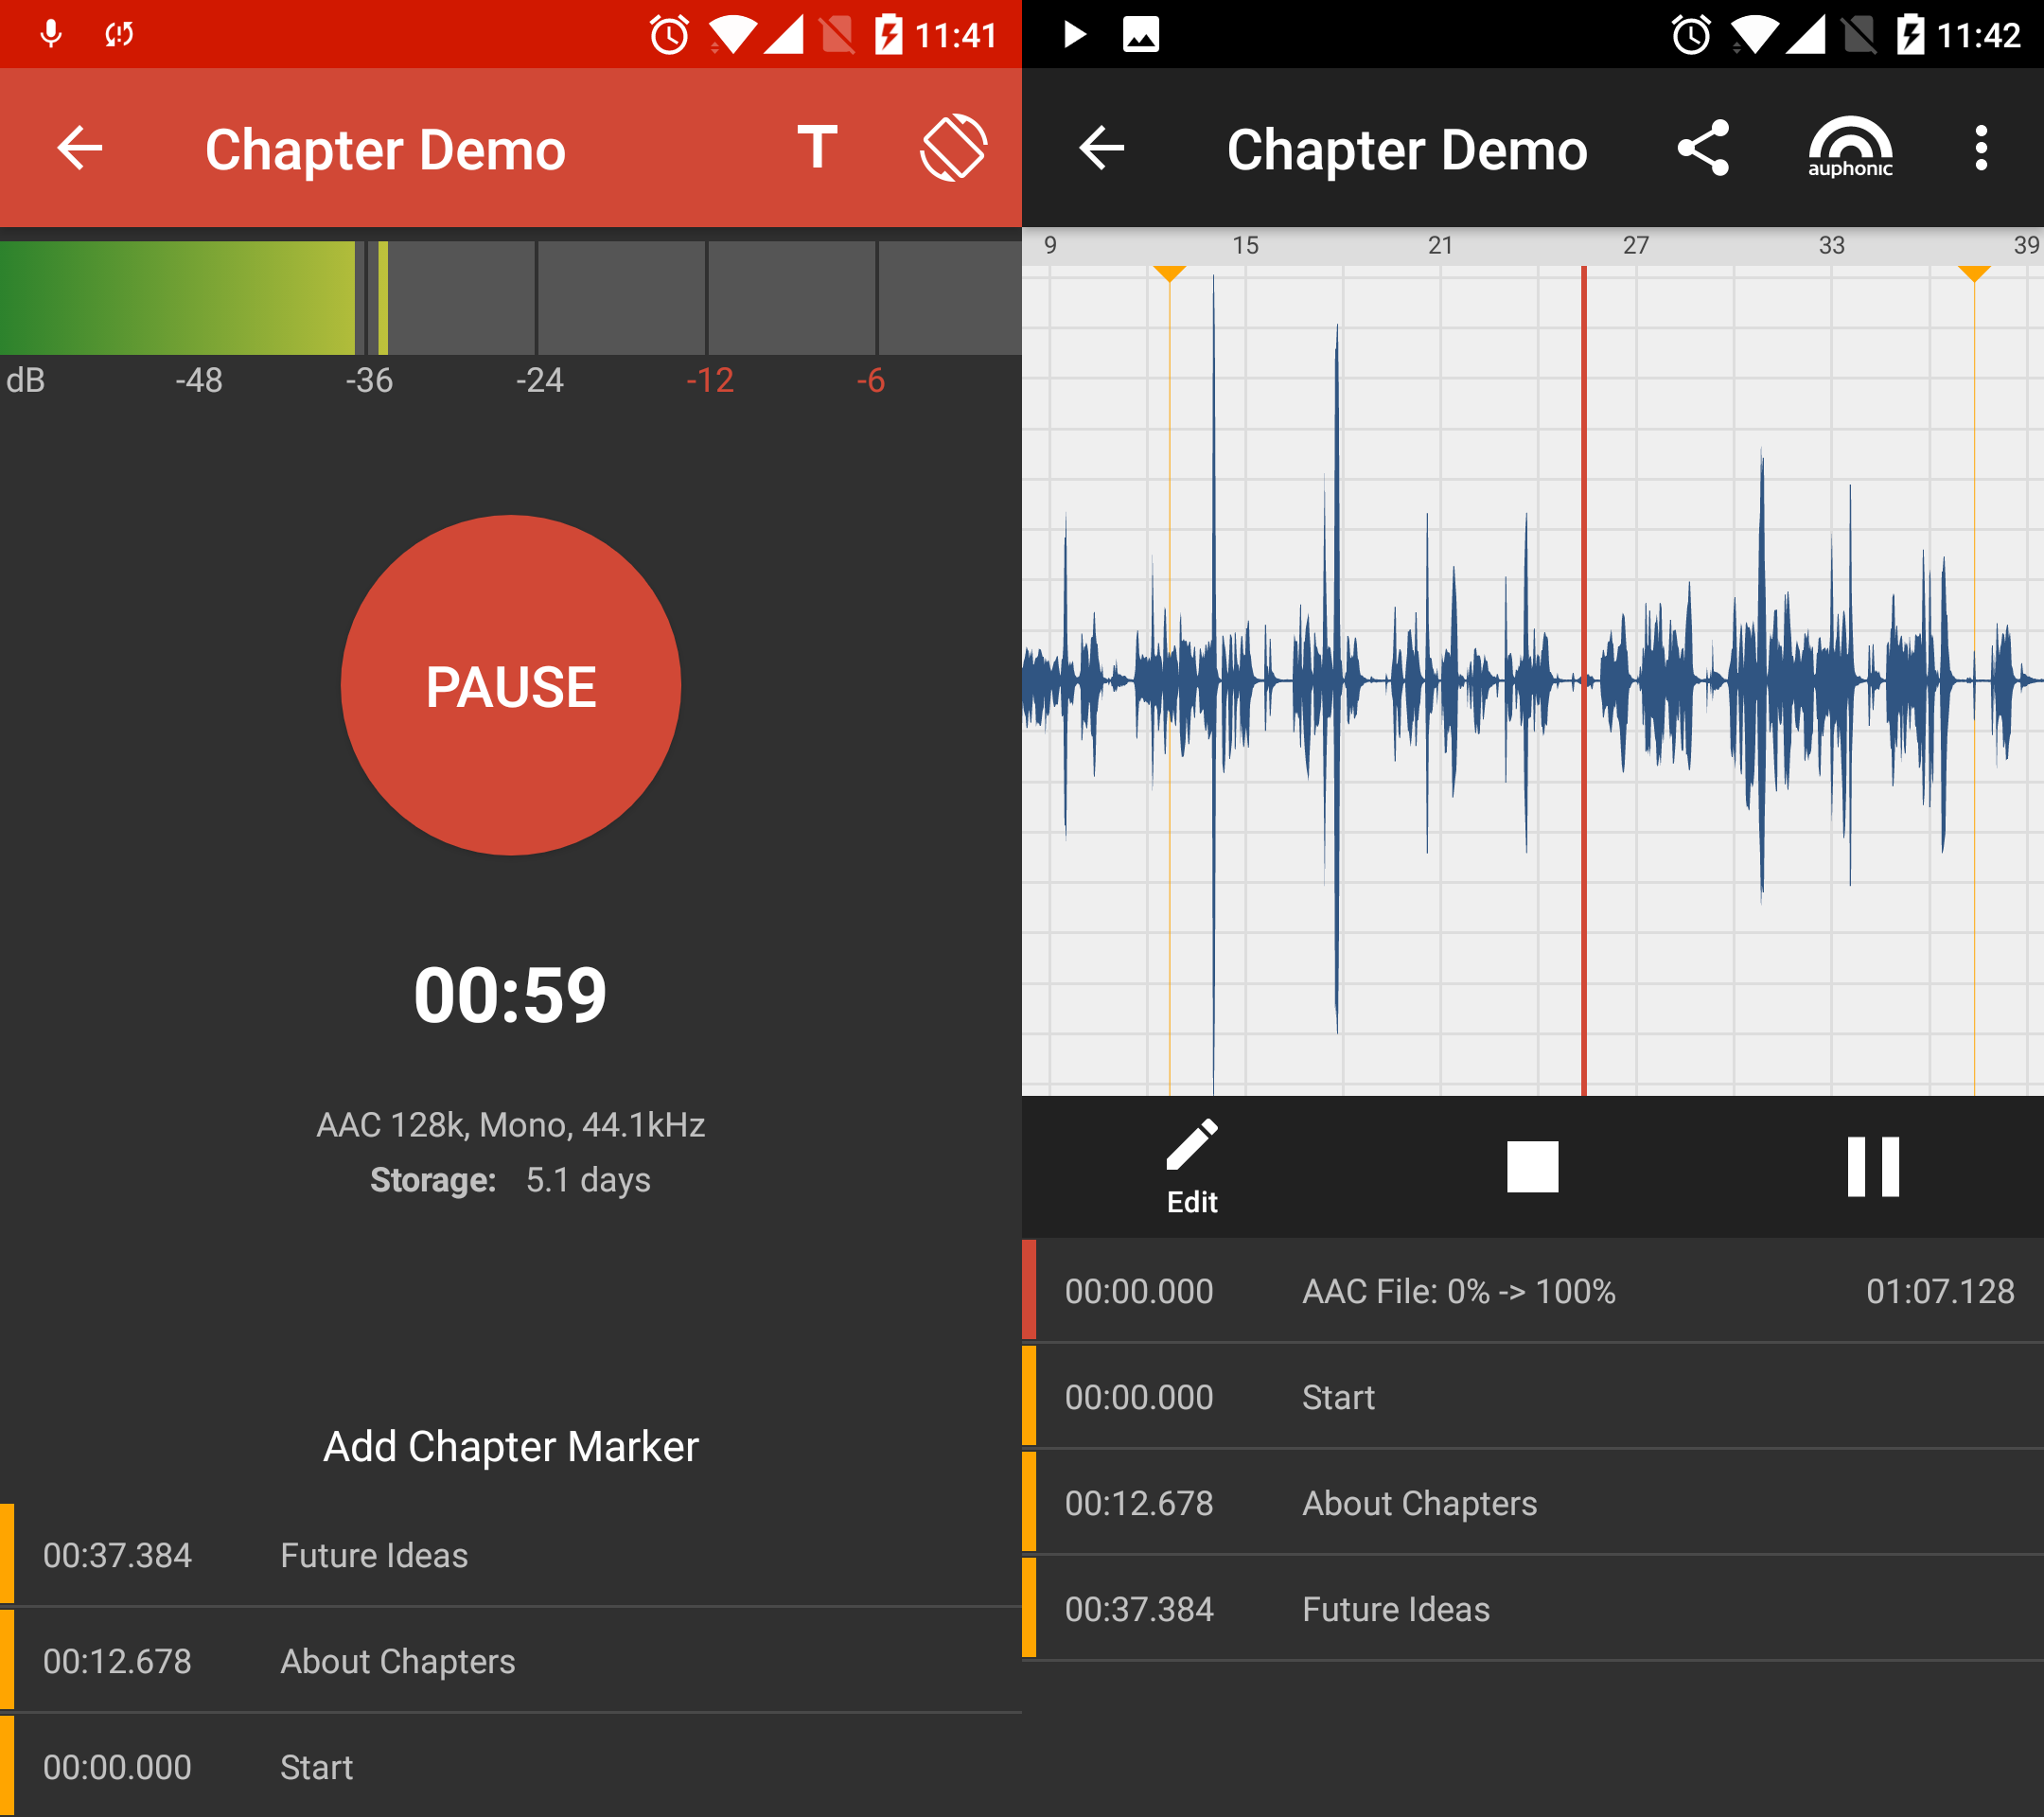
Auphonic Mobile App (Android): adding chapter marks while recording (left), listen to chapters to correct and edit them after recording (right).
This method allows you to create complete podcasts on-the-fly and reduces post production to an absolute minimum! You simply record your podcast chapter by chapter, adding titles as you go.
3. Import Chapter Marks from Audio Input Files and WAV Markers (Zoom, Audition, Garageband, Hindenburg, Ultraschall)
If you use a Zoom Recorder, Audition, Garageband, Hindenburg, Ultraschall, iMovie, Sound Forge, Reaper or any other audio editor (DAW) which supports chapters or markers in WAV files, export your project and Auphonic will import existing chapter marks from your input audio files automatically (formats: .mp4, .m4a, .mp3, .flac, .opus, .ogg, .wav, ...), including images and URLs:
- In your audio editor, add chapter marks or markers/labels as desired. See how to create chapters with Garageband, Hindenburg or iMovie.
- Bounce your session to an MP4, MP3 or WAV file (most audio editors don't support chapter marks in MP3, FLAC or Opus). We recommend that you use either high-bitrate AAC or lossless ALAC as your MP4 file's audio codec. For testing purposes, you can use our .m4a example file, which contains some chapters.
- Use this file as the source of an Auphonic production, from which you generate some new output files.
- You will notice that any chapters in the source file also appear in the output files, even though you will see the actual chapter information in your Auphonic production form only after processing. It all happens automatically in the background!
4. Import Chapter Information from Plain Text Files
It's also possible to import chapter information from a separate (small) text file rather than using our web interface. The format must be similar as defined by the tool mp4chaps:
- Each chapter mark must contain a single time marker (formated as hh:mm:ss[.mmm]) and a chapter title in a separate line.
- An optional URL can be added at the end of the line and must be embedded between a less-than and a greater-than sign.
00:00:00.000 Intro <http://url1.com>
00:00:10.000 Baby prepares to rock
00:00:30.000 Baby rocks the house
00:01:00.000 One Minute
00:01:30.000 End <http://url2.at/ha>
Now import the chapters file in your Auphonic production form (see screenshot below):
- In the production form, select section Chapter Marks.
- Select Import chapter marks from file to show the file importer.
- Click the button Import Chapter Marks and select your file.
- Your chapters will appear in the production form after a few seconds.
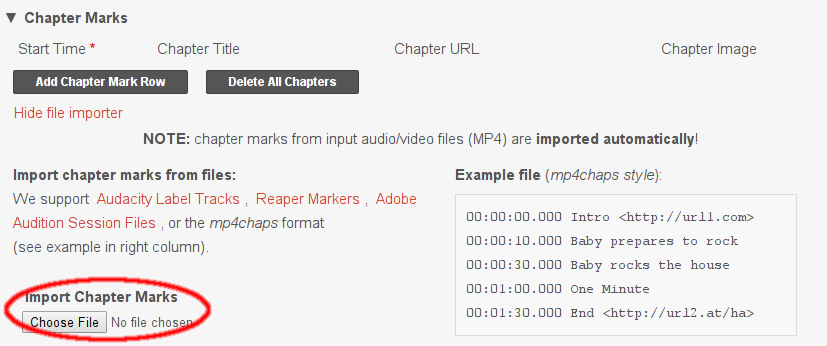 Importing chapter marks in the Auphonic production form.
5. Import Chapter Marks from Audacity
With the help of Auphonic, you can create chapter marks from an Audacity label track:
- Create a label track in Audacity (Tracks → Add New → Label Track)
- Add new "point labels" as desired (Tracks → Add Label at Selection)
- Export the labels to a text file (Tracks → Edit Labels → Export...)

- Import the text file in your Auphonic production
- Add URLs and images to the imported chapter marks as desired
6. Import Chapter Marks from Reaper
Auphonic can also import chapter marks from a Reaper marker list. The following step-by-step instructions contain links to an excellent screencast by Ralf Stockmann (with German voiceover, but using the English Reaper GUI), which describes the process in detail and is also embedded below:
- Set Reaper's timeline format to Hours:Minutes:Seconds:Frames (right mouse click on time display, then select Hours:Minutes:Seconds:Frames)
- Add new markers in your Reaper session by hitting the 'm' key
- Export the marker list (View → Region/Marker Manager, right mouse click for context menu: Export regions/markers)
- Import the marker list into Auphonic (see also screenshot further above)
7. Import Chapter Marks from Adobe Audition
Auphonic can create chapters from markers in an Adobe Audition session file:
- Add markers to your Audition multitrack session by hitting the 'm' key
- Edit and rename your markers in the Markers Panel (Windows → Markers)
- Export your Audition session using the native SESX format
- Import the session file in the Auphonic production form
- Add URLs and images to the imported chapter marks as desired
8. Create Chapter Marks through the Auphonic API
Of course you also have access to Auphonic's chapter mark features if you use the Auphonic API to automate your post production workflow.
- With the Auphonic Simple API, you can import chapter files in any format that can also be imported through the web interface (text files, Audacity label tracks, Reaper marker lists, Audition sessions).
- The Auphonic JSON API, on the other hand, allows you to specify chapter marks in JSON, without uploading any chapter files.
Conclusion
Auphonic supports chapter marks in many different ways:
- You can create chapter marks using our web interface or with the Auphonic mobile app as you are recording.
- We automatically import chapter marks that you have created with other programs (Garageband, Hindenburg, Ultraschall, etc.).
- You can import chapters form marker or session files of various audio editors (Audacity, Reaper, Adobe Audition).
- Create chapters using our API or upload plain text chapter files.
We believe that these features will make chapter marks much easier to handle for most podcasters, but we realize that different producers have very different requirements. Maybe you are using another editor that does not yet support chapter marks, and whose marker format you'd like Auphonic to support?
If your workflow is not readily supported by any of the above methods, just get in touch, and we'll see how we can help!