Cutting audio can be a rather tedious task. It requires a decent amount of time and is quite repetitive. Often silence segments, like speech breaks or breathing pauses, make cutting audio necessary in the first place.
 Photo by Daniel Schludi on Unsplash
We introduce our new automatic silence cutting feature! It will make your life easier by saving you the time you would normally require to cut silence segments in your recordings.
Why do you need to cut silence segments?
Silence segments occur in your audio recordings naturally. They can be due to short speech breaks or breathing pauses. It's also possible, that at the beginning of a recording equipment needs to be re-adjusted, which also may result in a few seconds of silence.
Usually, listeners do not want to hear silence segments. The reason is easy: silence is redundant filler content. Hence, silence segments need to be cut to achieve a high-quality listening experience. Locating the segments and cutting them manually is tedious though and takes a decent amount of time for longer recordings.
This is why we developed and released our own automatic silence cutting feature.
How do we cut silence for you?
Our automatic silence cutting algorithm detects and cuts silence segments reliably. All you need to do is to enable the algorithm in your production - no further settings are required! This is the easiest possible way for you to cut silence in an audio file.
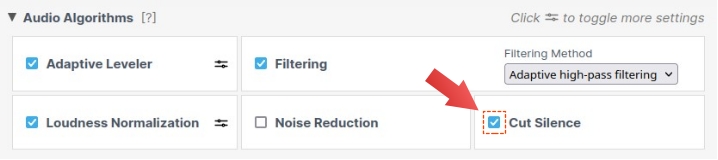 How to enable silence cutting for your production.
In our audio processing system, silence cutting is a multi-stage algorithm. We use our sophisticated voice activity detection algorithms to detect what is useful content and what is silence. Then we cut the silence parts and crossfade the remaining audio segments to make sure no audio artifacts are introduced. When cutting we ensure that intended speech breaks, e.g. between two sentences, remain untouched.
When we cut any audio, we make sure that chapter marks and speech recognition transcripts are adapted accordingly. Additionally, when exporting to other external services we make sure the cut tracks are exported and correctly labeled.
Audio Examples
Let's listen to two audio examples.
Example 1 (Singletrack production)
Here we have a singletrack production with three silence segments. The segments are located at the beginning of recording, between the first and the second "Hi" as well as at the end. Each silence segment is cut down to a length which still sounds natural, but does not annoy the listener.
The breathing onsets, which happen straight before voice kicks in again, are not cut. This makes sure that the character of the recording remains natural.
For this example, we also activated our new AutoEQ feature to remove pops in the audio.
| Original: | |
| Cut: |
Here is also a screenshot of how the result looks in our audio player. The gray areas show where our audio processing system cut the silence.
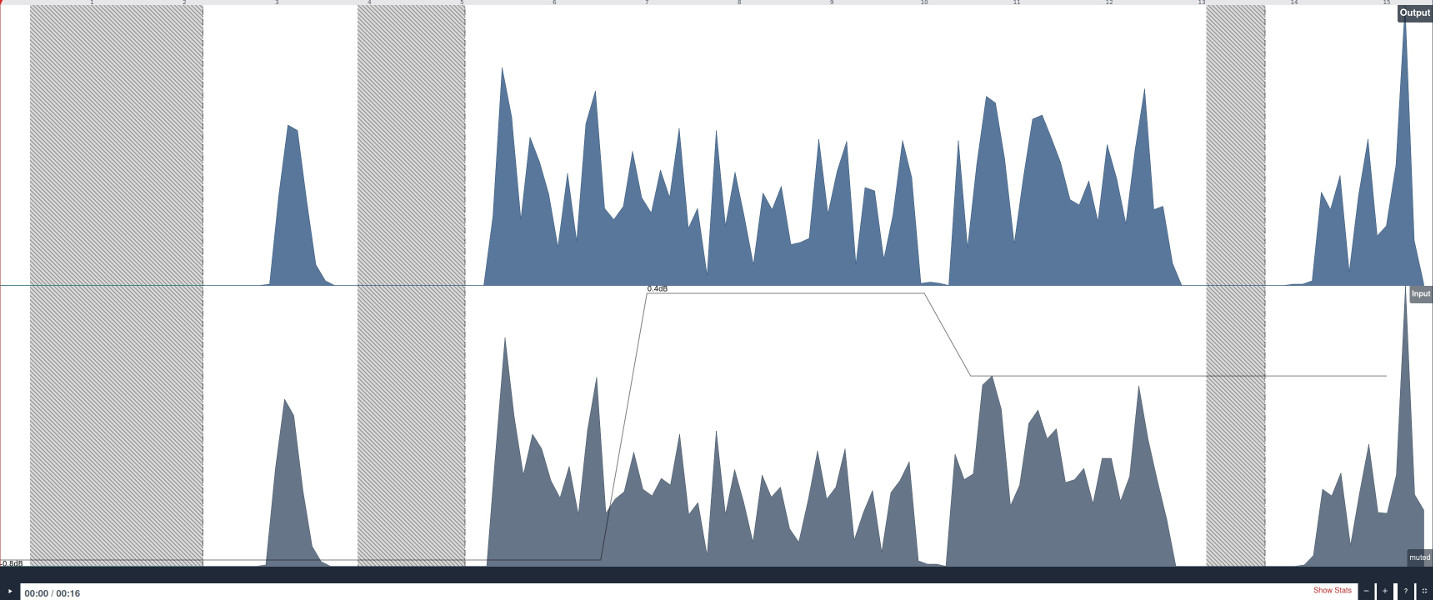 The result of example 01, as displayed by our Audio Inspector.
Thx to the Feel Free to Deviate podcast for providing this recording.
Example 2 (Multitrack production)
Let's also look at silence cutting in a multitrack production. This small excerpt of the TVEye podcast contains a music track and three speaker tracks. Before the intro music kicks in, there are a few seconds of silence.
| Un-cut: | |
| Cut: |
The few seconds of silence at the beginning of the file are cut. After that, no further cuts are applied though to make sure the background music remains intact.
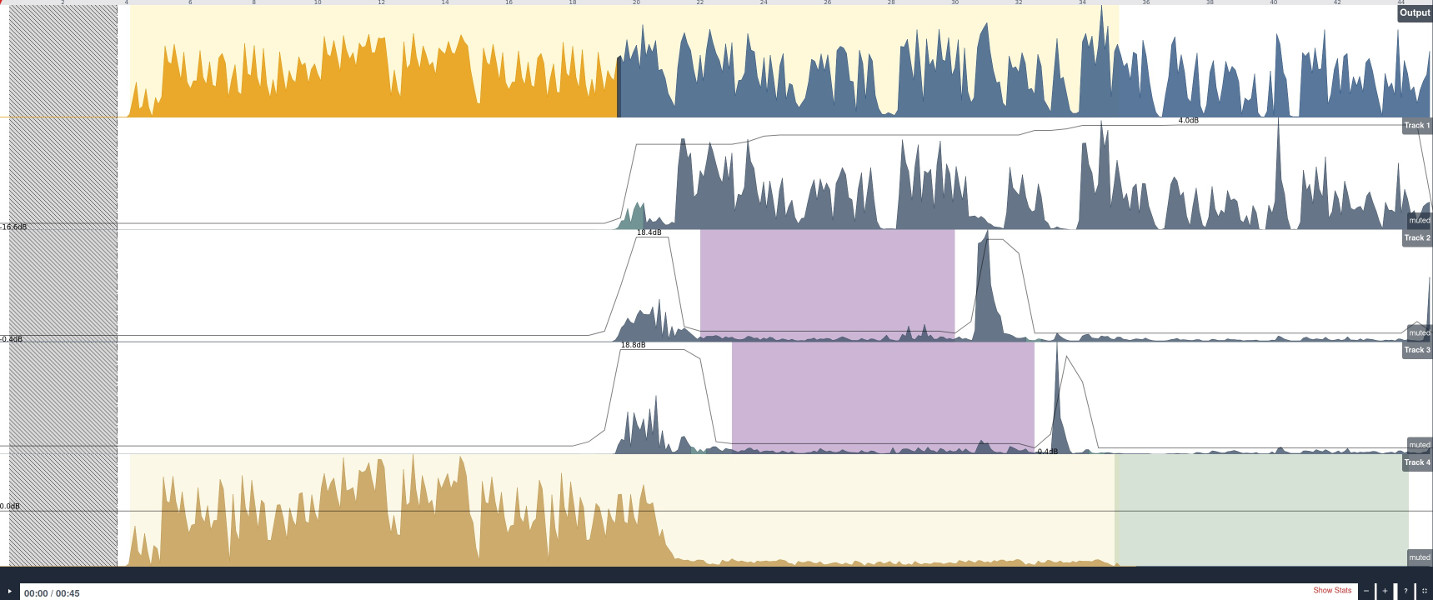 This is how the result of example 02 looks in our Audio Inspector.
Silence Cutting in our Audio Inspector
As you may have seen already in the examples, the cut segments are displayed as checked grey areas in the Audio Inspector. This is how they will be displayed by default.
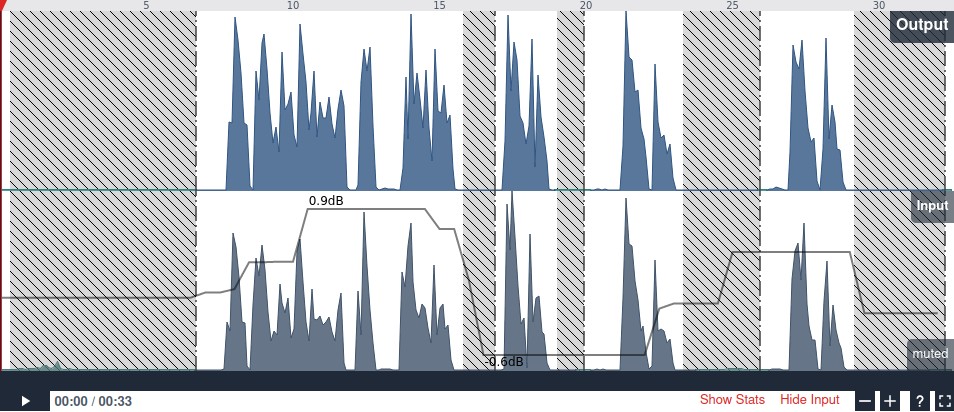 Cut segments are displayed as checked gray areas by default.
During playback, the Audio Inspector will automatically skip these cut segments on the master track and play the silence segments if you activate the input track. This way, you can check each segment that was cut.
It's also possible to hide the cut segments. The following picture shows you how to do that.
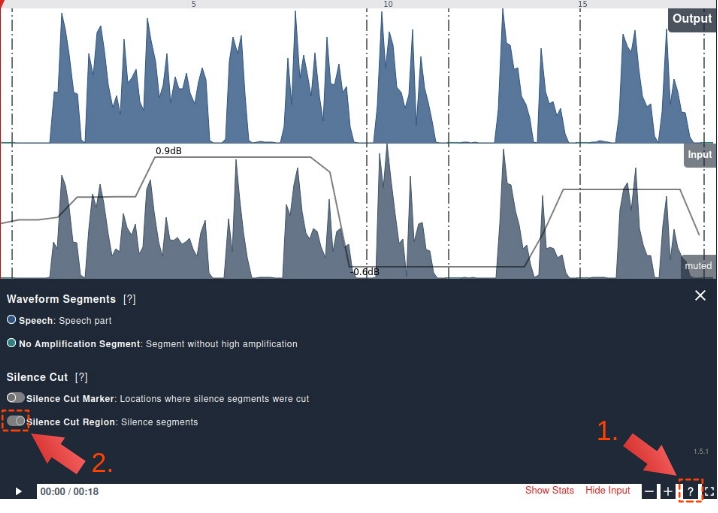 You can also hide cut segments.
First, you must click onto the "?" icon in the bottom right corner to show the Audio Inspector options. Then you must toggle the "Silence Cut Region" switch. After that, the cut regions are not displayed anymore, and also won't be played back on the input track anymore.
If you click onto "Show Stats", you can activate the audio processing statistics. These statistics show you how much of your audio was cut, as well as the resulting track length after the cuts were applied.
 The processing statistics tell you more about how much audio was cut.
Conclusion
With our automatic silence cutting feature, we went one step further towards the perfect audio assistant. Audio editing has been a tedious-but-necessary task for a long time, but with our automatic silence cutting feature, we just made it easier for you!
Feel free to send us your feedback - how do you like our new feature? Also, make sure to follow us, as we will release more automatic cutting algorithms for you in the future!