Multitrack
A multitrack production takes multiple parallel input audio tracks,
processes them individually as well as combined and creates the final mixdown automatically.
Leveling, dynamic range compression, gating, noise and hum reduction, crosstalk removal, ducking and filtering can be applied automatically according to the analysis of each track.
Our Master Audio Algorithms loudness normalization, true peak limiting, and silence cutting are used on the final mixdown.
For more details see Multitrack Post Production Algorithms.
Auphonic Multitrack is built for speech-dominated programs.
All tracks must be opened as separate files and start at the same time:
speech tracks recorded from multiple microphones, music tracks, remote speakers via phone, skype, etc.
Click here to create a new multitrack production in our web system: https://auphonic.com/engine/multitrack/
Note
If you want to process a single (master) mono or stereo audio file, please use a Singletrack Production instead!
Warning
Multitrack is much more complicated to use compared to our
Singletrack Version.
Please read and understand the Multitrack Best Practice
in detail before creating a Multitrack Production!
Audio Algorithms for Individual Tracks
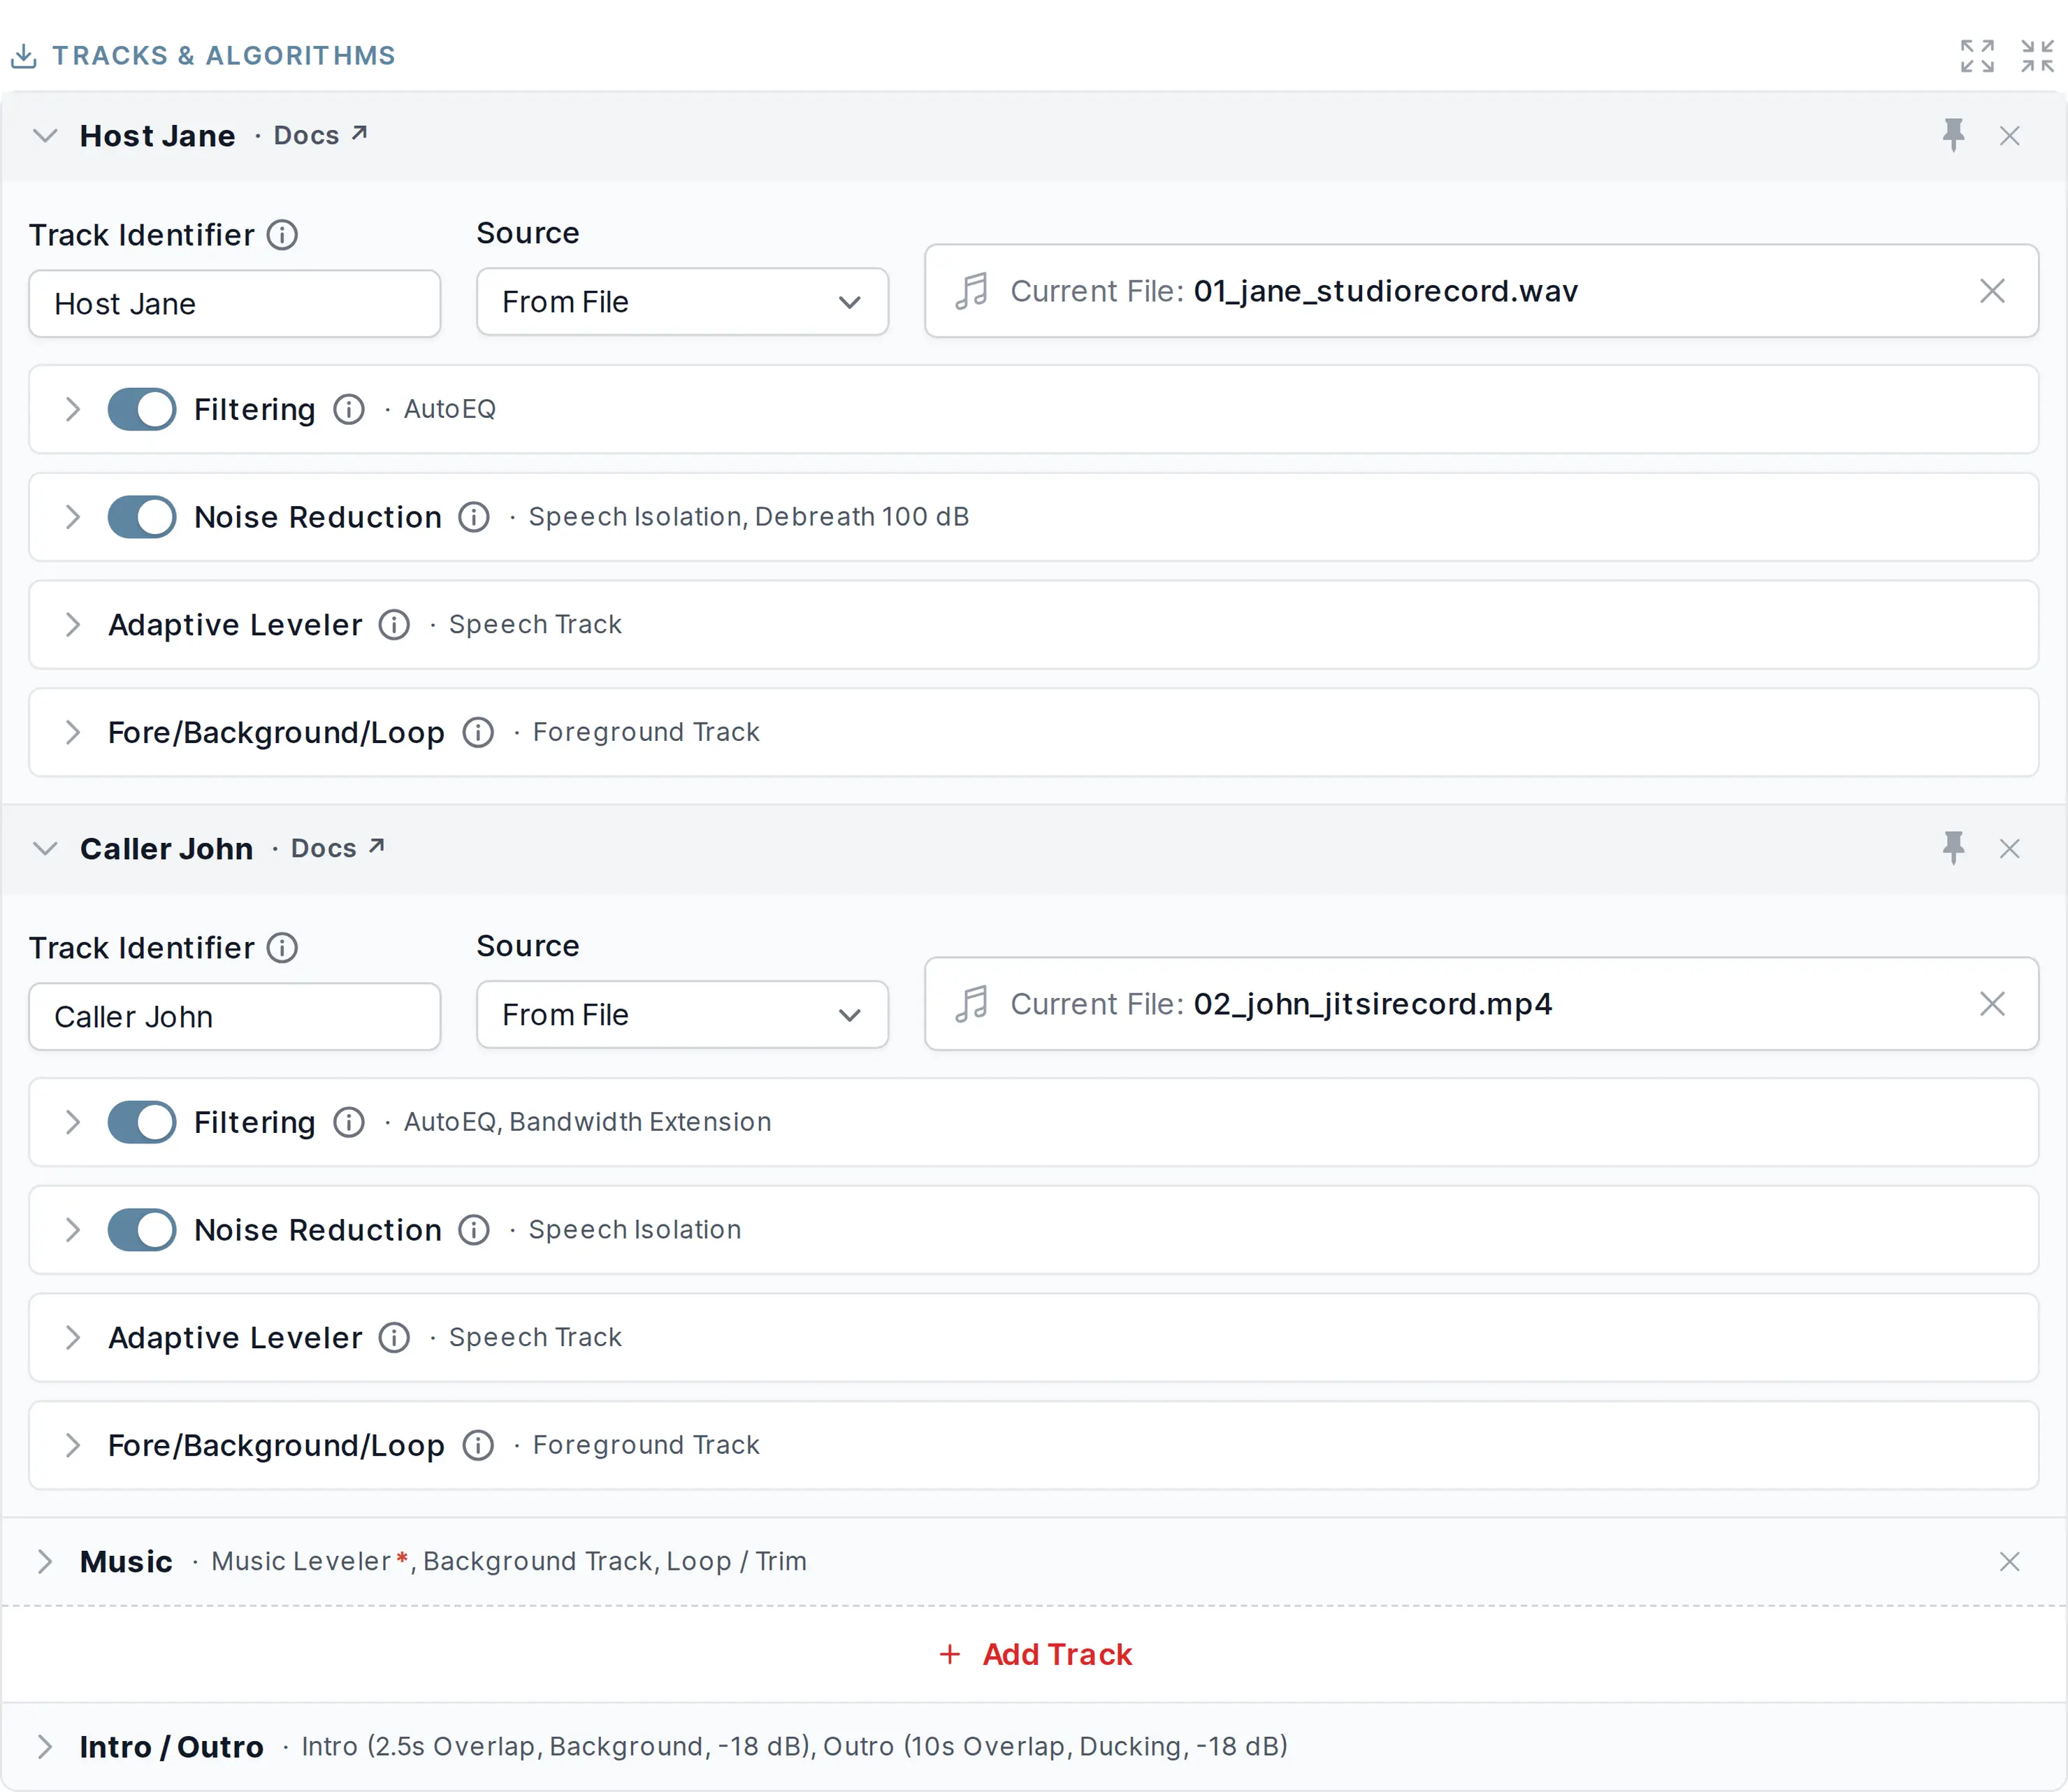
Select one audio source file per track and configure track-specific audio algorithms. See the overview below for a description of all track-specific audio algorithm parameters and an overview for the Master Track algorithms in section Audio Algorithms for Master Track.
For further information about all Multitrack Post Production Algorithms, please click here.
Please activate more settings by clicking the slider icon on the right side of your selected audio algorithms.
You can upload files directly in the browser, use HTTP links or any supported External Services (FTP, Dropbox, S3, Google Drive, SFTP, WedDAV and many more - please register the service first).
Supported filetypes:
MP2, MP3, MP4, M4A, M4B, M4V, WAV, BWF, RF64, OGG, OGA, OPUS, FLAC, ALAC, MPG, MOV, AC3, EAC3, AIF, AIFC, AIFF, AIFFC, AU, GSM, CAF, IRCAM, AAC, MPG, SND, VOC, VORBIS, VOX, WAVPCM, WMA, ASF, ALAW, APE, CAF, MPC, MPC8, MULAW, OMA, RM, TTA, W64, SPX, 3PG, 3G2, 3GPP, 3GP, 3GA, TS, MUS, AVI, DV, FLV, IPOD, MATROSKA, WEBM, MPEG, OGV, VOB, MKV, MK3D, MKA, MKS, QT, MXF.
Please let us know if you need an additional format.
For lossy codecs like MP3, please use a bitrate of 192k or higher!
- Track Identifier
Enter a name for the current audio track. This field is used as the speaker name in Speech Recognition.
Adaptive Filtering Settings

- Filtering Method
Here you can select the desired filtering algorithm for your production:
Adaptive high-pass filtering cuts disturbing low frequencies and interferences, depending on the context. Unnecessary low frequencies are removed adaptively in every audio segment, but the overall sound of the audio is preserved.
For more information, please see Adaptive high-pass filtering.Voice AutoEQ automatically removes sibilance (De-Esser), plosives (De-Plosive) and optimizes the frequency spectrum of a voice recording, to avoid speech that sounds very sharp, muddy, or otherwise unpleasant. The Voice AutoEQ is always applied in combination with the Adaptive high-pass filtering.
For more information, please see Voice AutoEQ.Voice AutoEQ + Bandwidth extension (BWE) recovers lost high frequencies in your archival or low-bitrate speech recordings.
It is specifically optimized for speech and does not enhance music, noise, reverb or other environmental sounds. As the name suggests, Voice AutoEQ is always included when using Voice AutoEQ + Bandwidth extension.
For more information, please see Bandwidth extension.Studio Voice (Beta) is our most powerful voice enhancement model and goes far beyond the other filtering methods. Whereas Voice AutoEQ is essentially dynamic equalization and filtering, Studio Voice reconstructs a clear, studio-quality voice and removes a much wider range of problems: codec and compression artefacts, distorted or clipped voices, and it also performs bandwidth extension to recover missing high frequencies. It even repairs artefacts introduced by other denoising algorithms or by speech-to-text and voice-processing pipelines.
Noise and Reverb Reduction Settings
Removes static and fast-changing noises including reverb from audio files.
For more details, see Noise Reduction Algorithms.
- Reset audio editor changes
Reset all manual segment changes made in the audio editor.
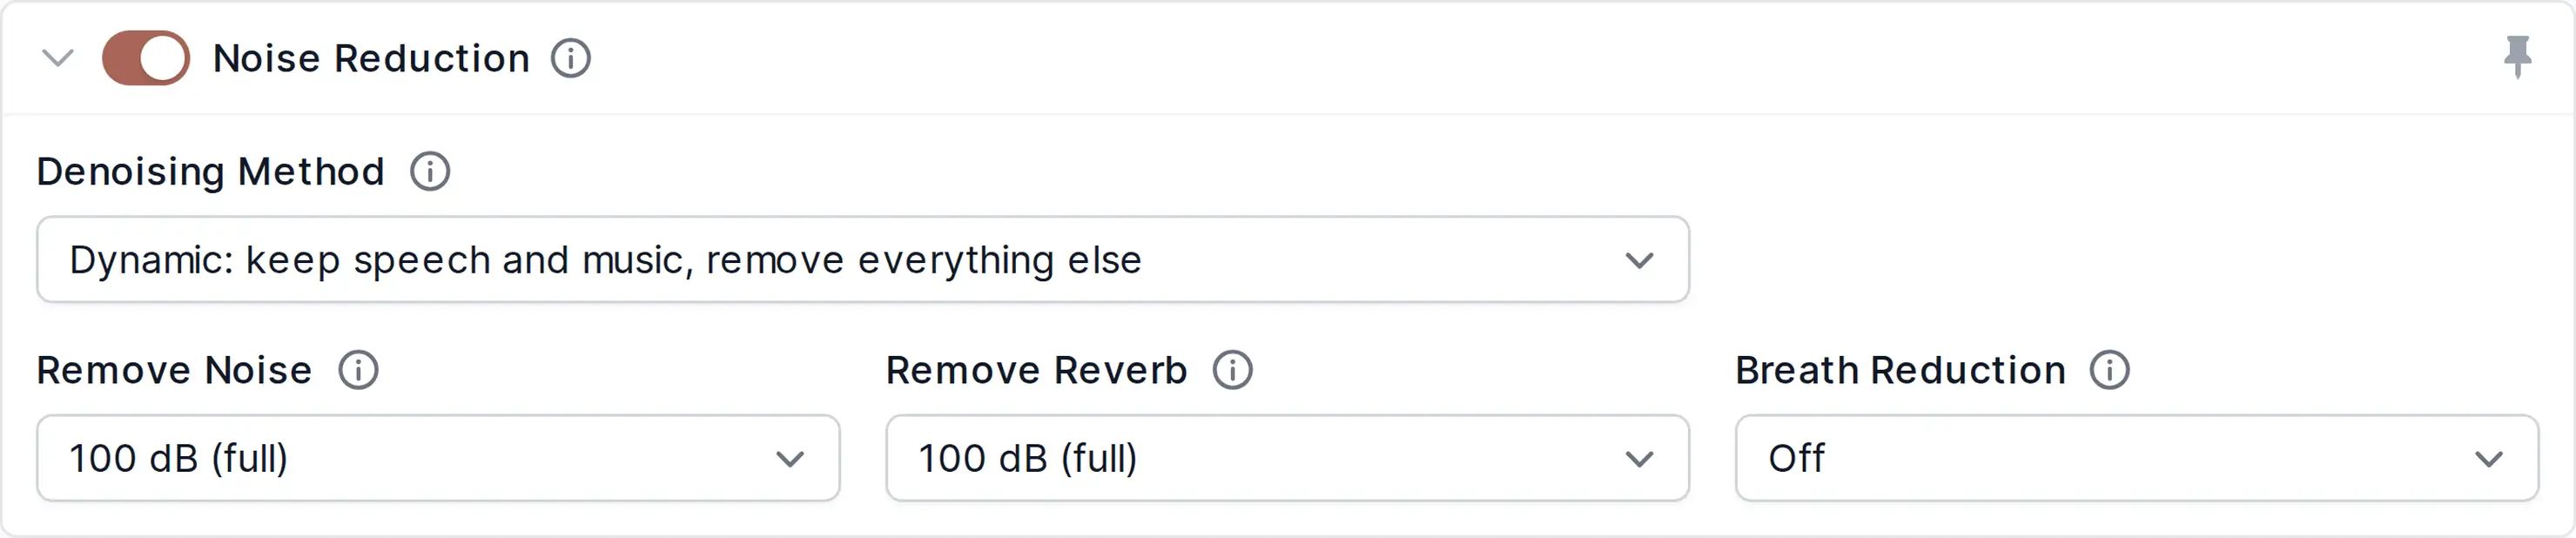
- Denoising Method
Define whether Auphonic should remove only static or also fast-changing noises including reverb or breaths and if we should keep or eliminate music.
The Static Denoiser removes reverb and stationary, technical noises, while our Dynamic Denoiser removes everything but voice and music. Select Speech Isolation if you only want to keep speech, so all noise and even music will be removed. The Classic Denoiser also removes static noise, but it works only if there is a short silent segment, where a noise print can be extracted.
Please listen to the differences between the algorithms in our Noise Reduction Audio Examples and find more details about Noise Reduction here.- Remove Noise
Regardless of which denoising method is selected, you can set the maximum noise reduction amount in dB.
The default value is 100 dB (full) noise reduction. Set to a lower value if you prefer less or no noise reduction.
For Classic Denoiser in Auto mode, a classifier decides if and how much noise reduction is necessary. Be aware, that custom set higher values might result in artifacts or destroy music segments!- Remove Reverb
For Static and Dynamic Denoiser or Speech Isolation, you can remove or reduce reverb caused by large rooms from your recordings. The default value is 100 dB (full) reverb reduction. Set to a custom value if you prefer less or no reverb reduction to keep some ambiance.
- Remove Breaths
If you enable Remove Breaths for Dynamic Denoiser or Speech Isolation, all distracting inhalation and exhalation sounds will be reduced or removed from your recordings. Set higher values to get more breath sound reduction.
- Parameters for Classic Denoising
In addition to the parameter Remove Noise, we offer two more parameters for the Classic Denoiser to control the combination of our Classic Noise and Hum Reduction algorithms.
Behavior of our Noise and Hum Reduction parameter combinations:Remove Noise
Hum Base Frequency
Hum Reduction Amount
Auto
Auto
Auto
Automatic hum and noise reduction
Auto or > 0
Disabled
No hum reduction, only denoise
Off
50Hz
Auto or > 0
Force 50Hz hum reduction, no denoise
Off
Auto
Auto or > 0
Automatic dehum, no denoise
12dB
60Hz
Auto or > 0
Always do dehum (60Hz) and denoise (12dB)
Hum Reduction Base Frequency
For Classic Denoising, set the hum base frequency to 50Hz or 60Hz (if you know it), or use Auto to automatically detect the hum base frequency in each speech region.Hum Reduction Amount
For Classic Denoising, set the maximum hum reduction in dB. Higher values remove more hum but carry the risk of worsening.
In Auto mode, a classifier decides how much hum reduction is necessary for each speech region.
Set it to a custom value (> 0), if you prefer more hum reduction or want to bypass our classifier.
Use Disable Dehum to disable hum reduction and use our noise reduction algorithms only.
Adaptive Leveler Track Settings

More parameters for our Multitrack Leveler to customize which parts of every single audio track should be leveled, how much they should be leveled, and how much dynamic range compression should be applied.
It’s also possible to set the stereo panorama (balance) of each track.
- Leveler Strength
The Leveler Strength controls how much leveling is applied: 100% means full leveling, 0% means no leveling at all. Changing the Leveler Strength increases/decreases the dynamic range of this track.
For example, if you want to increase the dynamic range of this track by 3dB compared to 100% leveling, just set the Leveler Strength parameter to 70% (~3dB).
We also like to call this concept Loudness Comfort Zone: above a maximum and below a minimum level (the comfort zone), no leveling is applied; the higher the Leveler Strength, the smaller the comfort zone (more leveling necessary). So if your track input file already has a small dynamic range (is within the comfort zone), our leveler will be just bypassed.Example Use Case:
Lower Leveler Strength values should be used if you want to keep more loudness differences in dynamic narration or dynamic music recordings (live concert/classical).- Compressor
Select a preset value for micro-dynamics compression:
A compressor reduces the volume of short and loud spikes like the pronunciation of “p” and “t” or laughter (short-term dynamics) and also shapes the sound of your voice (making the sound more or less “processed” or “punchy”).Possible values are:
Auto: The compressor setting depends on the selected Leveler Strength. Medium compression is used for strength values <= 100%, Hard compression for strength values > 100% (Fast Leveler and Amplify Everything).
Soft: Uses less compression.
Medium: Our default setting.
Hard: More compression, especially tries to compress short and extreme level overshoots. Use this preset if you want your voice to sound very processed, our if you have extreme and fast-changing level differences.
Off: No short-term dynamics compression is used at all, only mid-term leveling. Switch off the compressor if you just want to adjust the loudness range without any additional micro-dynamics compression.
- MusicSpeech Classifier Setting
Select between the Speech Track and Music Track Adaptive Leveler. If set to On, a classifier will decide if this is a music or speech track.
- Stereo Panorama (Balance)
Change the stereo panorama (balance for stereo input files) of the current track.
Possible values: L100, L75, …. Center, … R75 and R100. (from 100% left to 100% right)
Fore/Background/Loop Settings
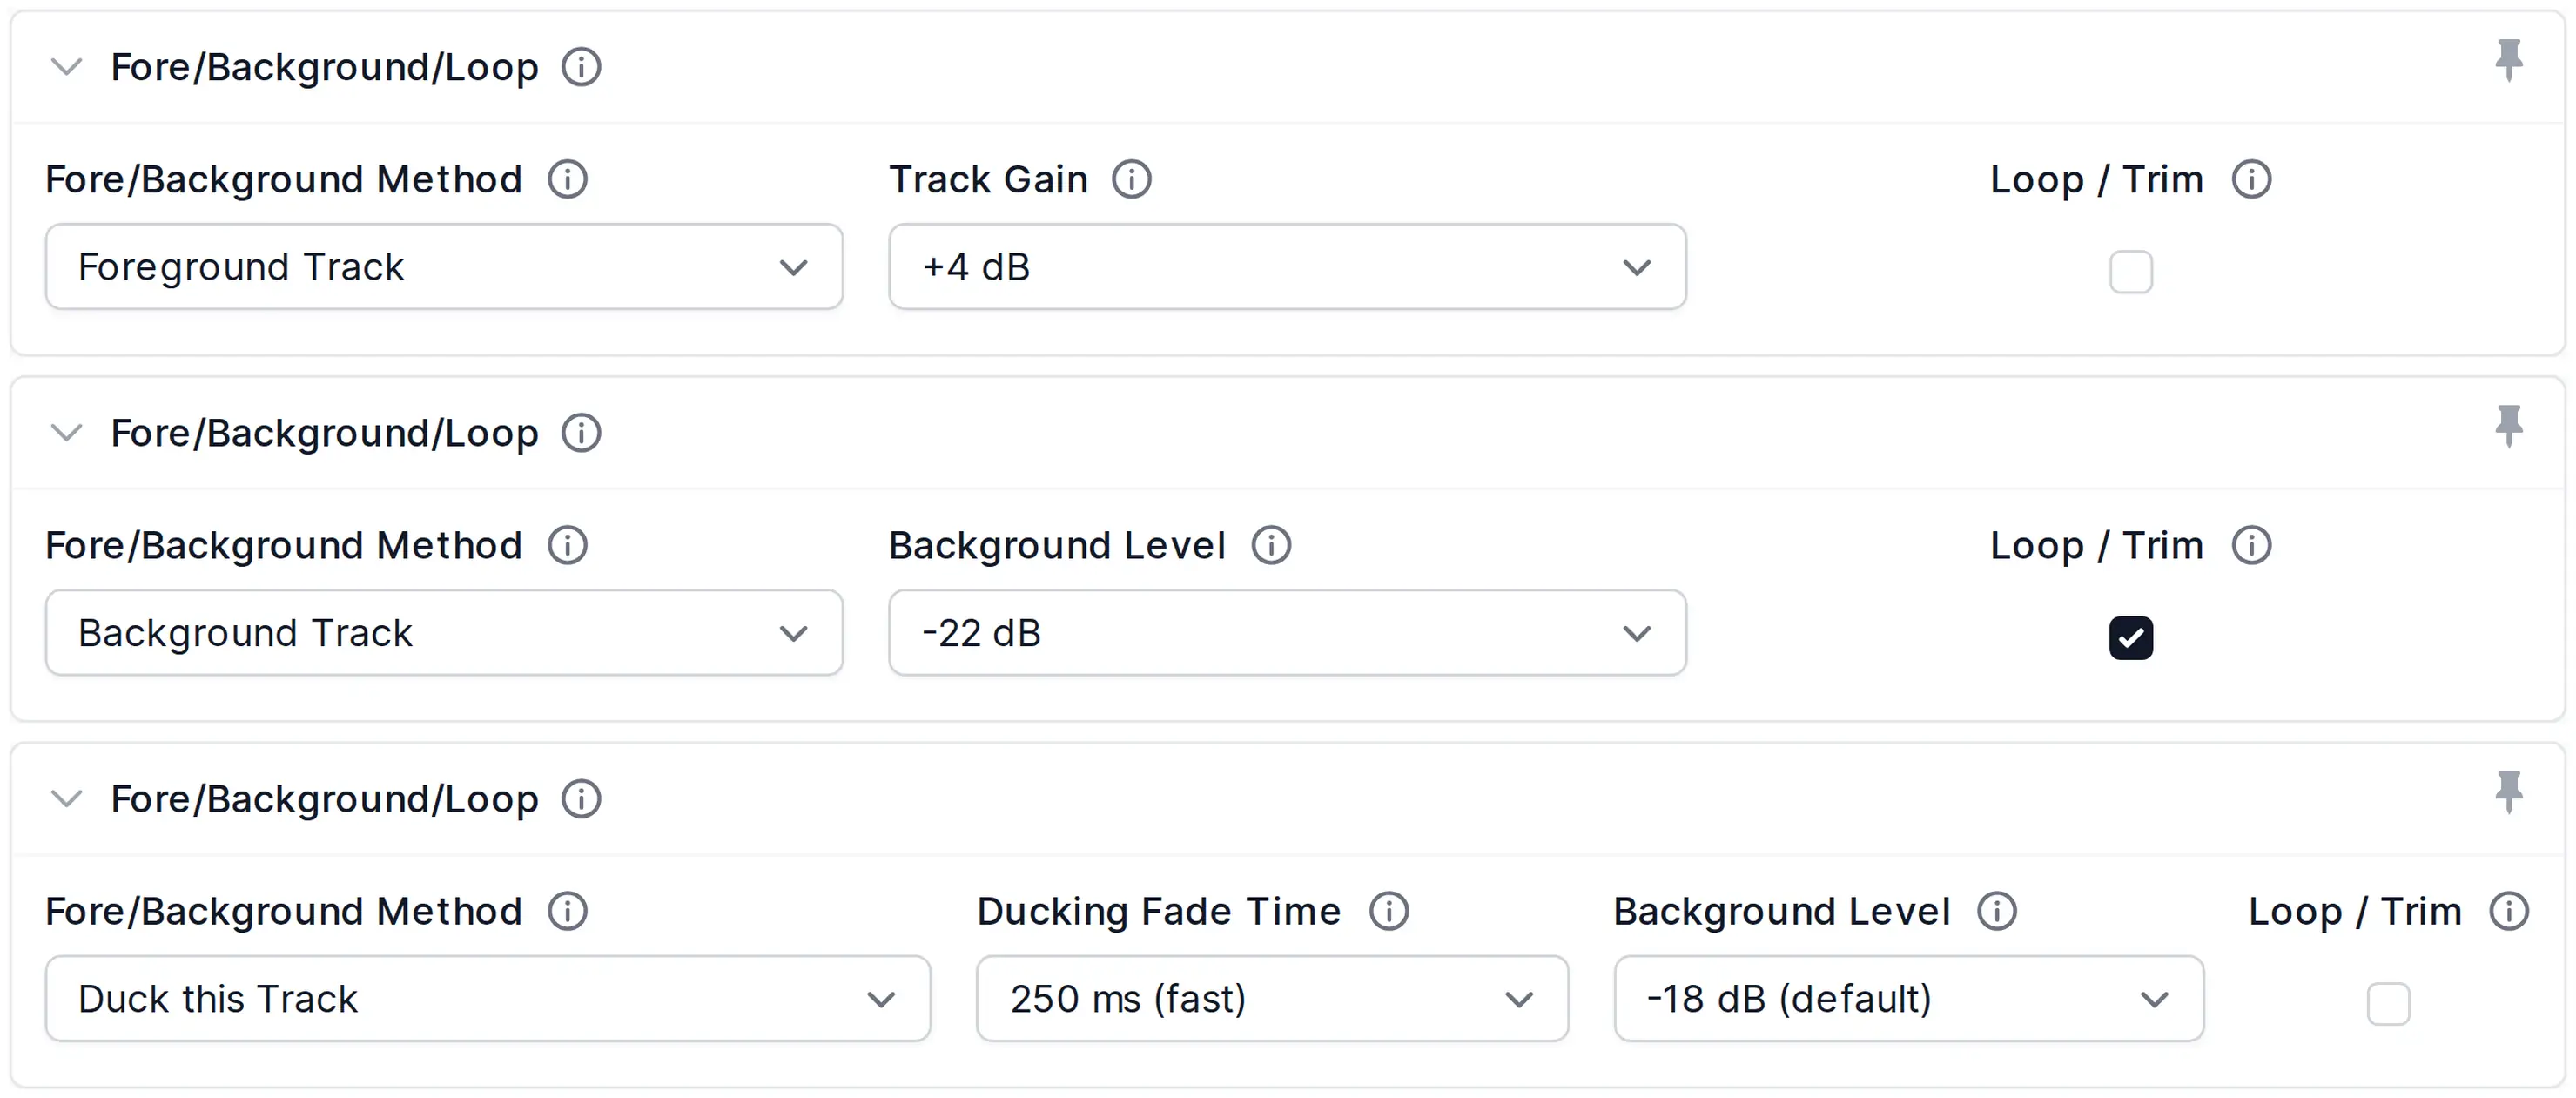
The parameter Fore/Background controls whether a track should be in foreground, in background, ducked, or unchanged.
Ducking automatically reduces the level of a track if speakers in other tracks are active. This is useful for intros/outros, translated speech, or for music, which should be softer if someone is speaking.
For more details, please see Foreground/Background/Loop Settings and Automatic Ducking.
- Track Gain
Increase/decrease the loudness of this track compared to other tracks.
This can be used to add gain to a music or a specific speech track, making it louder/softer compared to other tracks.- Level of Background Segments
Set the level of background segments/tracks (compared to foreground segments) in background and ducking tracks.
By default, background and ducking segments are 18dB softer than foreground segments.- Ducking Fade Time
Set fade down/up length (attack/release) for ducking segments in ms.
The default value is 500ms.- Loop / Trim
Automatically loops (lengthens) or trims (shortens) this track to match the length of the longest track that does not have Loop/Trim enabled.
Use this, for example, to loop a background music track so it covers the entire length of your speech tracks, or to trim an overly long ambience track to fit the production.
If every track has Loop/Trim enabled, the longest track is used as the reference and all shorter tracks are looped to match its length.
For more details, please see Loop/Trim Track.
Intro and Outro
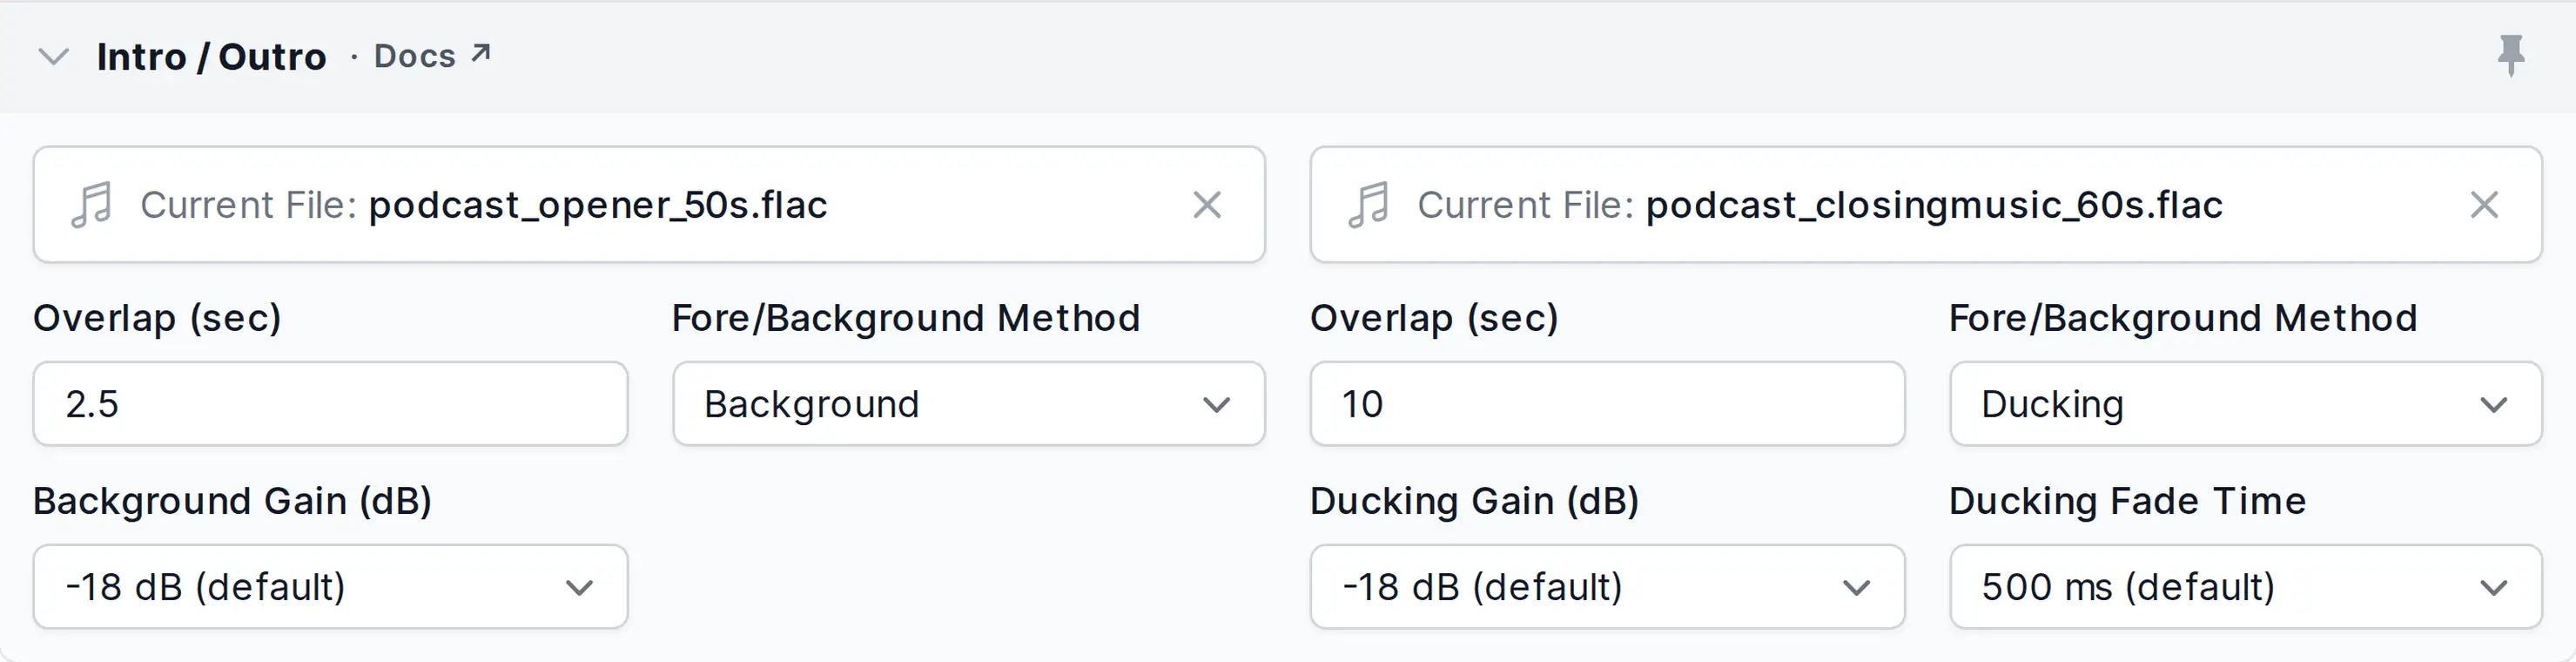
Automatically add an Intro/Outro to your production. Audio and video files are supported, with video files being limited to a length of 1 minute.
As intros/outros are intended to be used multiple times, they are only Loudness Normalized to match the loudness of your production without further Auphonic processing (no leveling, filtering, noise reduction, etc.). Therefore you should edit/process your intro/outro before.
For a detailed description of our intro/outro feature, please see the blog post Automatic Intros and Outros in Auphonic.
- Select Intro File
Select your intro audio from a local file (in productions only), HTTP or an External Service (Dropbox, SFTP, S3, Google Drive, SoundCloud, etc. - please register the service first).
NOTE:
We store audio files only for a limited number of days, therefore you have to use intro/outro files in presets from HTTP or an External Service. In productions, you can upload intro/outro files directly.- Intro Overlap
Set overlap time in seconds of intro end with main audio file start, for details see Overlapping Intros/Outros.
For overlapping intros, set Fore/Background Method to Background or Ducking so the intro is mixed under the main audio instead of overlapping at full volume.- Fore/Background Method
How this intro/outro is mixed against the main audio.
Foreground (default): play at same level as main audio. Use this when you insert a fade yourself.
Background: mix the whole intro/outro at a reduced level (see Background Gain).
Ducking: automatically lower the level while speakers in the main audio are active.- Background Gain (dB) / Ducking Gain (dB)
Level (in dB) at which this intro/outro is mixed against the main audio when Fore/Background Method is Background or Ducking. The default is -18 dB.
- Ducking Fade Time
Set fade down/up length (attack/release) for ducking segments in ms. The default value is 500ms.
- Select Outro File
Select your outro audio from a local file, HTTP or an External Service
(Dropbox, SFTP, S3, Google Drive, SoundCloud, etc. - please register the service first).- Outro Overlap
Set overlap time in seconds of outro start with main audio file end, for details see Overlapping Intros/Outros.
For overlapping outros, set Fore/Background Method to Background or Ducking so the outro is mixed under the main audio instead of overlapping at full volume.
Basic Metadata

Basic metadata for your production.
Metadata tags and cover images from input files will be imported automatically in empty fields!
We correctly map metadata to multiple Output Files.
For details see the following blog posts: ID3 Tags Metadata (used in MP3 output files), Vorbis Comment Metadata (used in FLAC, Opus and Ogg Vorbis output files) and MPEG-4 iTunes-style Metadata (used in AAC, M4A/M4B/MP4 and ALAC output files).
Metadata fields can make use of Variables and Placeholders.
- Cover Image
Add a cover image or leave empty to import the cover image from your input file.
If a Video Output File or YouTube export is selected, Auphonic generates a video with cover/chapter image(s) automatically!
Extended Metadata
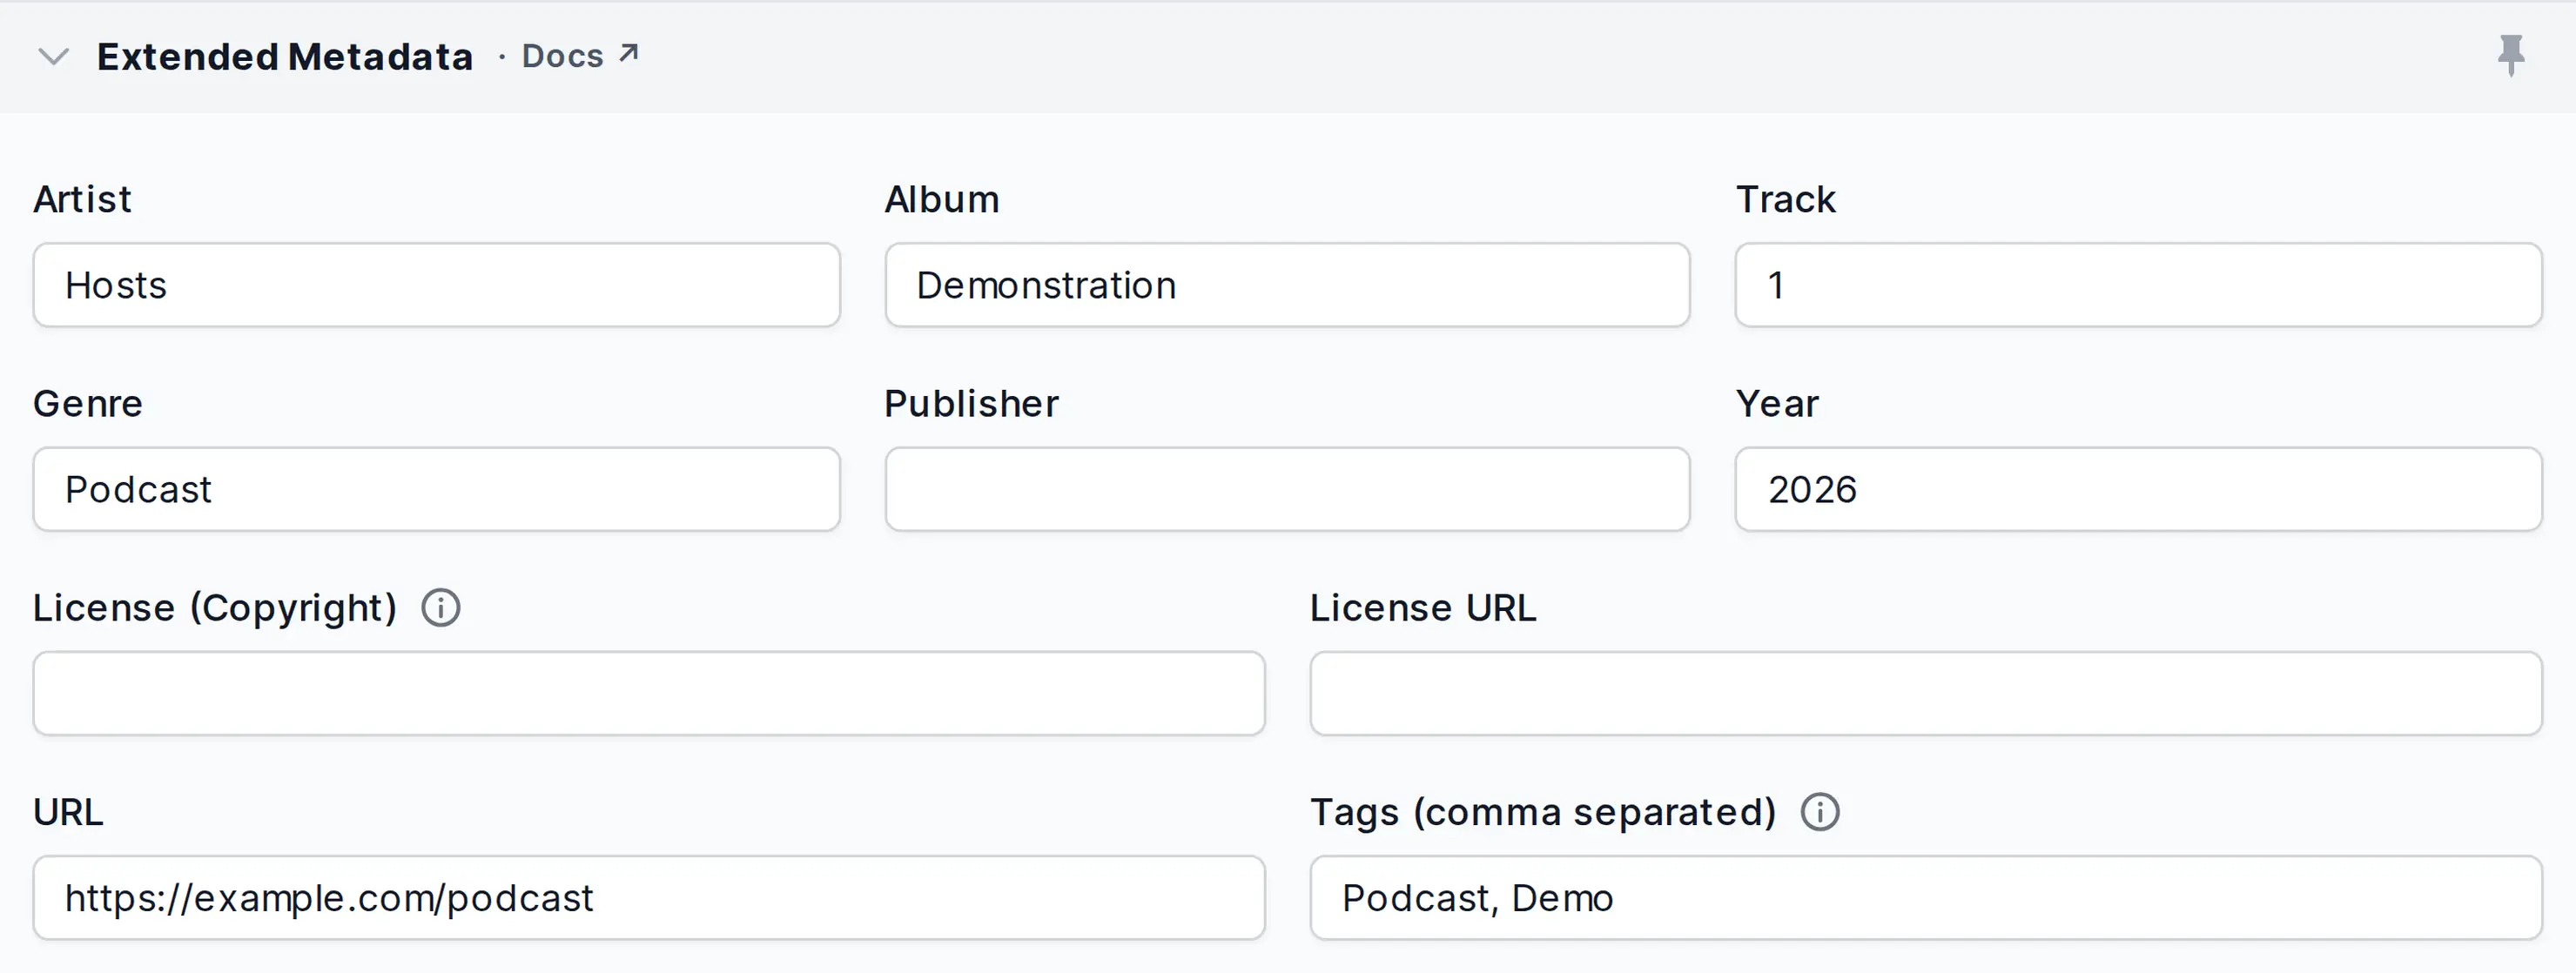
Extended metadata (subtitle, summary, genre, etc.) for your production.
Metadata tags from input files will be imported automatically in empty fields!
We correctly map metadata to multiple Output Files.
For details see the following blog posts: ID3 Tags Metadata (used in MP3 output files), Vorbis Comment Metadata (used in FLAC, Opus and Ogg Vorbis output files) and MPEG-4 iTunes-style Metadata (used in AAC, M4A/M4B/MP4 and ALAC output files).
Metadata fields can make use of Variables and Placeholders.
- Subtitle
A subtitle for your production, must not be longer than 255 characters!
- Summary / Description
Here you can write an extended summary or description of your content.
- Append Chapter Marks to Summary
Append possible Chapter Marks with time codes and URLs to your Summary.
This might be useful for audio players which don’t support chapters!- Create a Creative Commons License
Link to create your license at creativecommons.org.
Copy the license and its URL into the metadata fields License (Copyright) and License URL!- Tags, Keywords
Tags must be separated by comma signs!
Chapter Marks
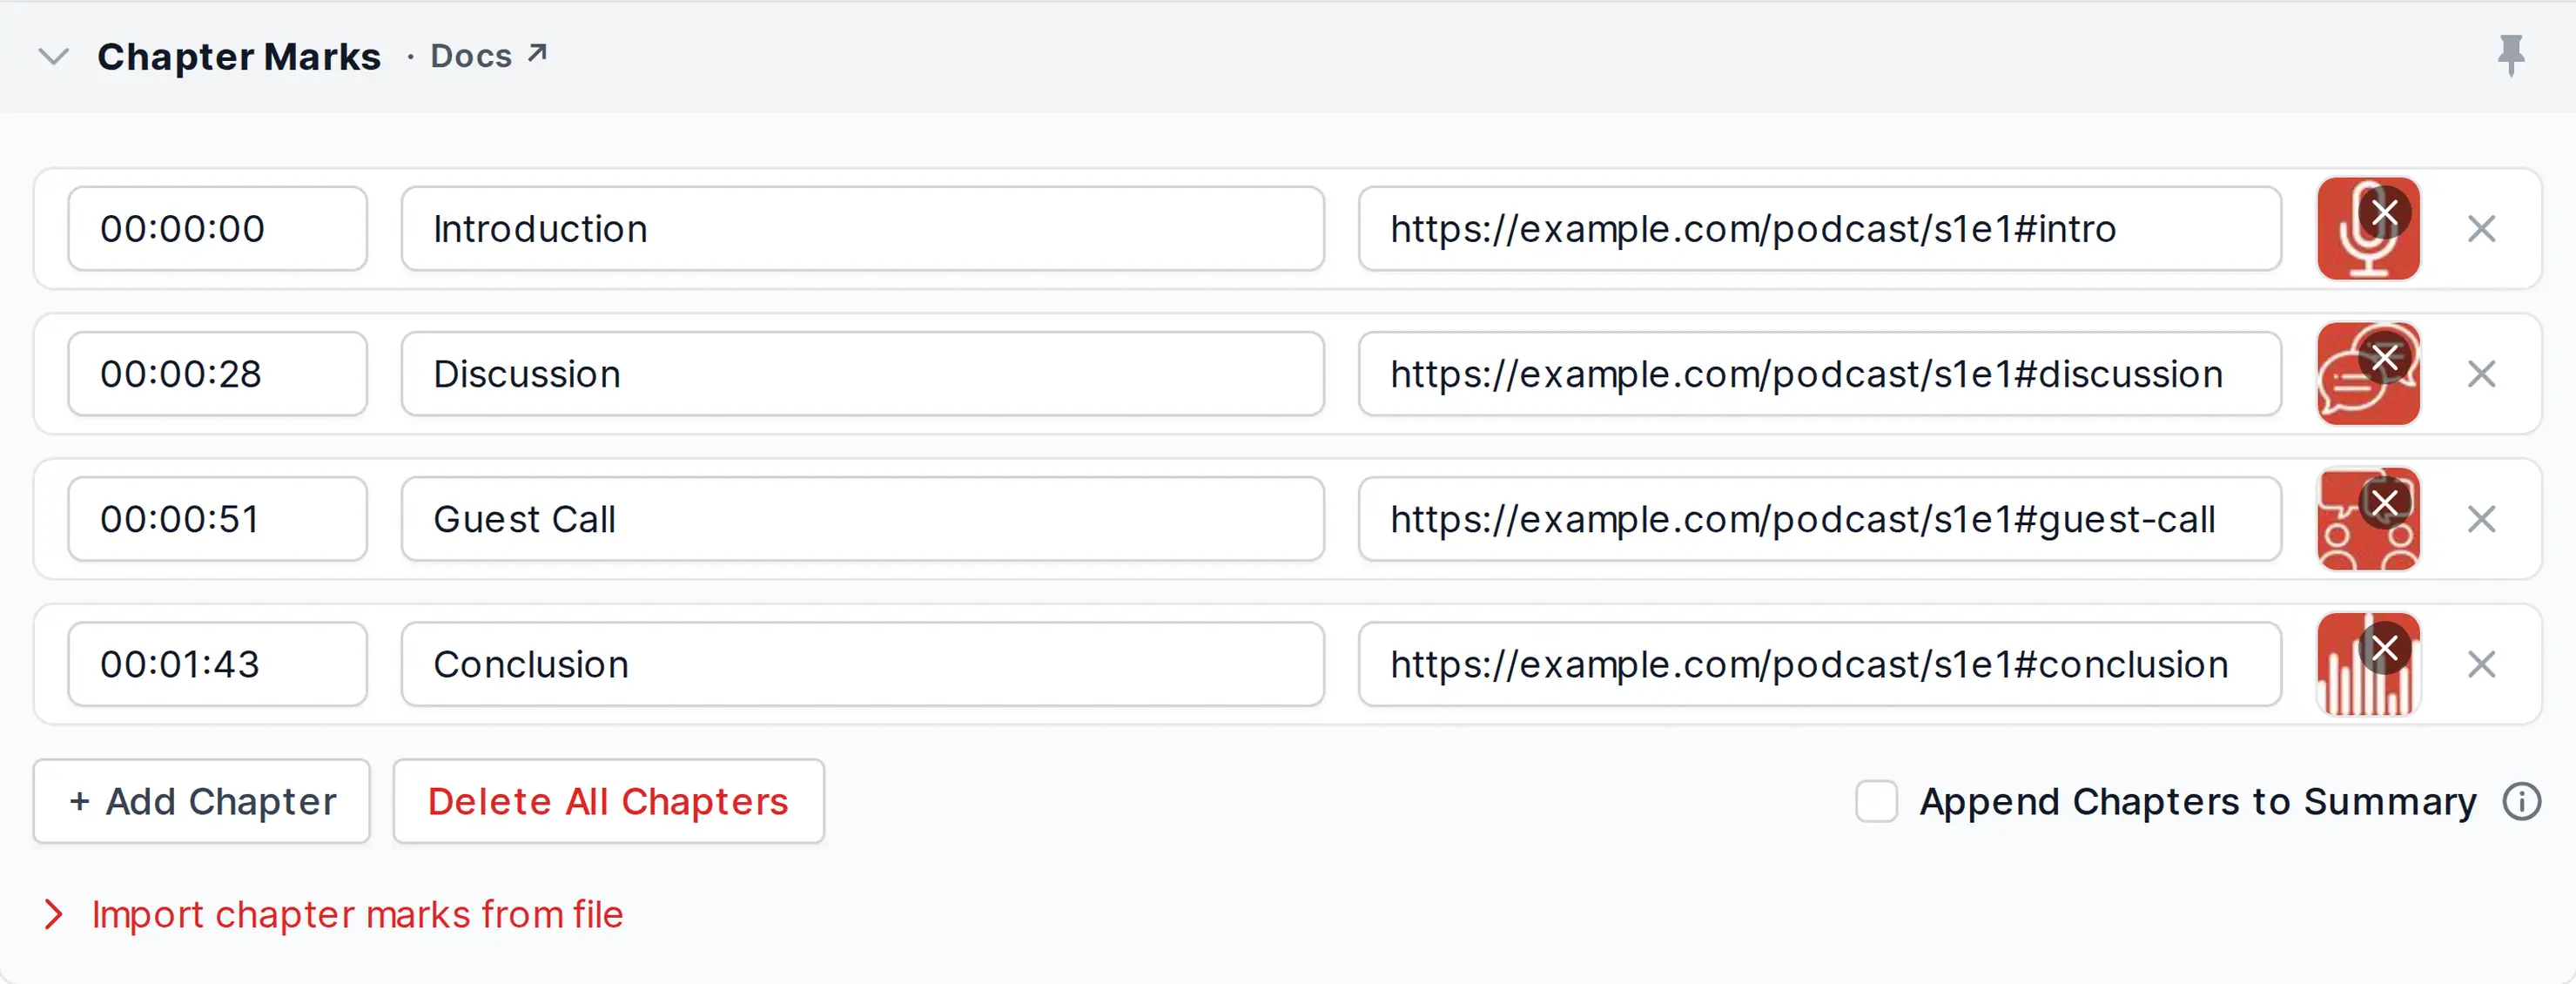
Chapter marks, also called Enhanced Podcasts, can be used for quick navigation within audio files. One chapter might contain a title, an additional URL and a chapter image.
Chapters are written to all supported output file formats (MP3, AAC/M4A, Opus, Ogg, FLAC, ALAC, etc.) and exported to Soundcloud, YouTube and Spreaker. If a video Output File or YouTube export is selected, Auphonic generates a video with chapter images automatically.
For more information about chapters and which players support them, please see Chapter Marks for MP3, MP4 Audio and Vorbis Comment (Enhanced Podcasts).
Chapter marks can be entered directly in our web interface or we automatically Import Chapter Marks from your input audio file.
It’s also possible to import a simple Text File Format with Chapters, upload markers from various audio editors (Audacity Labels, Reaper Markers, Adobe Audition Session, Hindenburg, Ultraschall, etc.), or use our API for Adding Chapter Marks programmatically.
For details, please see How to Import Chapter Marks in Auphonic.
- Chapter Start Time
Enter chapter start time in hh:mm:ss.mmm format (examples: 00:02:35.500, 1:30, 3:25.5).
NOTE: You don’t have to add the length of an optional Intro File here!- Chapter Title
Optional title of the current chapter.
Audio players show chapter titles for quick navigation in audio files.- Chapter URL
Enter an (optional) URL with further information about the current chapter.
- Chapter Image
Upload an (optional) image with visual information, e.g. slides or photos.
The image will be shown in podcast players while listening to the current chapter, or exported to video Output Files.- Import Chapter Marks from File
Select a Text File Format with a timepoint (hh:mm:ss[.mmm]) and a chapter title in each line or Import Chapter Marks from Audio Editors.
NOTE: We automatically import chapter marks form your input audio file!
Output Files
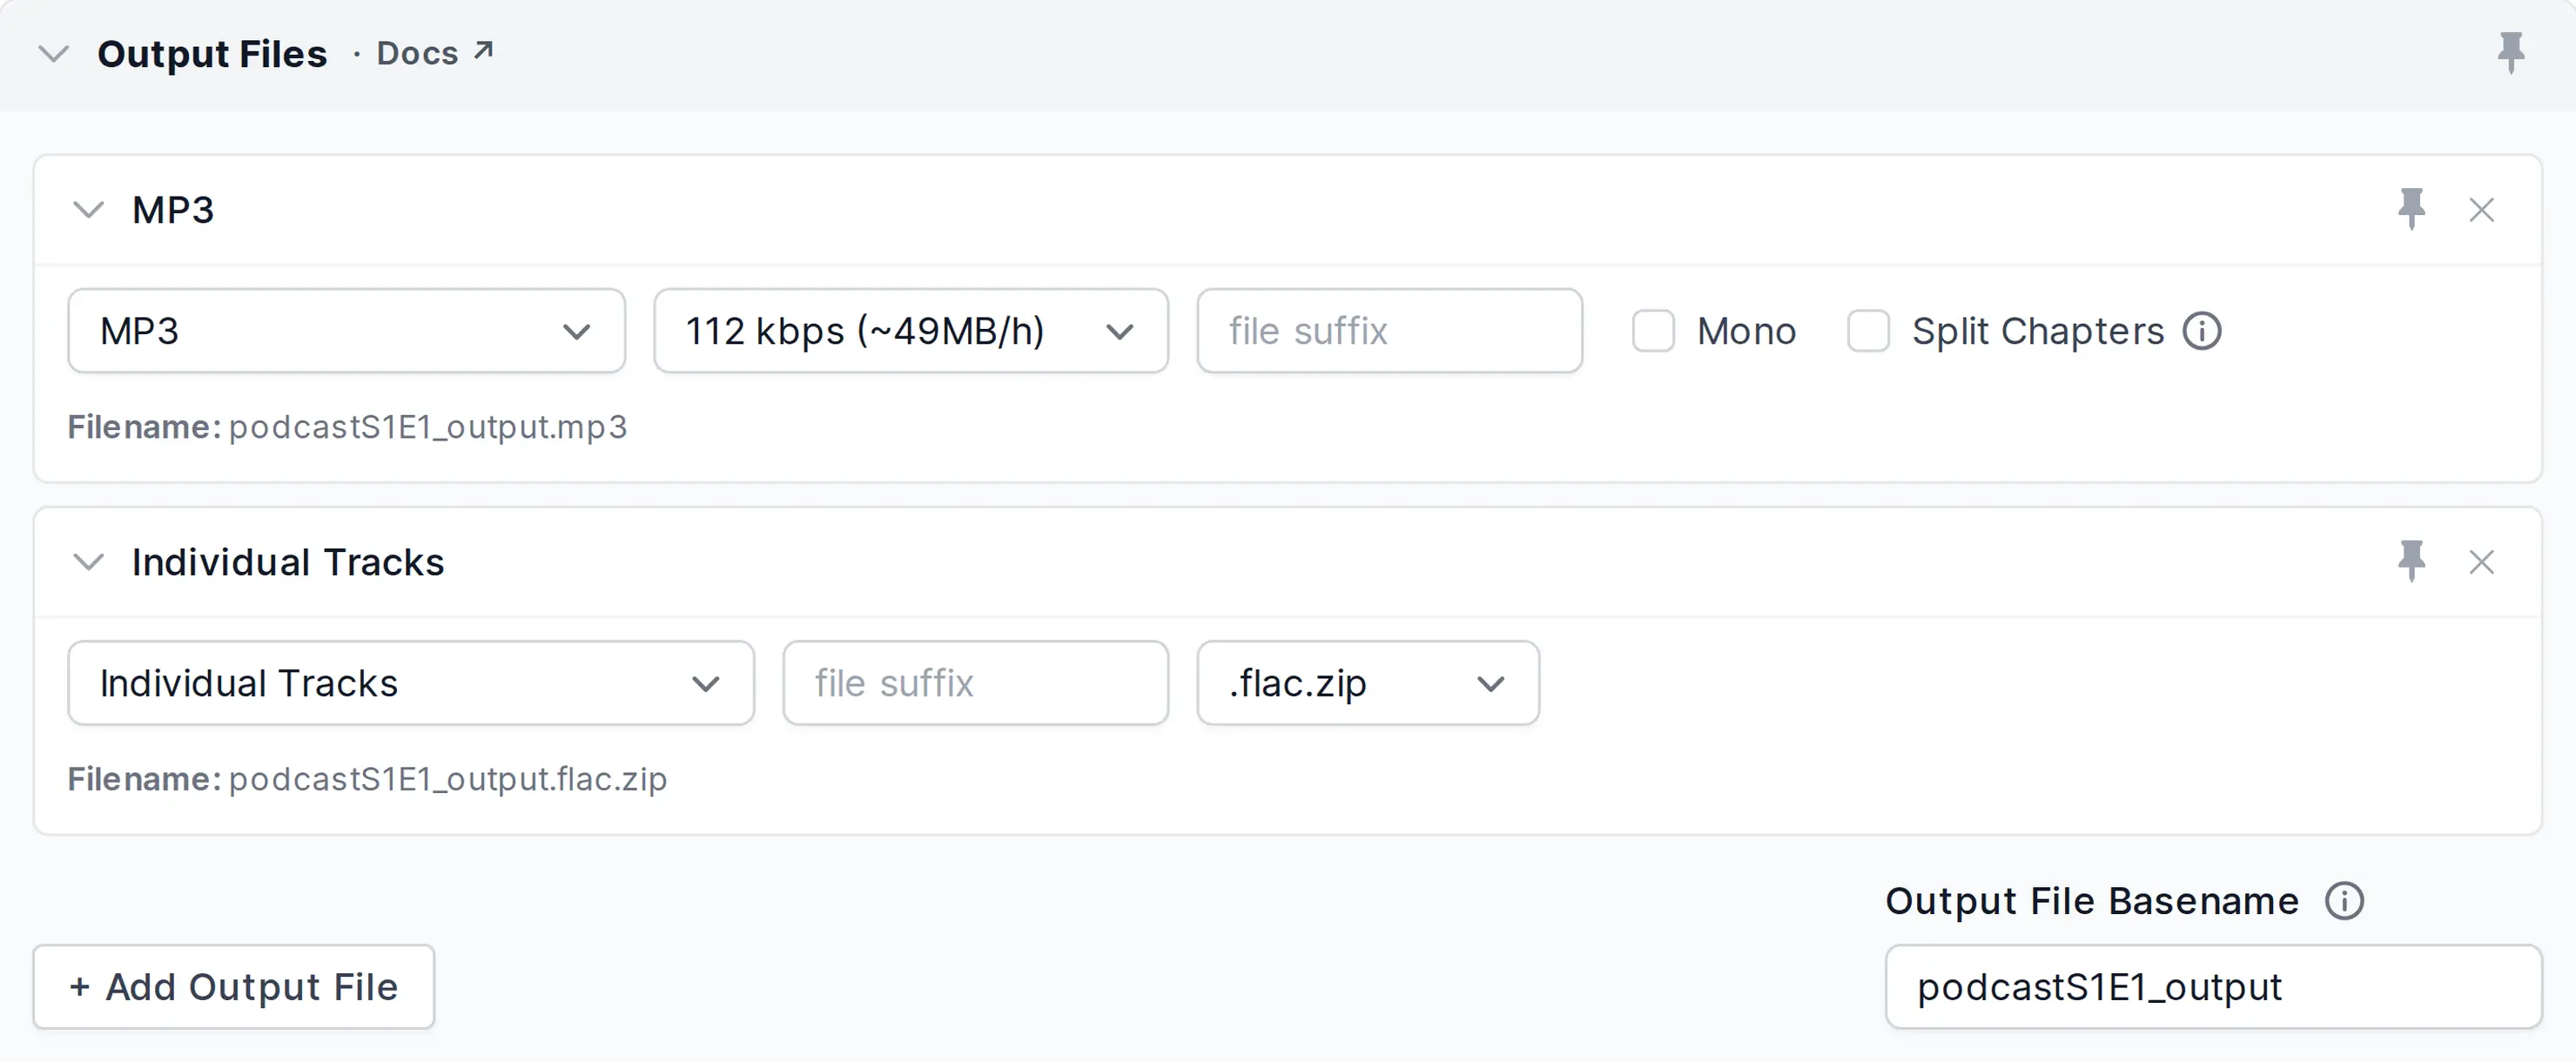
Add one or multiple output file formats (MP3, MP4, Ogg, WAV, Video, …) with bitrate, channel and filename settings to a production (see Audio File Formats and Bitrates for Podcasts). All Metadata Fields and Chapter Markers will be mapped to multiple output files. See below for a list of other, specialized output formats.
With Auphonic you can process video input files as well, or automatically generate a video output file from input audio using Cover and Chapter images - for details see Video Input and Output.
Export individual processed tracks:
To export the processed version of each individual track for further editing, click Add Output File and select Individual Tracks in the Output Files section. Once your multitrack production is done, you will find a downloadable .zip archive file containing the processed version of each individual track in .wav or .flac audio format, along with all the production result files.
Supported audio output file formats:
MP3: see MP3 Details and bitrate suggestions
MP3 Variable Bitrate: see Lossy Audio Formats
AAC (M4A, MP4, M4B): see AAC Details and bitrate suggestions
Opus: see Opus Details and bitrate suggestions
Ogg Vorbis: see Lossy Audio Formats
FLAC: see FLAC Details and bitrate suggestions
ALAC (M4A, MP4): see Lossless Audio Formats
WAV 16-bit PCM: see Uncompressed Audio Formats
WAV 24-bit PCM: see Uncompressed Audio Formats
Other output file formats:
Video: Video Output for a video input file (we process the audio track only) or for an audio input file (we generate a video from your Cover and Chapter images)
Audiogram (Waveform Video): generates a Shareable Audiogram Video from your input audio, including a dynamically generated waveform and your Cover Image (or possible Chapter Images) as background
Individual Tracks: exports all individual, processed tracks of a Multitrack Production as separate files in WAV or FLAC format
Unprocessed Input File: original (unprocessed) audio/video Input File
Chapters File: chapter marks in MP4chaps Text Format
Podlove Simple Chapters: chapter marks in Podlove Simple Chapter format (XML or JSON)
Podcasting 2.0 Chapters: chapter marks in Podcasting 2.0 Chapters format (JSON)
Cover Image: a copy of the Cover Image in full resolution
Production Description: complete Description Of Your Production with all metadata, audio processing statistics, etc. (in JSON, XML or YAML)
Audio Processing Statistics: loudness stats, music/speech, speaker activity, etc. in TXT, JSON or YAML format - see Audio Statistics
Transcript: human-readable HTML Transcript from Speech Recognition results
Speech Data: machine-readable JSON or XML Data File with Speech Recognition results
Subtitles: Subtitles/Captions File in WebVTT or SRT format with Speech Recognition results
Cut List (Filler and Silence): export Filler Cuts and Silence Cuts as Cut Lists in Audacity, Adobe Audition, Reaper or EDL format
- Output File Basename
Set basename (without extension) for all output files or leave it empty to take the original basename of your input file.
- Output File Format
For an overview of audio formats see Output Files.
- Audio Bitrate (all channels)
Set combined bitrate of all channels of your audio output file.
For details see Audio File Formats and Bitrates for Podcasts.- Filename Suffix (optional)
Suffix for filename generation of the current output file, leave empty for automatic suffix!
- Filename Ending, Extension
Filename extension of the current output file.
- Mono Mixdown
Click here to force a mono mixdown of the current output file.
- Split on Chapters
If you have Chapter Marks, this option will split your audio in one file per chapter.
All filenames will be appended with the chapter number and packed into one ZIP output file.
Burn in Subtitles
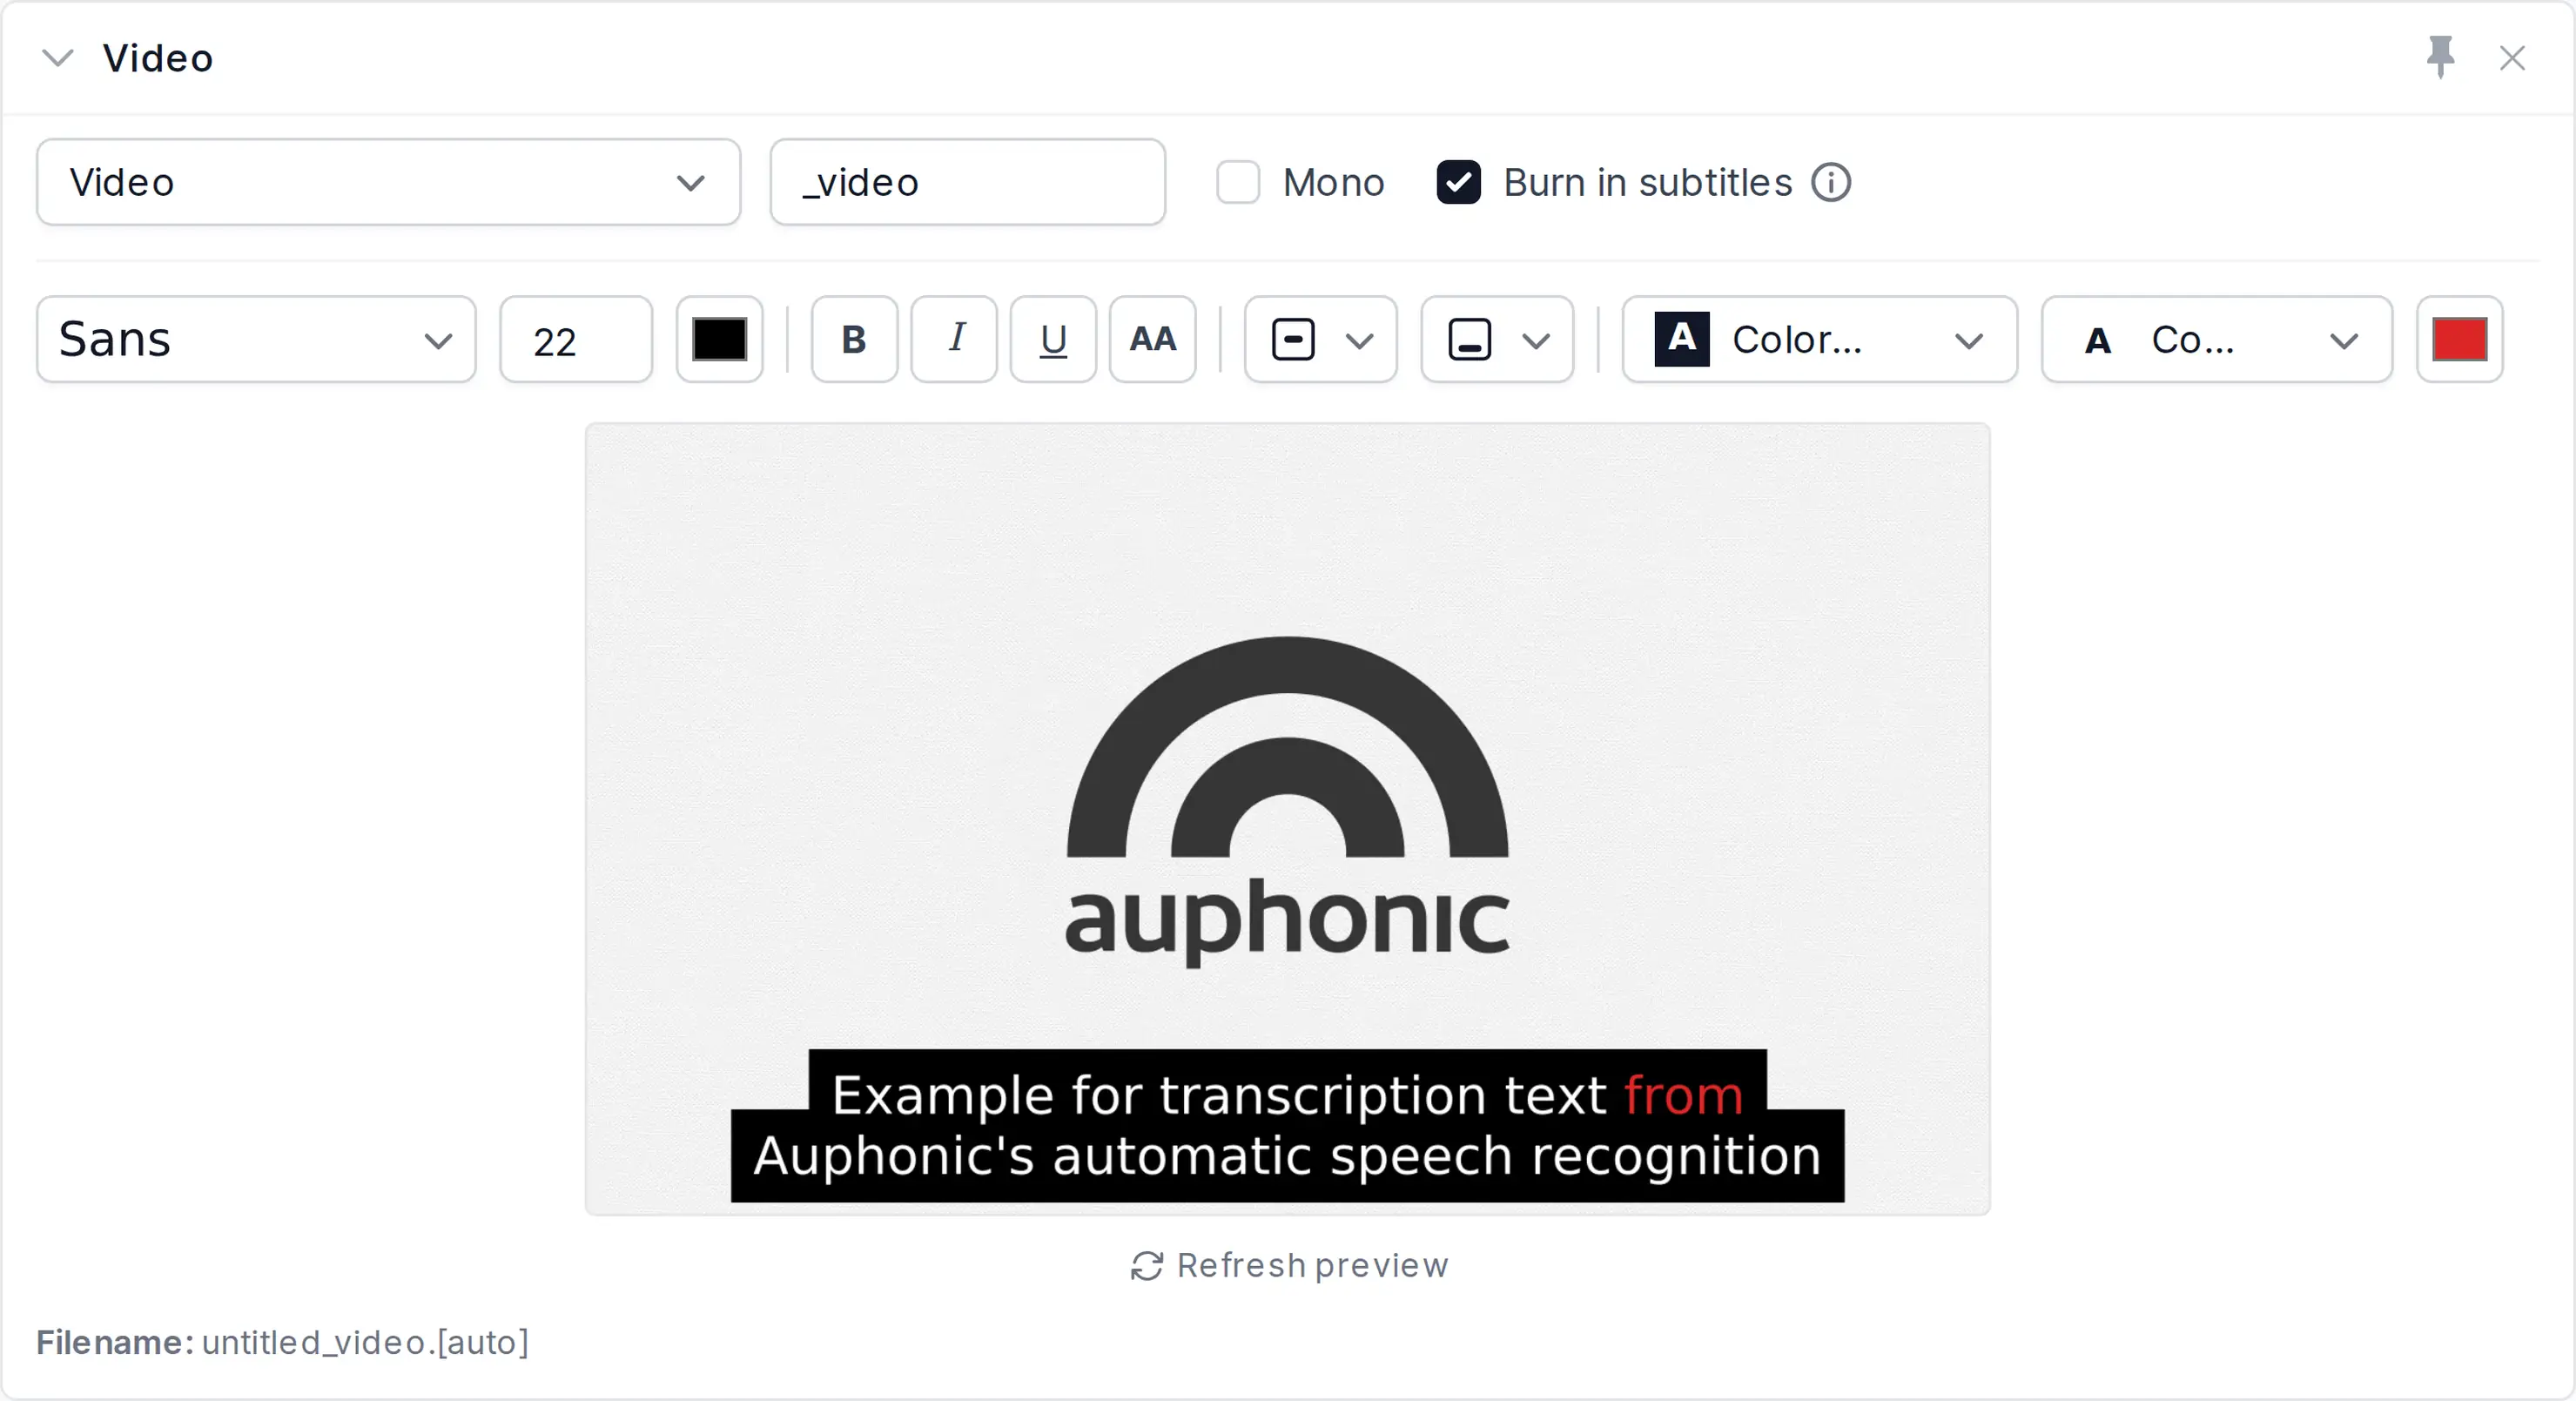
With Speech Recognition enabled, the generated transcript can be rendered directly into a video output file. Tick Burn in subtitles on a video output to style the font, size, colors, alignment and per-word highlighting — a live preview shows the result.
Speech Recognition

Auphonic built a layer on top of multiple engines to offer affordable automatic speech recognition (ASR) in over 100 languages.
Please select our internal Auphonic Whisper ASR or an External ASR Engine when creating a new Production or Preset.
We send small audio segments to the speech recognition engine and then combine the results, add punctuation and apply some structuring to produce three types of Output Result Files: an HTML transcript, a WebVTT/SRT subtitle file and a JSON/XML speech data file.
If you use a Multitrack Production, we can automatically assign speaker names to all transcribed audio segments.
IMPORTANT: Speech Recognition is only available for paying users!
Using our internal Auphonic Whisper ASR, you have the following benefits:
No external account is needed to run ASR in Auphonic.
Your data doesn’t leave our Auphonic servers for ASR processing.
No extra costs for the ASR services.
Additional Auphonic pre- and post-processing for more accurate ASR, especially for Multitrack Productions.
The quality of Whisper ASR is absolutely comparable to the “best” services in our comparison table.
Whisper also provides a reliable automatic language detection feature.
Note:
If you want to use an external speech recognition engine, you first have to connect to an external Speech Recognition Service at the External Services page! For Auphonic Whisper ASR you do NOT need to register an external service!
For more details about our speech recognition system, the available engines, the produced output files and for some complete examples in English and German, please also visit Speech Recognition and our blog post about Auphonic Whisper ASR.
- Select Service
For Automatic Speech Recognition you can select Auphonic Whisper ASR or an external service. For external services please register the service first!
- Select Language
Select a language/variant for speech recognition.
Auphonic Whisper ASR
- Select Service
For Auphonic Whisper ASR you do NOT need to register an external service!
- Speaker Diarization
Automatically detect different speakers and add them to the transcript.
The number of speakers can be auto-detected or selected manually.- Speaker Names
Add a comma-separated list of speaker names for speaker detection.
List them in the order they appear in your input audio file.
Google Speech API
- Word and Phrase Hints
Add Word and Phrase Hints to improve speech recognition accuracy for specific keywords and phrases.
Metadata (chapters, tags, title, artist, album) will be added automatically!
Wit.ai Speech Recognition
- Wit.ai Language
The language must be set directly in your Wit.ai App.
IMPORTANT: If you need multiple languages, you have to add an additional Wit.ai service for each language!
Amazon Transcribe
- Custom Vocabulary
Add Custom Vocabularies to improve speech recognition accuracy for specific keywords and phrases.
Metadata (chapters, tags, title, artist, album) will be added automatically!
Speechmatics
- Custom Dictionary
Add your Custom Dictionary to improve speech recognition accuracy for specific keywords and phrases.
Metadata (chapters, tags, title, artist, album) will be added automatically!
Automatic Shownotes and Chapters
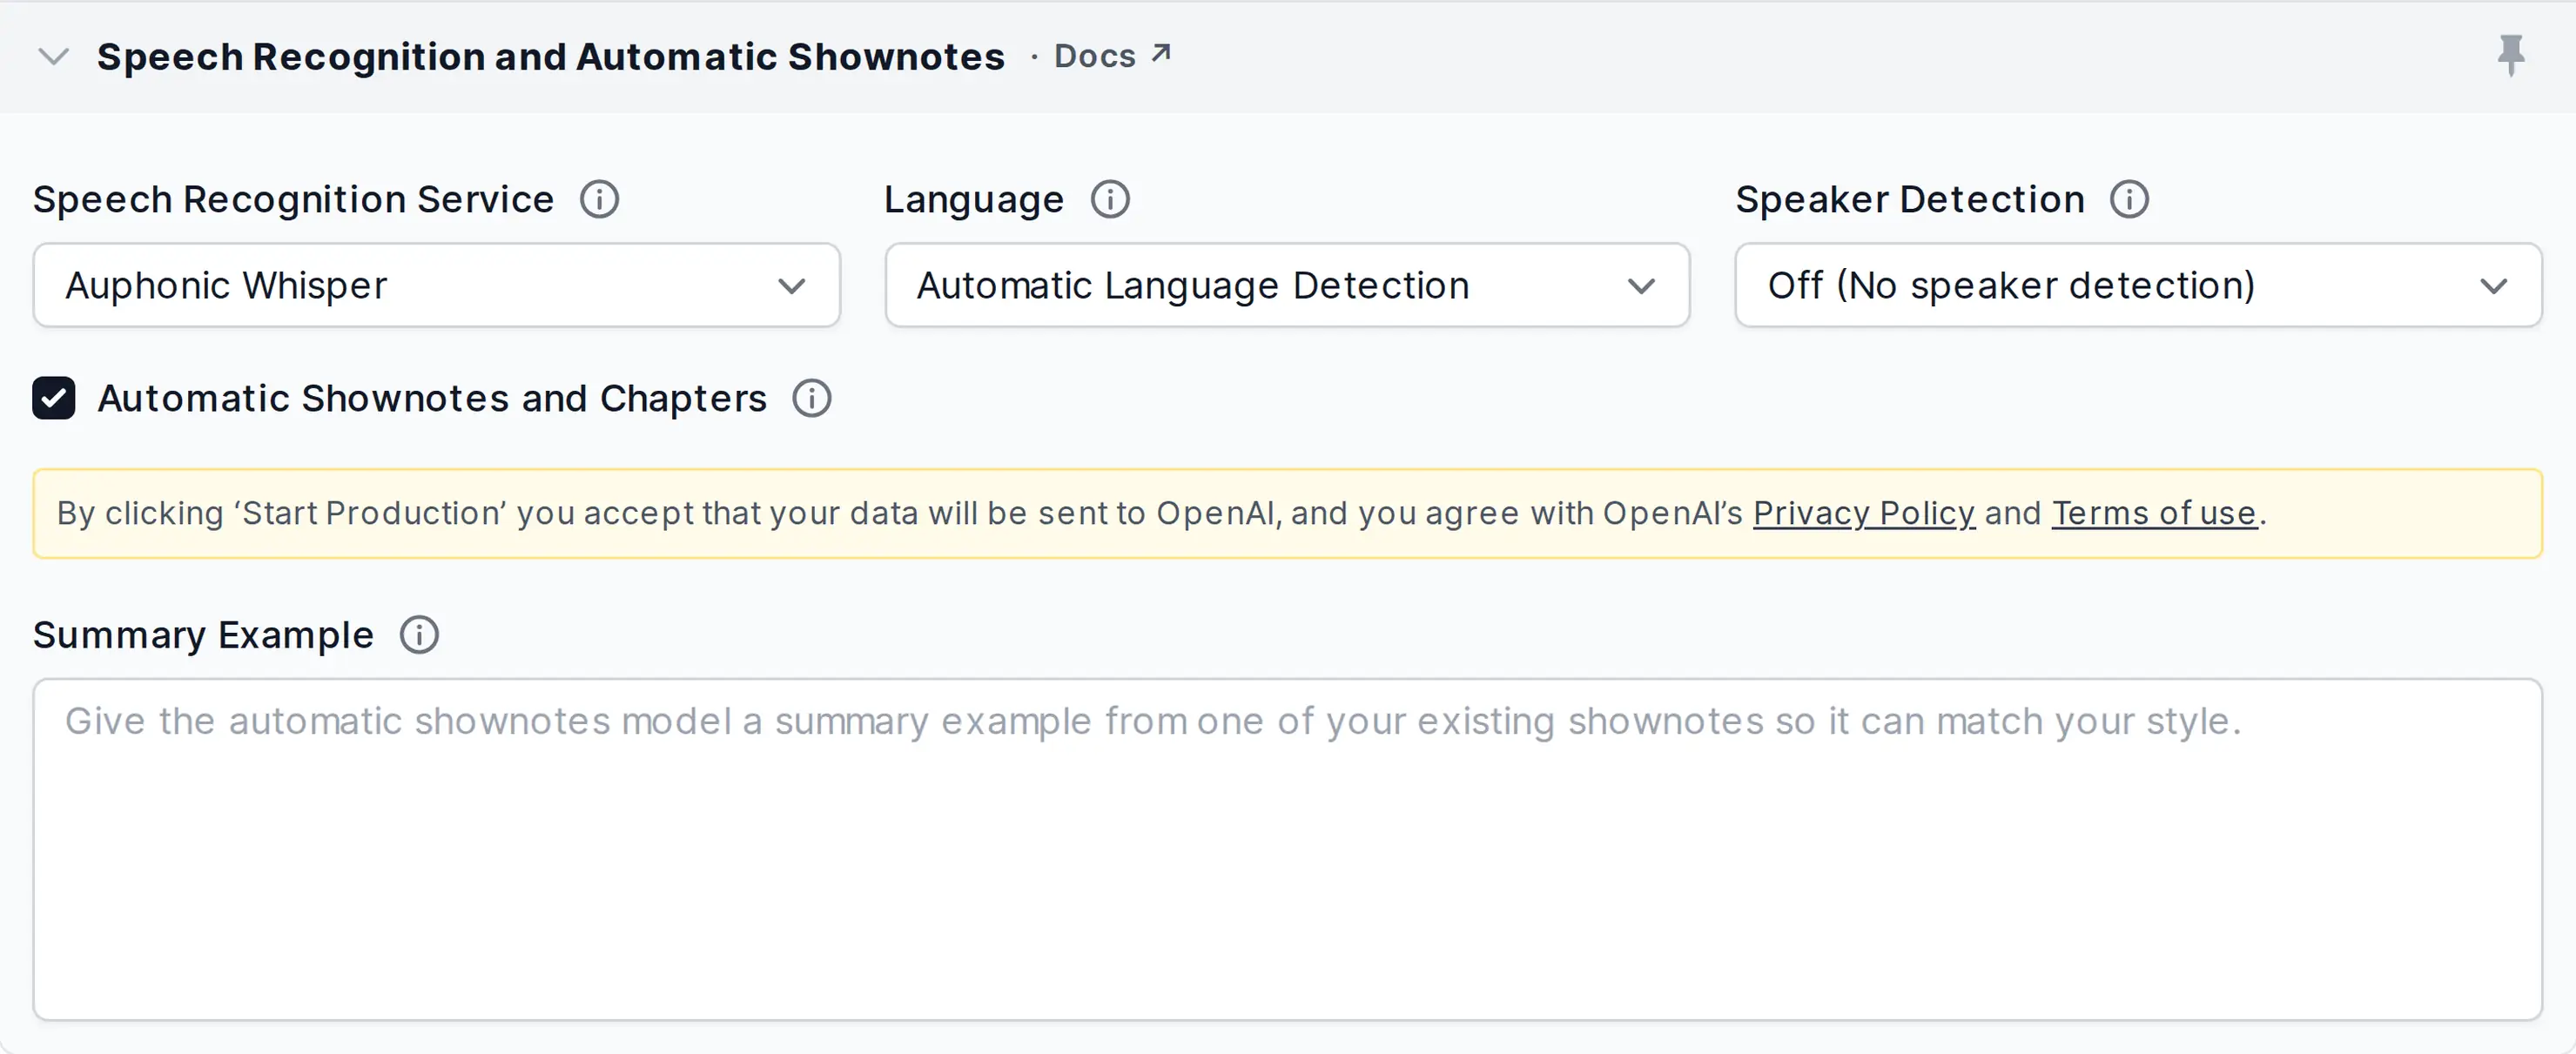
You can automatically generate shownotes and chapters by checking the Automatic Shownotes and Chapters Checkbox in the Auphonic singletrack or multitrack Production Form with any of our ASR Services enabled.
Once your production is done, the generated data will show up in your transcript result files and in the Auphonic Transcript Editor above the speech recognition transcript section.
Unless you have manually entered content before, the generated data will also be stored in your audio files’ metadata.
For more details and a description how to edit the autogenerated data, see Automatic Shownotes and Chapters Algorithm.
- Shownotes Summary Example
Personalize the generated summary by providing a sample of one of your own summaries. This way, the shownotes model will try to imitate your style, and the generated summary will better match your existing self-written ones.
Additionally, you can use this feature to make the generated summary match your formatting, such as bullet points, HTML tags, or Markdown.
Publishing / External Services
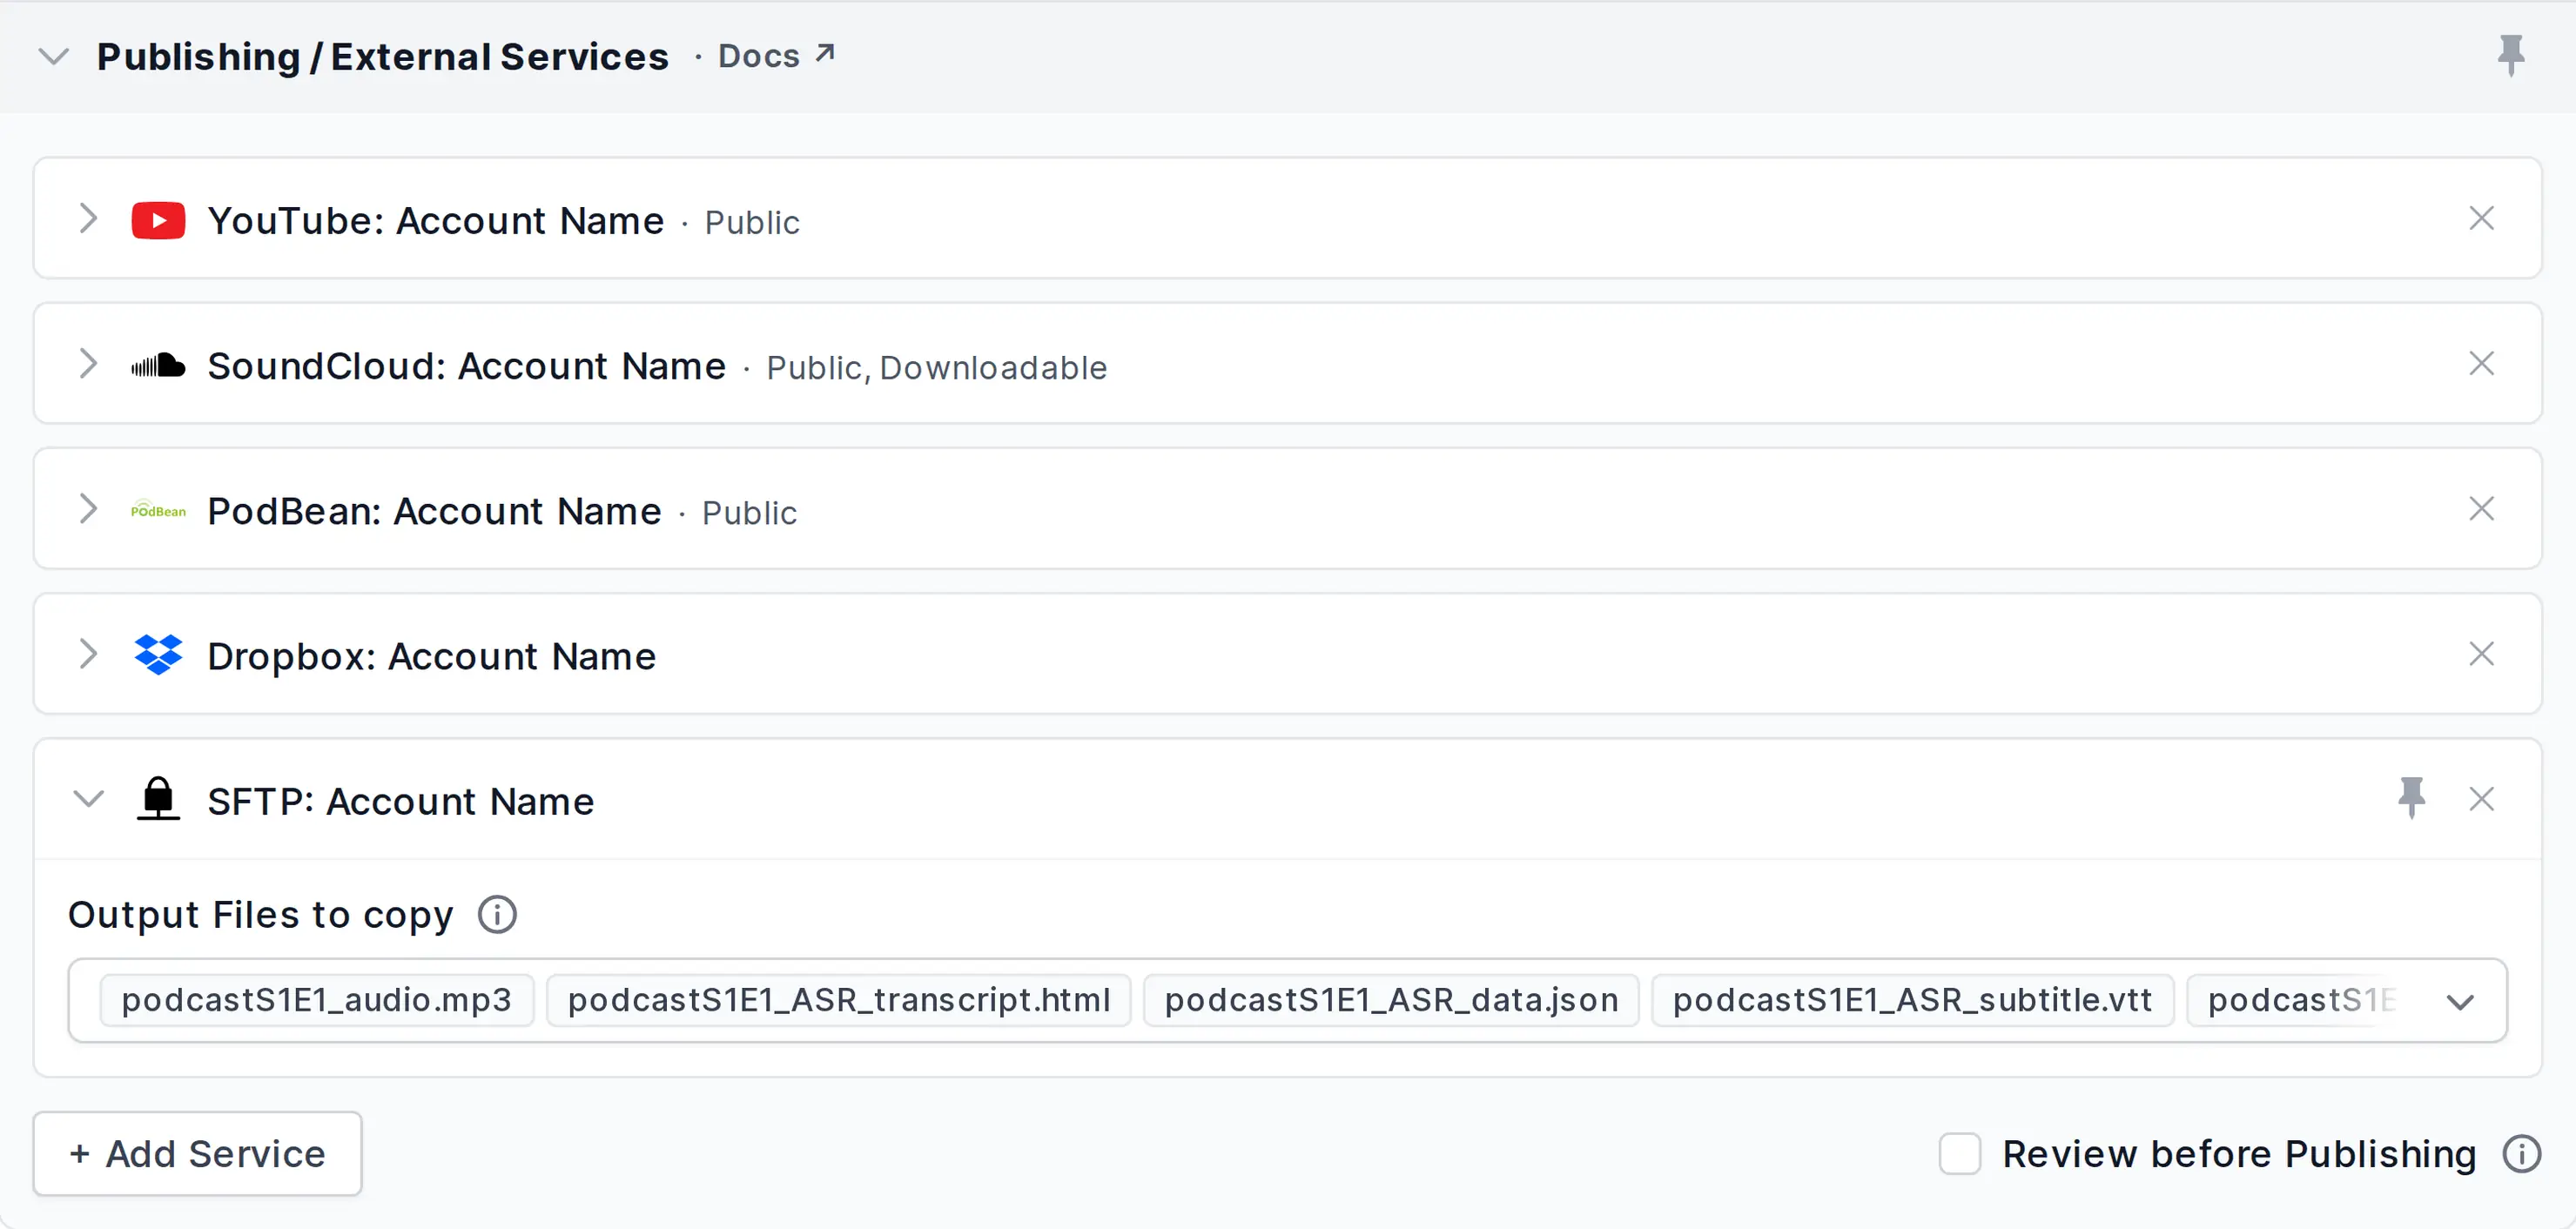
Copy one or multiple result files to any External Service (Dropbox, YouTube, (S)FTP, SoundCloud, GDrive, LibSyn, Archive.org, S3, etc.):
1. First you have to connect to an external service at the External Services page.
2. Then you can select the service when creating a new Production or Preset.
When exporting to Podcasting/Audio/Video Services (SoundCloud, YouTube, Libsyn, Spreaker, Blubrry, Podlove, etc.), all metadata will be exported as well.
For a complete list and details about all supported services, see Auphonic External Services.
- Review before Publishing
Enable this option to require a review before publishing results to services. You are able to publish the results on the status page after processing.
- Select Service
Select an external service for outgoing file transfers. Please register your service first!
- Output Files to copy
Select which Output Files should be copied to the current external service. If an Automatic option is available and selected, Auphonic will automatically select the best output file for the current service.
YouTube Service
- YouTube Privacy Settings
Set your video to Public (everyone can see it), Private (only your account can see it) or Unlisted (everyone who knows the URL can see it, not indexed by YouTube).
- YouTube Category
Select a YouTube category.
Facebook Service
- Facebook Distribution Settings
Post to News Feed: The exported video is posted directly to your news feed / timeline.
Exclude from News Feed: The exported video is visible in the videos tab of your Facebook Page/User (see for example Auphonic’s video tab), but it is not posted to your news feed (you can do that later if you want).
Secret: Only you can see the exported video, it is not shown in the Facebook video tab and it is not posted to your news feed (you can do that later if you want).For more details and examples please see the Facebook Export blog post.
- Facebook Embeddable
Choose if the exported video should be embeddable in third-party websites.
SoundCloud Service
- SoundCloud Sharing
Set your exported audio to Public or Private (not visible by other users).
- SoundCloud Downloadable
Select if users should be able to download your audio on SoundCloud, otherwise only streaming is allowed.
- SoundCloud Type
Select a SoundCloud type/category.
- SoundCloud Audio File Export
Select an audio output file which should be exported to SoundCloud.
If set to Automatic, Auphonic will automatically choose a file.
Spreaker Service
- Spreaker Draft Status
Check this option to add this episode as draft to Spreaker without actually publishing it.
- Spreaker Collection / Show
Select your Spreaker Collection where this track should be published.
Each Collection has a separate RSS feed and can be created in your Spreaker Account.- Spreaker Sharing
Set your exported audio to Public or Private (not visible by other users).
- Spreaker Downloadable
If disabled, listeners won’t be offered the option to download this track and it won’t be included in your RSS feed.
RSS.com Service
- RSS.com Podcast Selection
Select your RSS.com podcast where this track should be published.
- Audio File Selection
Select an audio output file which should be exported to RSS.com.
If set to Automatic, Auphonic will automatically choose a file.
Acast Service
- Acast Show
Select your Acast Show where this episode should be published.
- Acast Episode Status
Set the publication status of your episode: Draft, Published, Scheduled or Disabled.
- Acast Episode Type
Set the episode type: Full (regular episode), Trailer or Bonus.
PodBean Service
- PodBean Draft Status
Check this option to add this episode as draft at PodBean without actually publishing it.
- PodBean Episode Type
Select which audience you wish to publish this episode to.
The exact list of options will vary based on your PodBean subscription model and settings. If you recently changed your subscription and miss some option here, please reauthorize us to see the updated list.
Captivate Service
- Captivate Draft Status
Check this option to add this episode as draft at Captive without actually publishing it.
- Episode Type
The episode type to mark this podcast in feeds and some apps as. Normal episodes are considered regular content, while trailer and bonus episodes may be displayed differently.
Audio Algorithms for Master Track
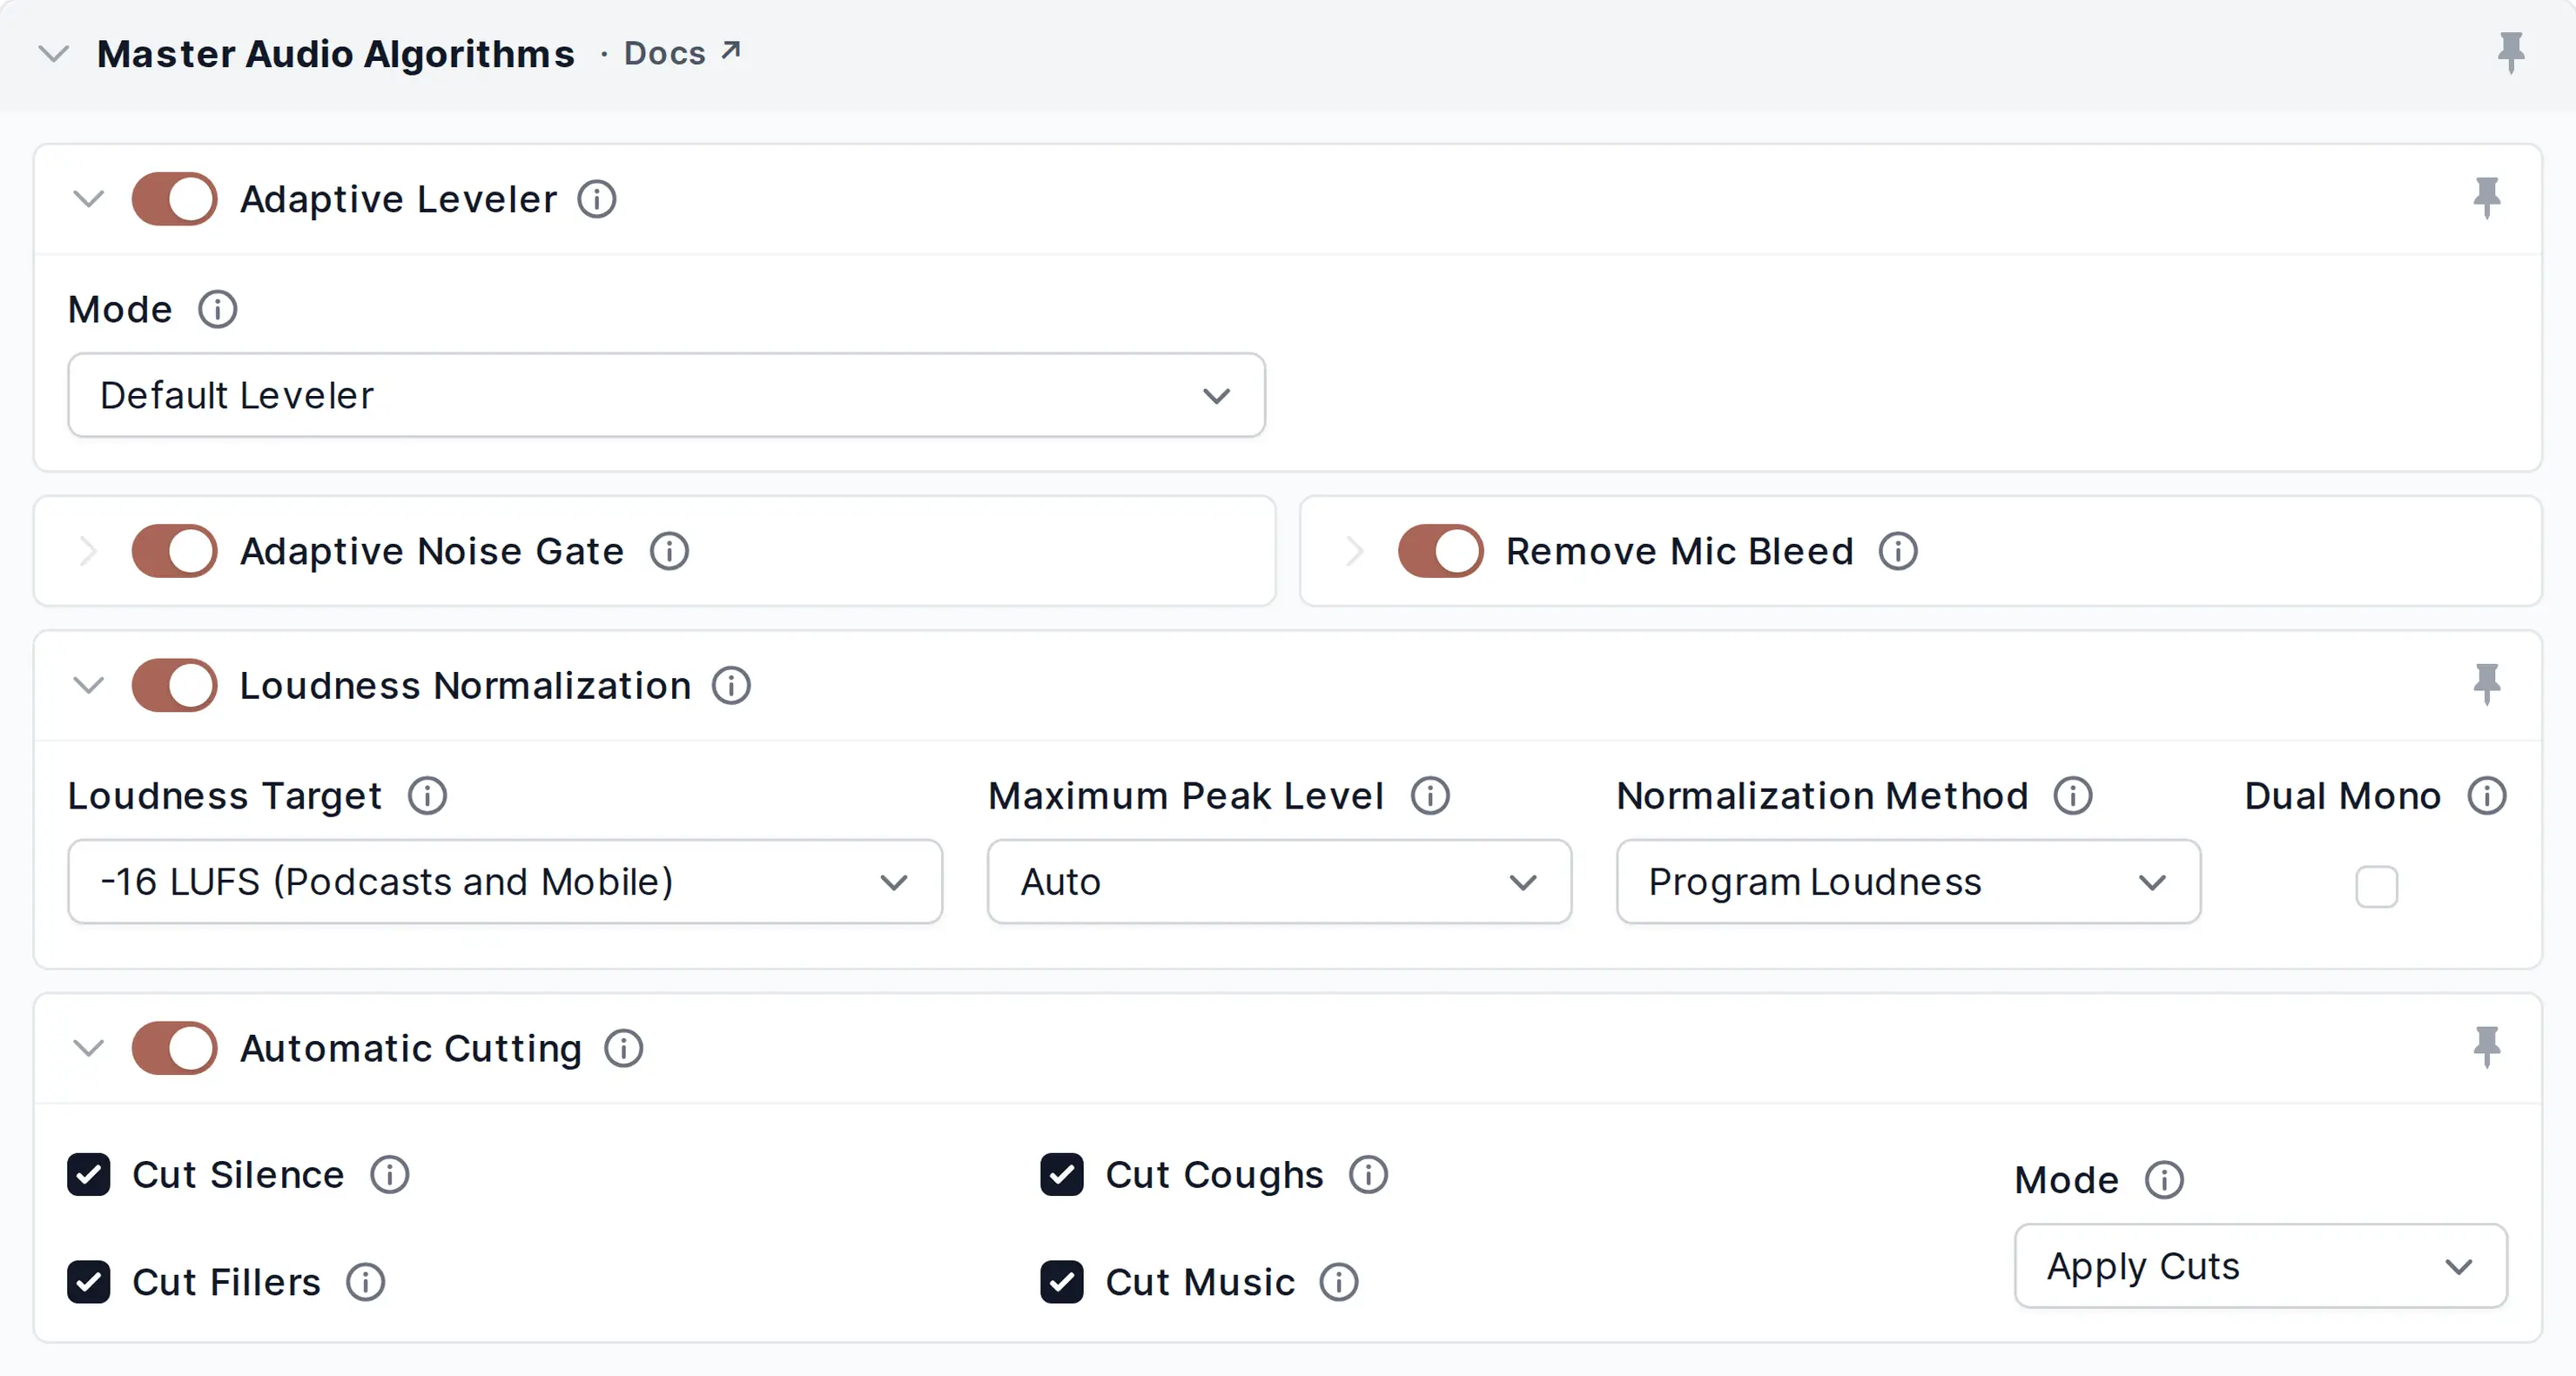
Enable/disable master audio algorithms, track-specific algorithms can be set in section Audio Algorithms for Individual Tracks.
Please activate more settings by clicking the slider icon on the right side of your selected audio algorithms.
For further details about our algorithms see Auphonic Multitrack Algorithms.
Adaptive Noise Gate Settings
The gate will decrease background noise if a speaker/track is not active.
For details and examples, see Adaptive Noise Gate.
Remove Mic Bleed
Analyzes which speaker is active and removes crosstalk/bleed, ambience, reverb and noise recorded from other tracks.
For details and examples, see Remove Mic Bleed.
Automatic Cutting
Our automatic cutting algorithms detect and remove filler words, silent segments and respiratory noises (coughs, etc.) to enhance the clarity and professionalism of your content. You just need to enable the Cut Fillers and/or Cut Silence algorithms in your production – no further settings are required.
To additionally download all cut input tracks, choose “Individual Tracks” as “Output File” (per default, the audio output is only the cut master track).
In the Auphonic Editor, you can edit the auto-generated cut positions manually by moving, deactivating or adding individual cut regions.
Cutting is also available for video files. You can use the “Apply Cuts” Mode as well as the “Set Cuts To Silent” or the “Export Uncut Audio” Mode.
- Cut Silence for Multitrack
Our automatic silence cutting algorithm detects and removes silent segments from your audio or video, that might be caused by speech breaks, pauses for breaths, or equipment-re-adjusting.
For details and examples, please visit Silence Cutting.- Cut Fillers for Multitrack
The filler word cutting algorithm automatically detects and removes filler words from your audio or video, namely any kind of “um”, “uh”, “mh”, German “ähm”, “äh”, “öh”, French “euh”, Spanish “eh” and similar.
For details and examples, please visit Filler Cutting.- Cut Coughs for Multitrack
The cough cutting algorithm automatically detects and removes coughs, throat-clearings, sneezes and other respiratory sounds from your audio or video.
For details and examples, please visit Cough Cutting.- Cut Music for Multitrack
The music cutting algorithm automatically removes foreground music segments longer than about 20 seconds from your audio or video. For details and examples, please visit Music Cutting.
- Cut Mode
Select what to do with detected cuts. The “Apply Cuts” mode actually cuts audio or video content. “Set Cuts To Silent” fades cut regions to silence instead of actually cutting them. “Export Uncut Audio” keeps your content as it is. With the “Set Cuts To Silent” mode and the “Export Uncut Audio” mode we automatically generate “Cut Lists” in various formats. You can apply those in your favorite audio or video editor via import.
Adaptive Leveler Master Settings
Corrects level differences between tracks, speakers, music and speech, etc. to achieve a balanced overall loudness.
For details and examples, see Multitrack Adaptive Leveler.
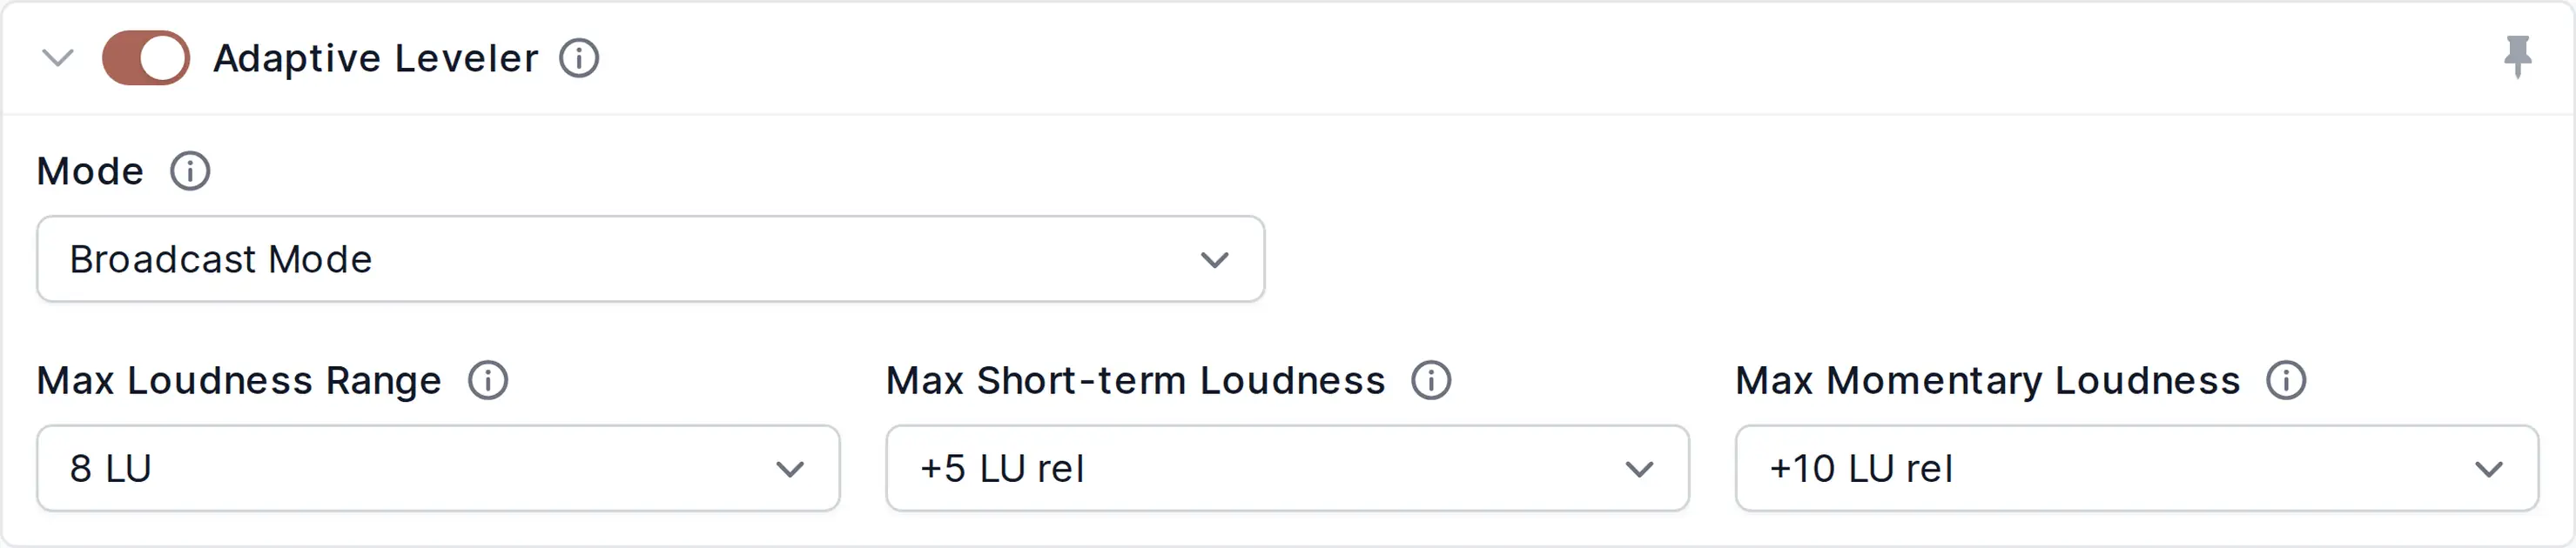
- Leveler Mode
The Multitrack Adaptive Leveler can be controlled with different leveling parameters in each track.
In addition to that, you can switch the Leveler Mode in the Master Track Algorithm Settings to Broadcast Mode to control the combined leveling strength.
Volume changes of our leveling algorithms will be adjusted so that the final mixdown of the multitrack production meets the given MaxLRA, MaxS, or MaxM target values - as is done in the Singletrack Broadcast Mode.If it’s not possible for the levels of the mixdown file to be below the given MaxLRA, MaxS, or MaxM target values, you will receive a warning message via email and on the production page.
- Maximum Loudness Range (MaxLRA)
The loudness range (LRA) indicates the variation of loudness throughout a program and is measured in LU (loudness units) - for more details, see Loudness Measurement and Normalization or EBU Tech 3342.
The volume changes of our Leveler will be restricted so that the LRA of the output file is below the selected value (if possible).
High LRA values will result in very dynamic output files, whereas low LRA values will result in compressed output audio. If the LRA value of your input file is already below the maximum loudness range value, no leveling at all will be applied.Loudness Range values are most reliable for pure speech programs: a typical LRA value for news programs is 3 LU; for talks and discussions, an LRA value of 5 LU is common. LRA values for features, radio dramas, movies, or music strongly depend on the individual character and might be in the range of 5 to 25 LU - for more information, please see Where LRA falls short.
Netflix, for instance, recommends an LRA of 4 to 18 LU for the overall program and 7 LU or less for dialog.Example Use Case:
The broadcast parameters can be used to generate automatic mixdowns with different LRA values for different target environments (very compressed environments like mobile devices or Alexa, or very dynamic ones like home cinema, etc.).- Maximum Short-term Loudness (MaxS)
Set a Maximum Short-term Loudness target (3s measurement window, see EBU Tech 3341, Section 2.2) relative to your Global Loudness Normalization Target.
Our Adaptive Leveler will ensure that the MaxS loudness value of the output file, which are loudness values measured with an integration time of 3s, will be below this target (if possible).
For example, if the MaxS value is set to +5 LU relative and the Loudness Target to -23 LUFS, then the absolute MaxS value of your output file will be restricted to -18 LUFS.The Max Short-term Loudness is used in certain regulations for short-form content and advertisements.
See for example EBU R128 S1: Loudness Parameters for Short-form Content (advertisements, promos, etc.), which recommends a Max Short-term Loudness of +5 LU relative.- Maximum Momentary Loudness (MaxM)
Similar to the MaxS target, it’s also possible to use a Maximum Momentary Loudness target (0.4s measurement window, see EBU Tech 3341, Section 2.2) relative to your Global Loudness Normalization Target.
Our Adaptive Leveler will ensure that the MaxM loudness value of the output file, which are loudness values measured with an integration time of 0.4s, will be below this target (if possible).The Max Momentary Loudness is used in certain regulations by broadcasters. For example, CBC and Radio Canada require that the Momentary Loudness must not exceed +10 LU above the target loudness.
Loudness Normalization and True Peak Limiter Settings

Adjusts the global, overall loudness to the specified Loudness Target (using a True Peak Limiter), so that all processed files have a similar average loudness.
For more see Loudness Normalization with True Peak Limiter and following Parameters.
- Loudness Target
Set a loudness target in LUFS for Loudness Normalization, higher values result in louder audio outputs.
The maximum true peak level will set automatically to -1dBTP for loudness targets >= -23 LUFS (EBU R128) and to -2dBTP for loudness targets <= -24 LUFS (ATSC A/85).
For details and examples, see Global Loudness Normalization and True Peak Limiter.- Maximum Peak Level
Maximum True Peak Level of the processed output file. Use Auto for a reasonable value according to the selected loudness target: -1dBTP for EBU R128 and higher, -2dBTP for ATSC A/85 and lower.
- Dual Mono
If a mono production is played back on a stereo system (dual mono), it should be attenuated by 3 dB (= 3 LU) to sound as loud as the equivalent stereo production. The EBU Guidelines for Reproduction require that this -3 dB offset should be applied in the playback device - however, most devices don’t do so (but some do).
Please select the dual mono flag, to automatically add a -3 LU offset for mono productions.
This means, if you select a loudness target of -16 LUFS and the dual mono flag, your stereo productions will be normalized to -16 LUFS, but mono productions to -19 LUFS.For details, please see Loudness Normalization of Mono Productions.
- Normalization Method
Perform loudness normalization according to the whole file (Program Loudness) , speech parts only (Dialog Loudness), or RMS levels (for Audible / ACX compliance).
For details, please see Loudness Specifications.